Google Cloud Storage
We outline the process to set up GCS to connect your data to the Tenyks platform.
Before you start
📣 Please make sure you read the following points before continuing.
- We require
read-onlyaccess to the dataset images. We need to store metadata (e.g., thumbnails, compressed files); we can store it for you. If this is convenient for you, follow theread-onlyapproach. This is the recommended approach! 💫 - (Optional) If you prefer to store metadata on your own cloud, you can:
- Create a single bucket with separate image and metadata folders, and provide us
read/writeaccess to that entire bucket.
- Create a single bucket with separate image and metadata folders, and provide us
- 🚧 The
read-onlyapproach is in progress, please use theread-writeapproach instead (Section 3.2).
1. Expected folder structure
Here's the expected folder structure based on the option you choose:
read-only |
|---|
Container name: {your_tenyks_data_bucket} |
Images Directory: {your_tenyks_data_bucket}/{your_dataset_name}/{images_directory_name}/img_n.png |
Predictions File (in COCO Format): {your_tenyks_data_bucket}/{your_dataset_name}/predictions.json |
Annotations File (in COCO Format): {your_tenyks_data_bucket}/{your_dataset_name}/annotations.json |
| Metadata Directory: We will set this up for you! |
For the read-write option, follow the same structure as in read-only but since your metadata remains in your own cloud, please add a Metadata Directory:
{your_tenyks_data_bucket}/{your_dataset_name}/{metadata_directory_name} (see Section 3.2)
2. Setting up GCS buckets
We assume you have set up the necessary bucket(s) based on the structure described above. If you haven't set up your buckets, this short tutorial shows you how to create GCS buckets.
3. Access Policies
Coming soon!We're currently in the process of developing the
read-onlyoption.Please, use the
read-writeoption 😃.
- Navigate to the dashboard of your project.
- On the left bar, hover over IAM & Admin and select Roles.
- On the top bar, click on Create Role.
- Provide a name for Title and ID.
- Click on Add Permissions.
- Search for the term
storage.objectson the Filter section (see Figure 1).
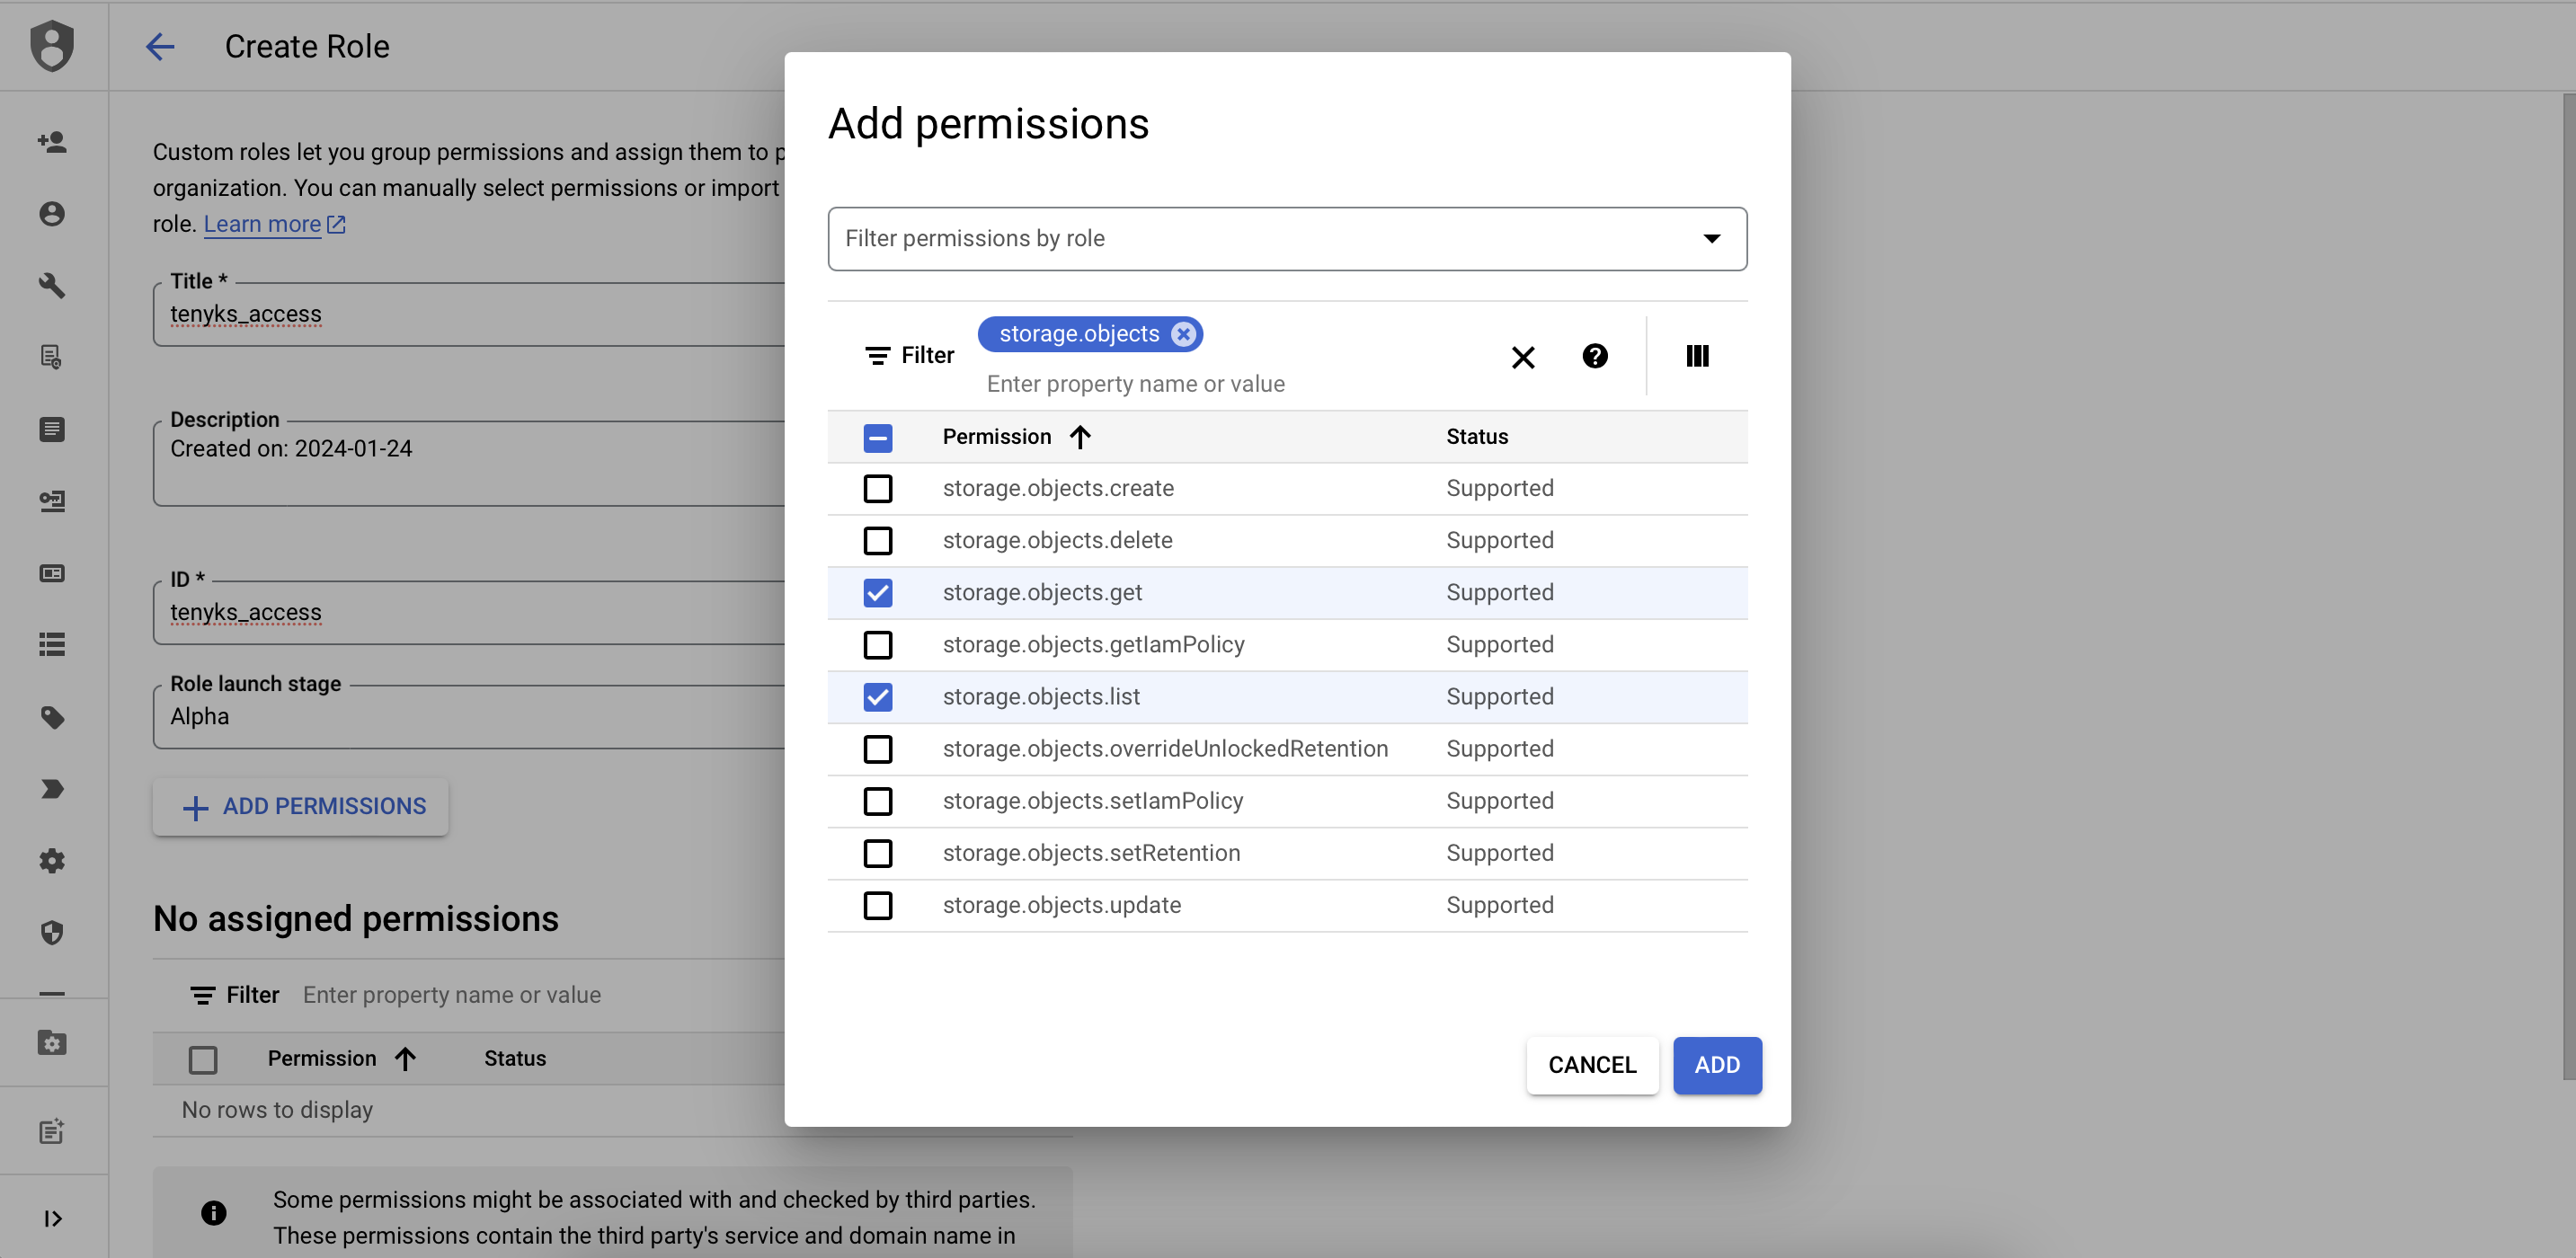
Add the appropriate permissions depending on the approach you chose:
read-write | read-only |
|---|---|
storage.objects.get | storage.objects.get |
storage.objects.list | storage.objects.list |
storage.objects.create | |
storage.objects.delete | |
storage.objects.update |
- Create the role.
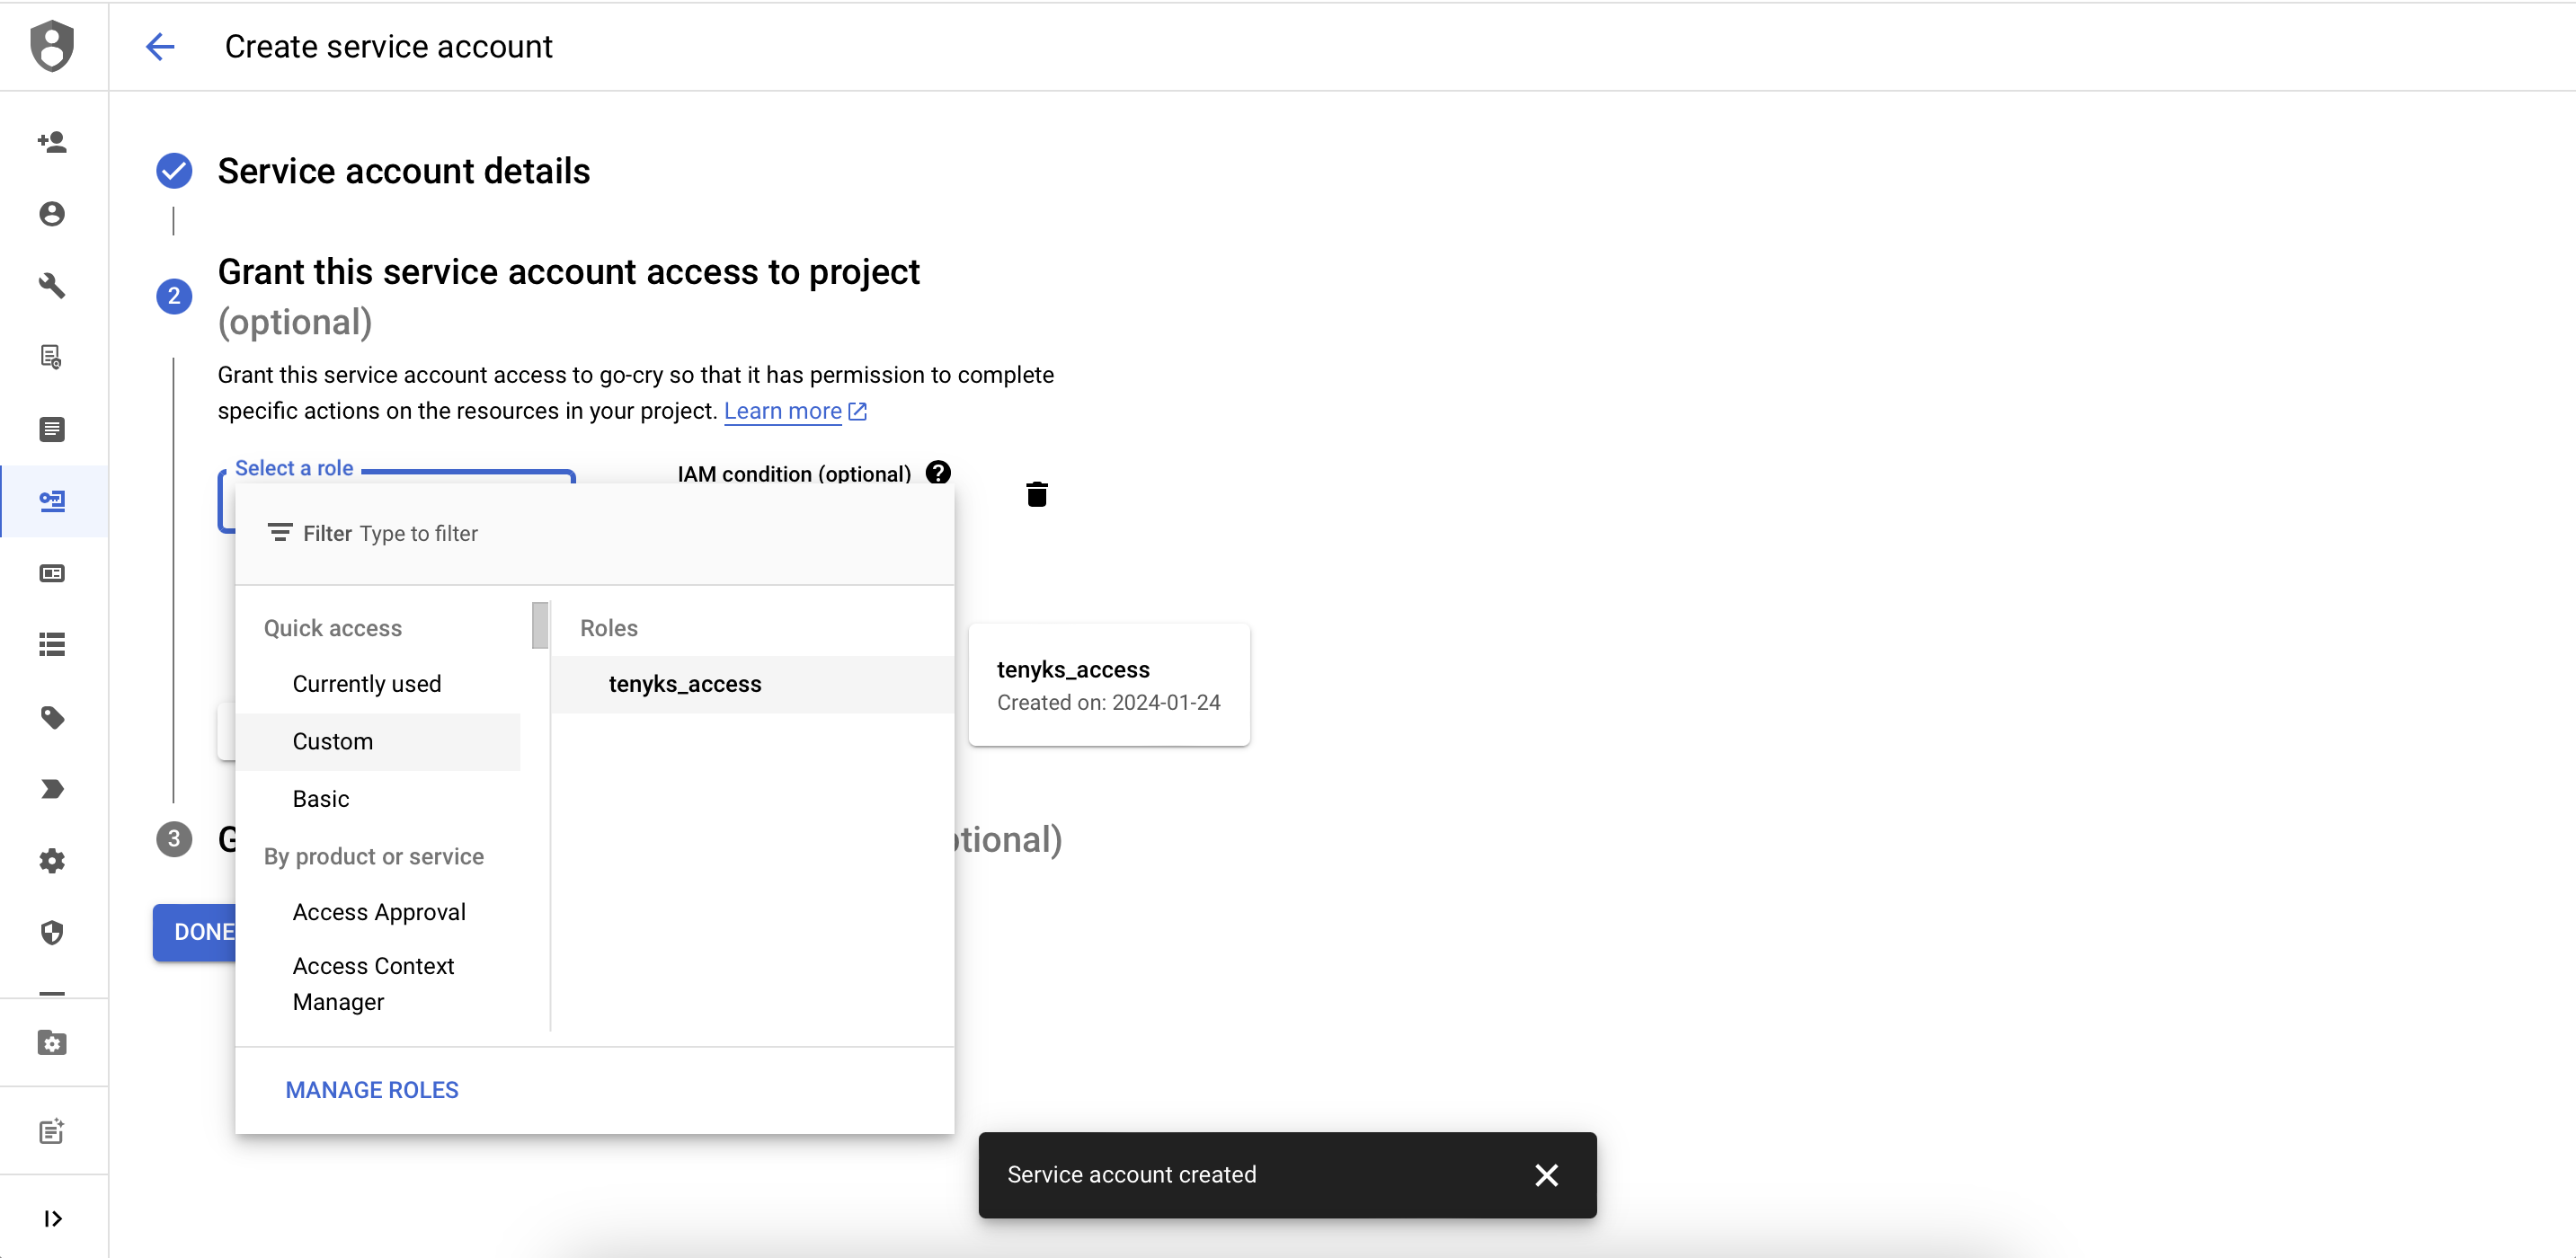
- On your project dashboard hover over APIS & Services and select Credentials.
- On the top bar, click on Create Credentials and choose Service Account.
- Provide a Service account name and a Service account description. Then, click on Create and Continue.
- Select the custom role we previously created (see Figure 2).
- On the right side where you selected a role, click on Add IAM Condition.
- Provide a Title, and select Condition Editor.
- Add the following policy:
(
    resource.type == 'storage.googleapis.com/Bucket' &&
    resource.name.startsWith("projects/_/buckets/{your_tenyks_data_bucket}")
) || (
    resource.type == 'storage.googleapis.com/Object' &&
    resource.name.startsWith("projects/_/buckets/{your_tenyks_data_bucket}/objects/{your_dataset_name}/")
)
⚠️ Note that you should replace the terms in brackets (e.g. {your_tenyks_data_bucket}) with your own bucket and folder names. Leave the rest unchanged.
- Save the condition and click on Done to create a Service Account.
- Go back to your project dashboard, hover over APIS & Services and select Credentials.
- On the Service Accounts, click on the email corresponding to the new Service Account you just created.
- On the top bar, click on Keys.
- Click on Add Key to create a new JSON key.
Your JSON key should have a format similar to the following:
{
  "type": "service_account",
  "project_id": "gcs-testing-...",
  "private_key_id": "...",
  "private_key": "",
  "client_email": "...",
  "client_id": "...",
  "auth_uri": "https://accounts.google.com/o/oauth2/auth",
  "token_uri": "https://oauth2.googleapis.com/token",
  "auth_provider_x509_cert_url": "https://www.googleapis.com/oauth2/v1/certs",
  "client_x509_cert_url": "",
  "universe_domain": "googleapis.com"
}
:rotating-light: Note that the full JSON object should be copied and pasted as the value of credentials in the request body of some of the endpoints.
4. Metadata bucket CORS settings
If you are storing metadata on your own cloud, to use functionalities like the Embedding Viewer, please configure the CORS settings for your bucket as follows:
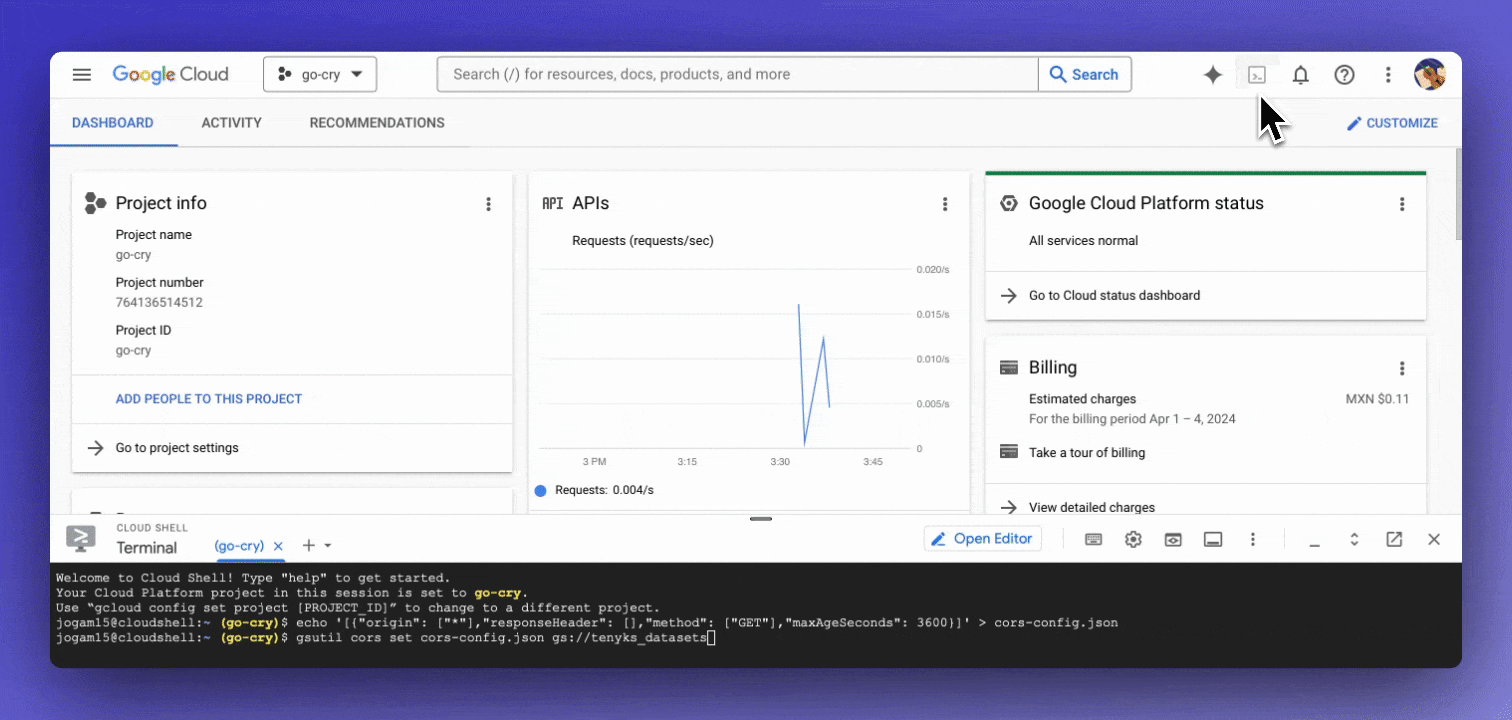
- Navigate to the main dashboard of your project
- Click on "Activate Google Cloud Shell" in the upper right corner (see Figure 3)
-
Copy and execute each of the following lines of code on the newly opened terminal:
echo '[{"origin": ["*"],"responseHeader": [],"method": ["GET"],"maxAgeSeconds": 3600}]' > cors-config.jsongsutil cors set cors-config.json gs://{YOUR_BUCKET_NAME}
-
Verify your CORS setup by running
gsutil cors get gs://{YOUR_BUCKET_NAME}
5. Summary
We successfully created the following:
- One bucket with independent images and metadata folders.
- One custom role with permission policies.
- One service account.
- One JSON key to access the bucket.
Updated over 1 year ago