Set up your first dataset
Learn how to upload your first dataset in the Tenyks platform!
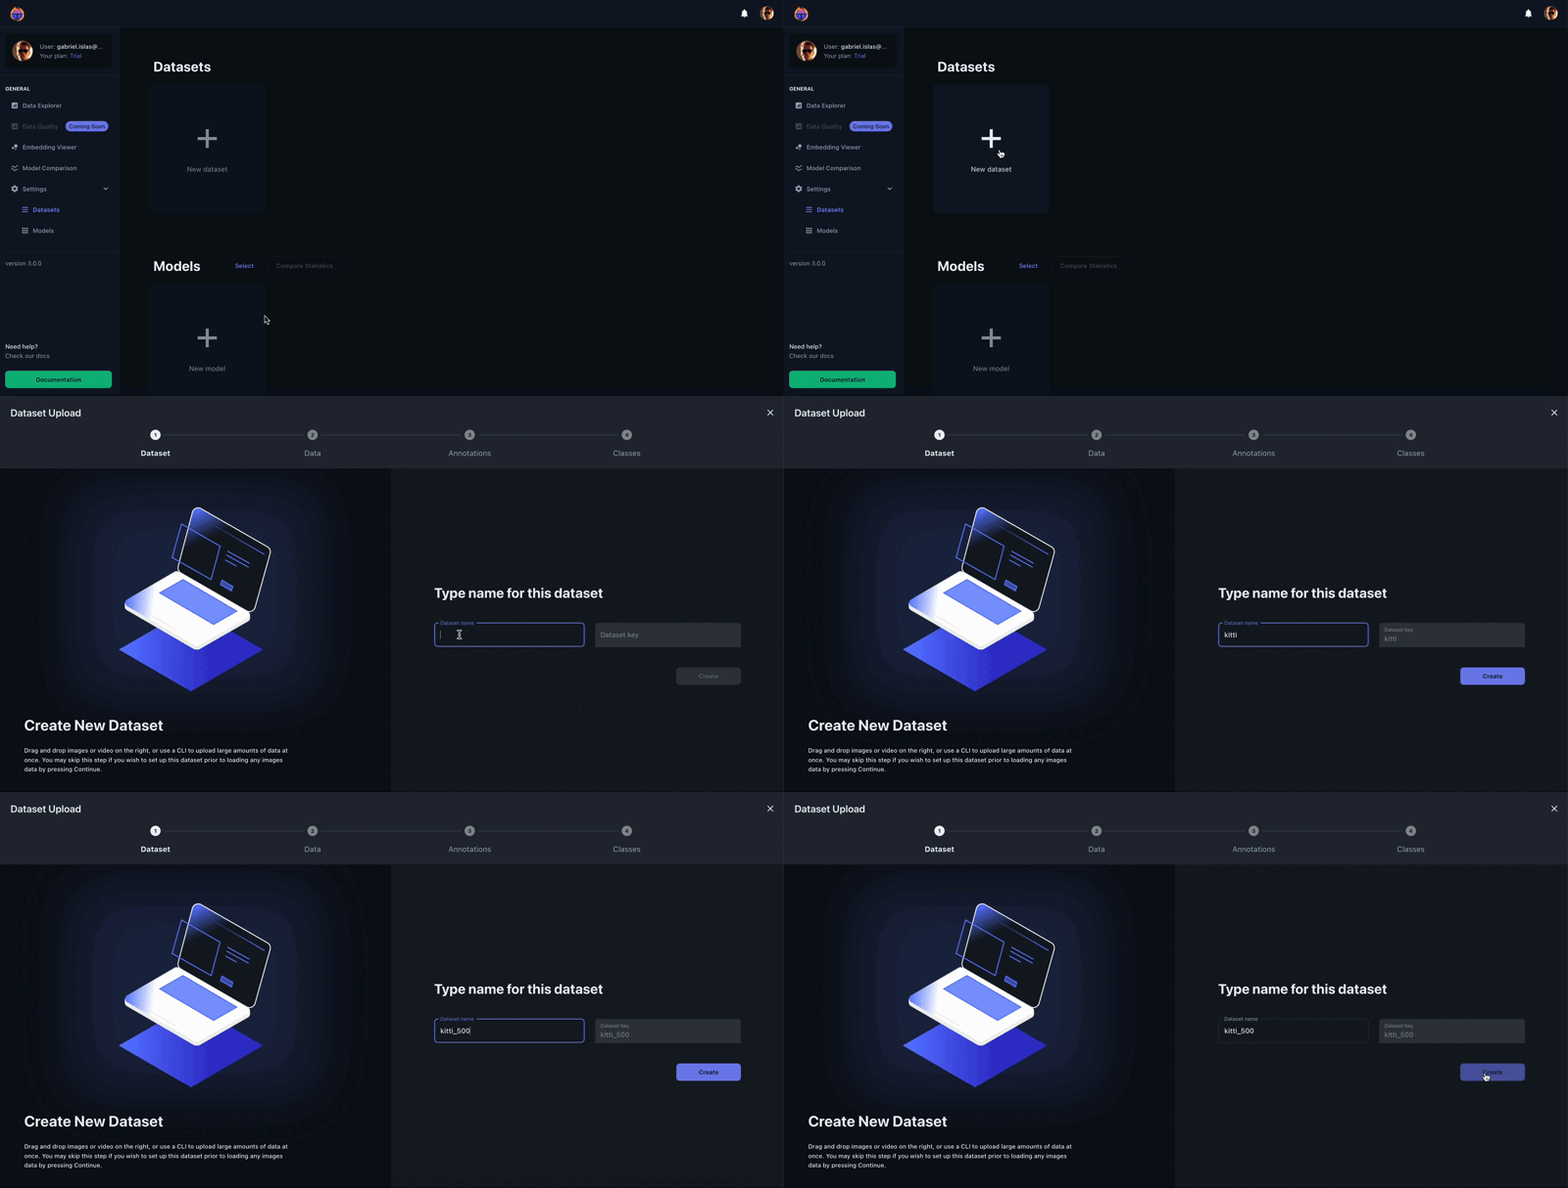
In the Tenyks dashboard, click on New Dataset. The dataset upload wizard screen will show up containing four steps.
Your first dataset😉 We prepared this toy dataset for you: download it, and complete these steps!
1. Dataset name
Assign a name for your dataset. This name will be used as the dataset_key. This dataset identifier will become handy if you later use the Tenyks Command Line Interface (CLI) to leverage the full power of the Tenyks platform.

🎀 Tip: Use a short but memorable name for your dataset; you never know who might end up seeing your project thrive! ⭐
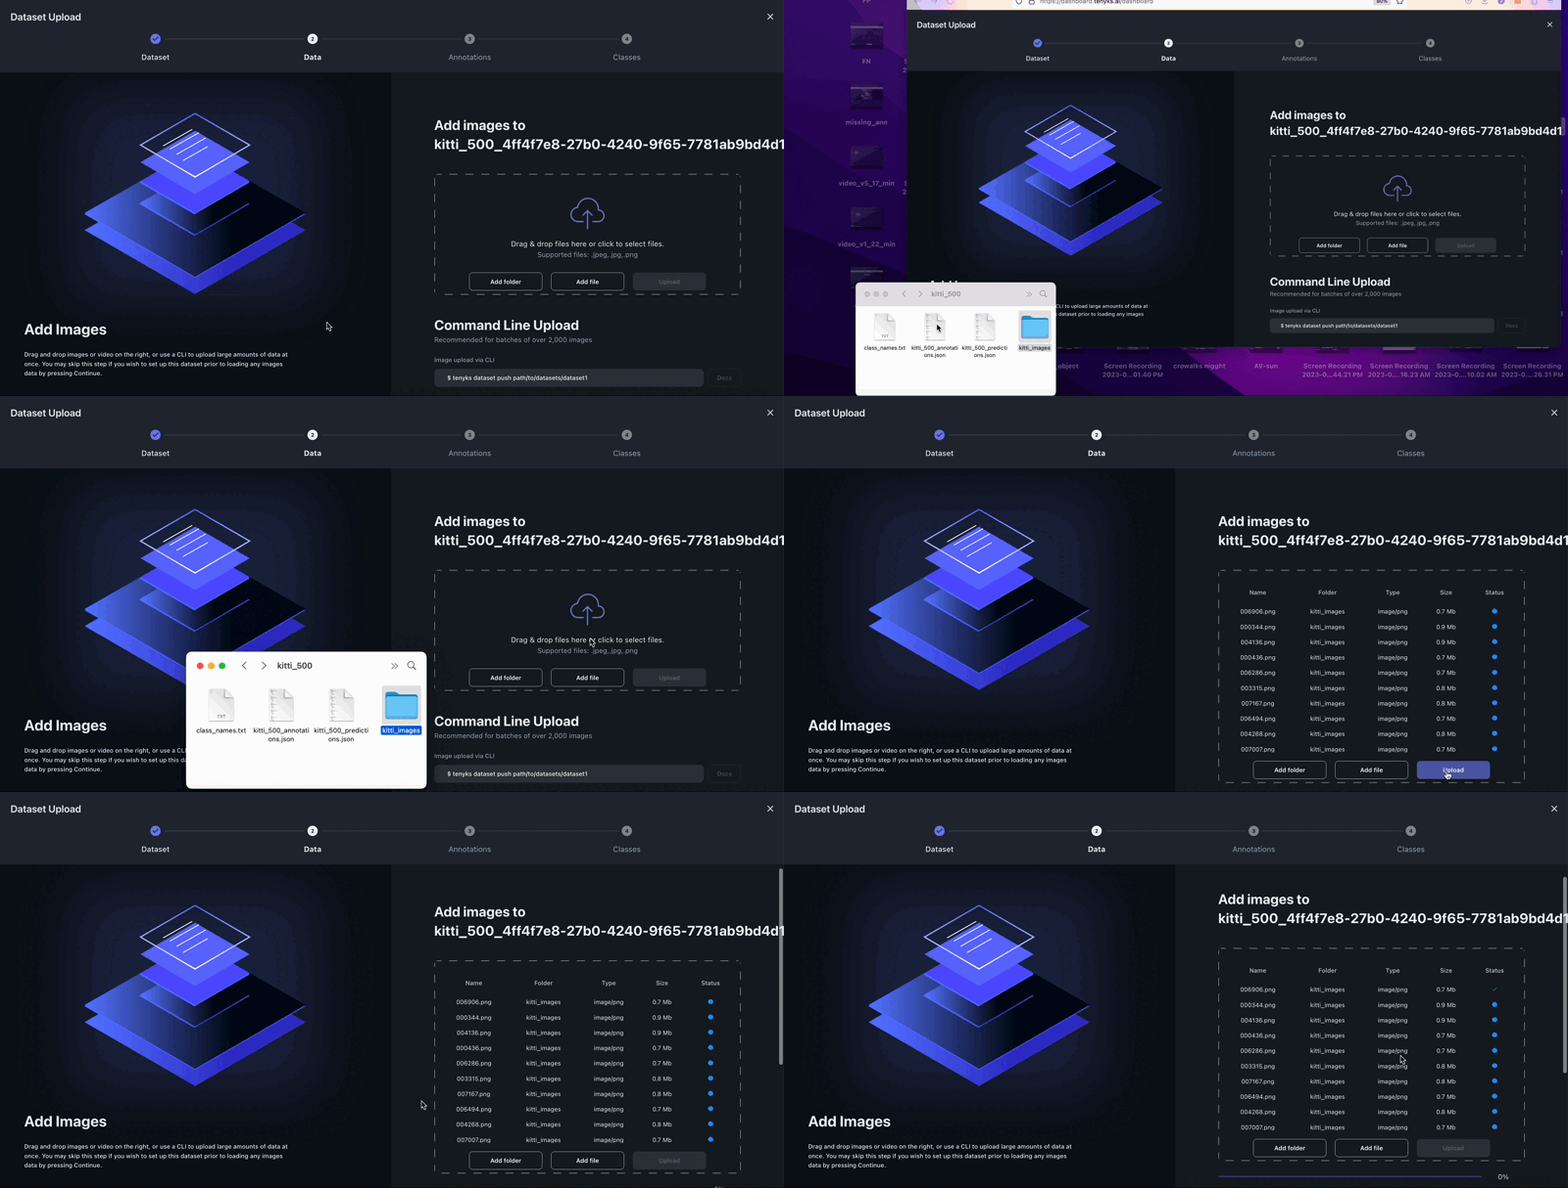
2. Add your images
During this step, you will upload your raw dataset images:
- drag and drop your entire folder, or
- click to select the images from your device

🎀 Tip: If you have large datasets (i.e. 2000+ images) and you love automation, you will be able to build 🔨 all kinds of integrations with the Tenyk's CLI. For instance, you can quickly bring your datasets from other services (e.g. Labelbox, Roboflow) to the Tenyks platform.
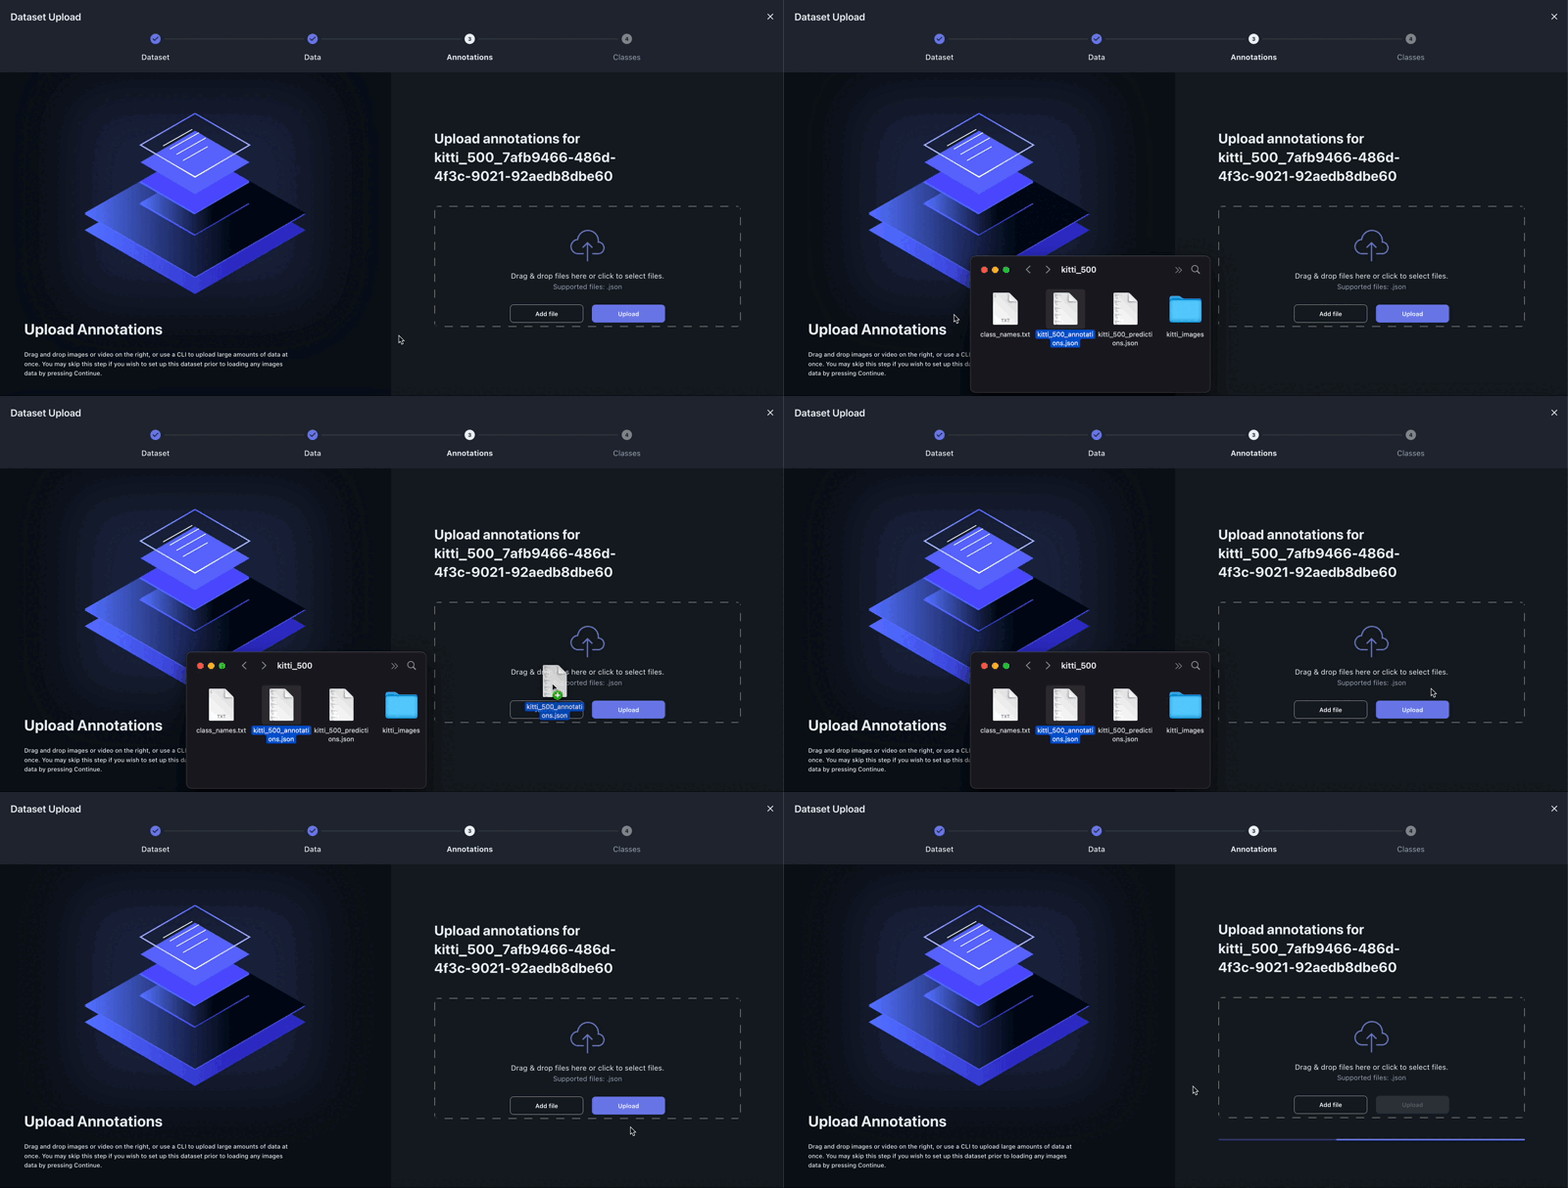
3. Upload your annotations
In this step you will upload the annotations for your images.

The expected annotation's format is the COCO format, a standard data format for annotating and organizing datasets used in object detection, image segmentation, and other computer vision tasks.
{
  "images": [
    {
      "id": 1,
      "width": 640,
      "height": 480,
      "file_name": "example_image.jpg",
      "date_captured": "2023-08-29"
    }
  ],
  "annotations": [
    {
      "id": 1,
      "image_id": 1,
      "category_id": 1,
      "bbox": [100, 150, 200, 300],
      "area": 60000,
      "segmentation": [],
      "iscrowd": 0
    }
  ],
  "categories": [
    {
      "id": 1,
      "name": "example_object",
      "supercategory": "objects"
    }
  ]
}
🎀 Tip: Other supported formats are available via the Tenyk's CLI, such as YOLO, Vott CSV, Deepstream, and many others. You can even upload your annotations from your S3 bucket!
Don't despair if you are running into troubles to have the annotations in the right format, drop us a line: [email protected], or ping us via the Intercom available directly inside the platform.
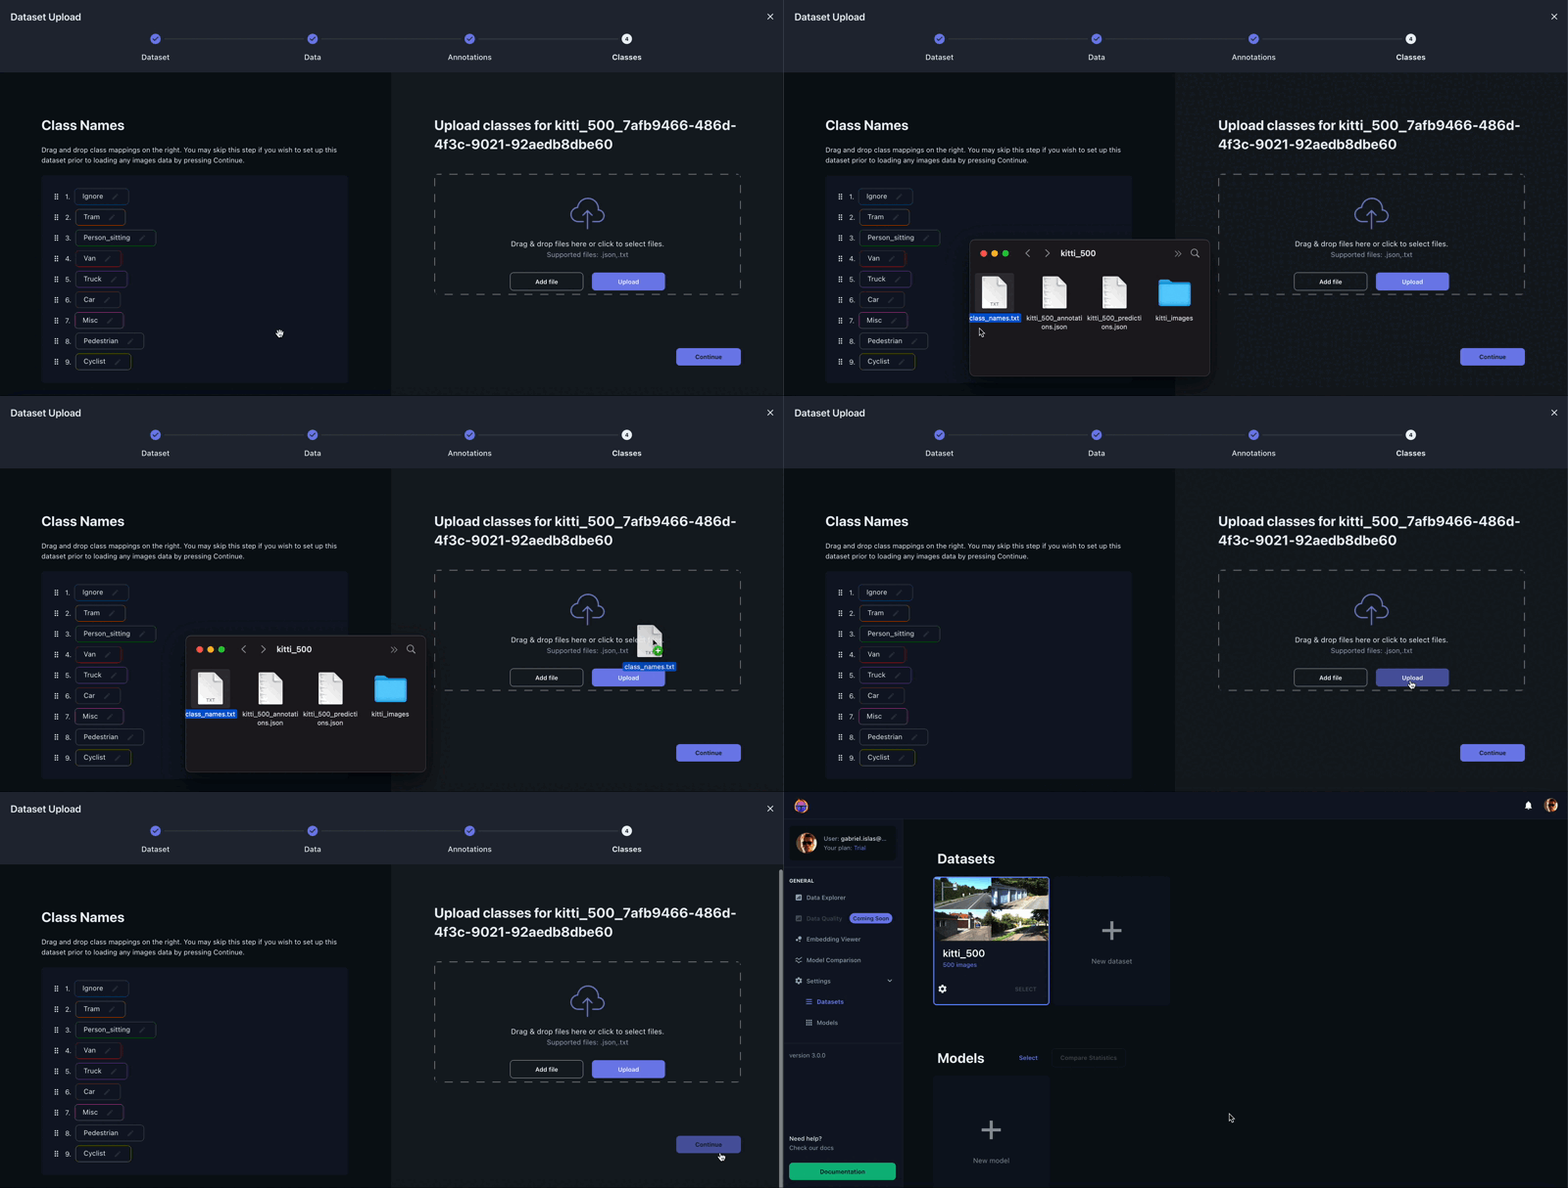
4. Define your Class names
In this last step you can upload a TXT or a JSON file with the names (i.e. labels) of your classes.

The TXT file contains each class name per line.
Ignore
Tram
Person_sitting
Van
Truck
Car
Misc
Pedestrian
Cyclist
On the other hand, the JSON file contains a JSON object with a single key categories and a list of the names of the classes.
{"categories": ["Ignore", "Tram", "Person_sitting", "Van", "Truck", "Car", "Misc", "Pedestrian", "Cyclist"]}🎀 Tip: Before uploading any file, it's likely that your labels were correctly extracted in the previous step, hence verify on the left side of this screen if your classes are in the right ascending order.
Congratulations! 😍 You uploaded your first dataset in the Tenyks platform!
You can now open Data Explorer and start browsing 👓
Updated 12 months ago
Once you successfully uploaded a dataset, it's time to upload your model.
