Azure
We summarize the setup process on Azure to connect your data to the Tenyks platform.
Before you start
📣 Please make sure you read the following points before continuing.
- We require
read-onlyaccess to the dataset images. We need to store metadata (e.g., thumbnails, compressed files); we can store it for you. If this is convenient for you, follow theread-onlyapproach. This is the recommended approach 💫. - (Optional) If you prefer to store metadata on your own cloud, you can:
- Create a single container with separate image and metadata folders, and provide us
read/writeaccess to that entire bucket.
- Create a single container with separate image and metadata folders, and provide us
1. Expected folder structure
Here's the expected folder structure based on the option you choose:
read-only |
|---|
Container name: {your_tenyks_data_container} |
Images Directory: {your_tenyks_data_container}/{your_dataset_name}/{images_directory_name}/img_n.png |
Predictions File (in COCO Format): {your_tenyks_data_container}/{your_dataset_name}/predictions.json |
Annotations File (in COCO Format): {your_tenyks_data_container}/{your_dataset_name}/annotations.json |
| Metadata Directory: We will set this up for you! ⭐ |
For the read-write option, follow the same structure as in read-only but since your metadata remains in your own cloud, please add a Metadata Directory:
{your_tenyks_data_container}/{your_dataset_name}/{metadata_directory_name} (see Section 3.2)
2. Setting up Azure containers
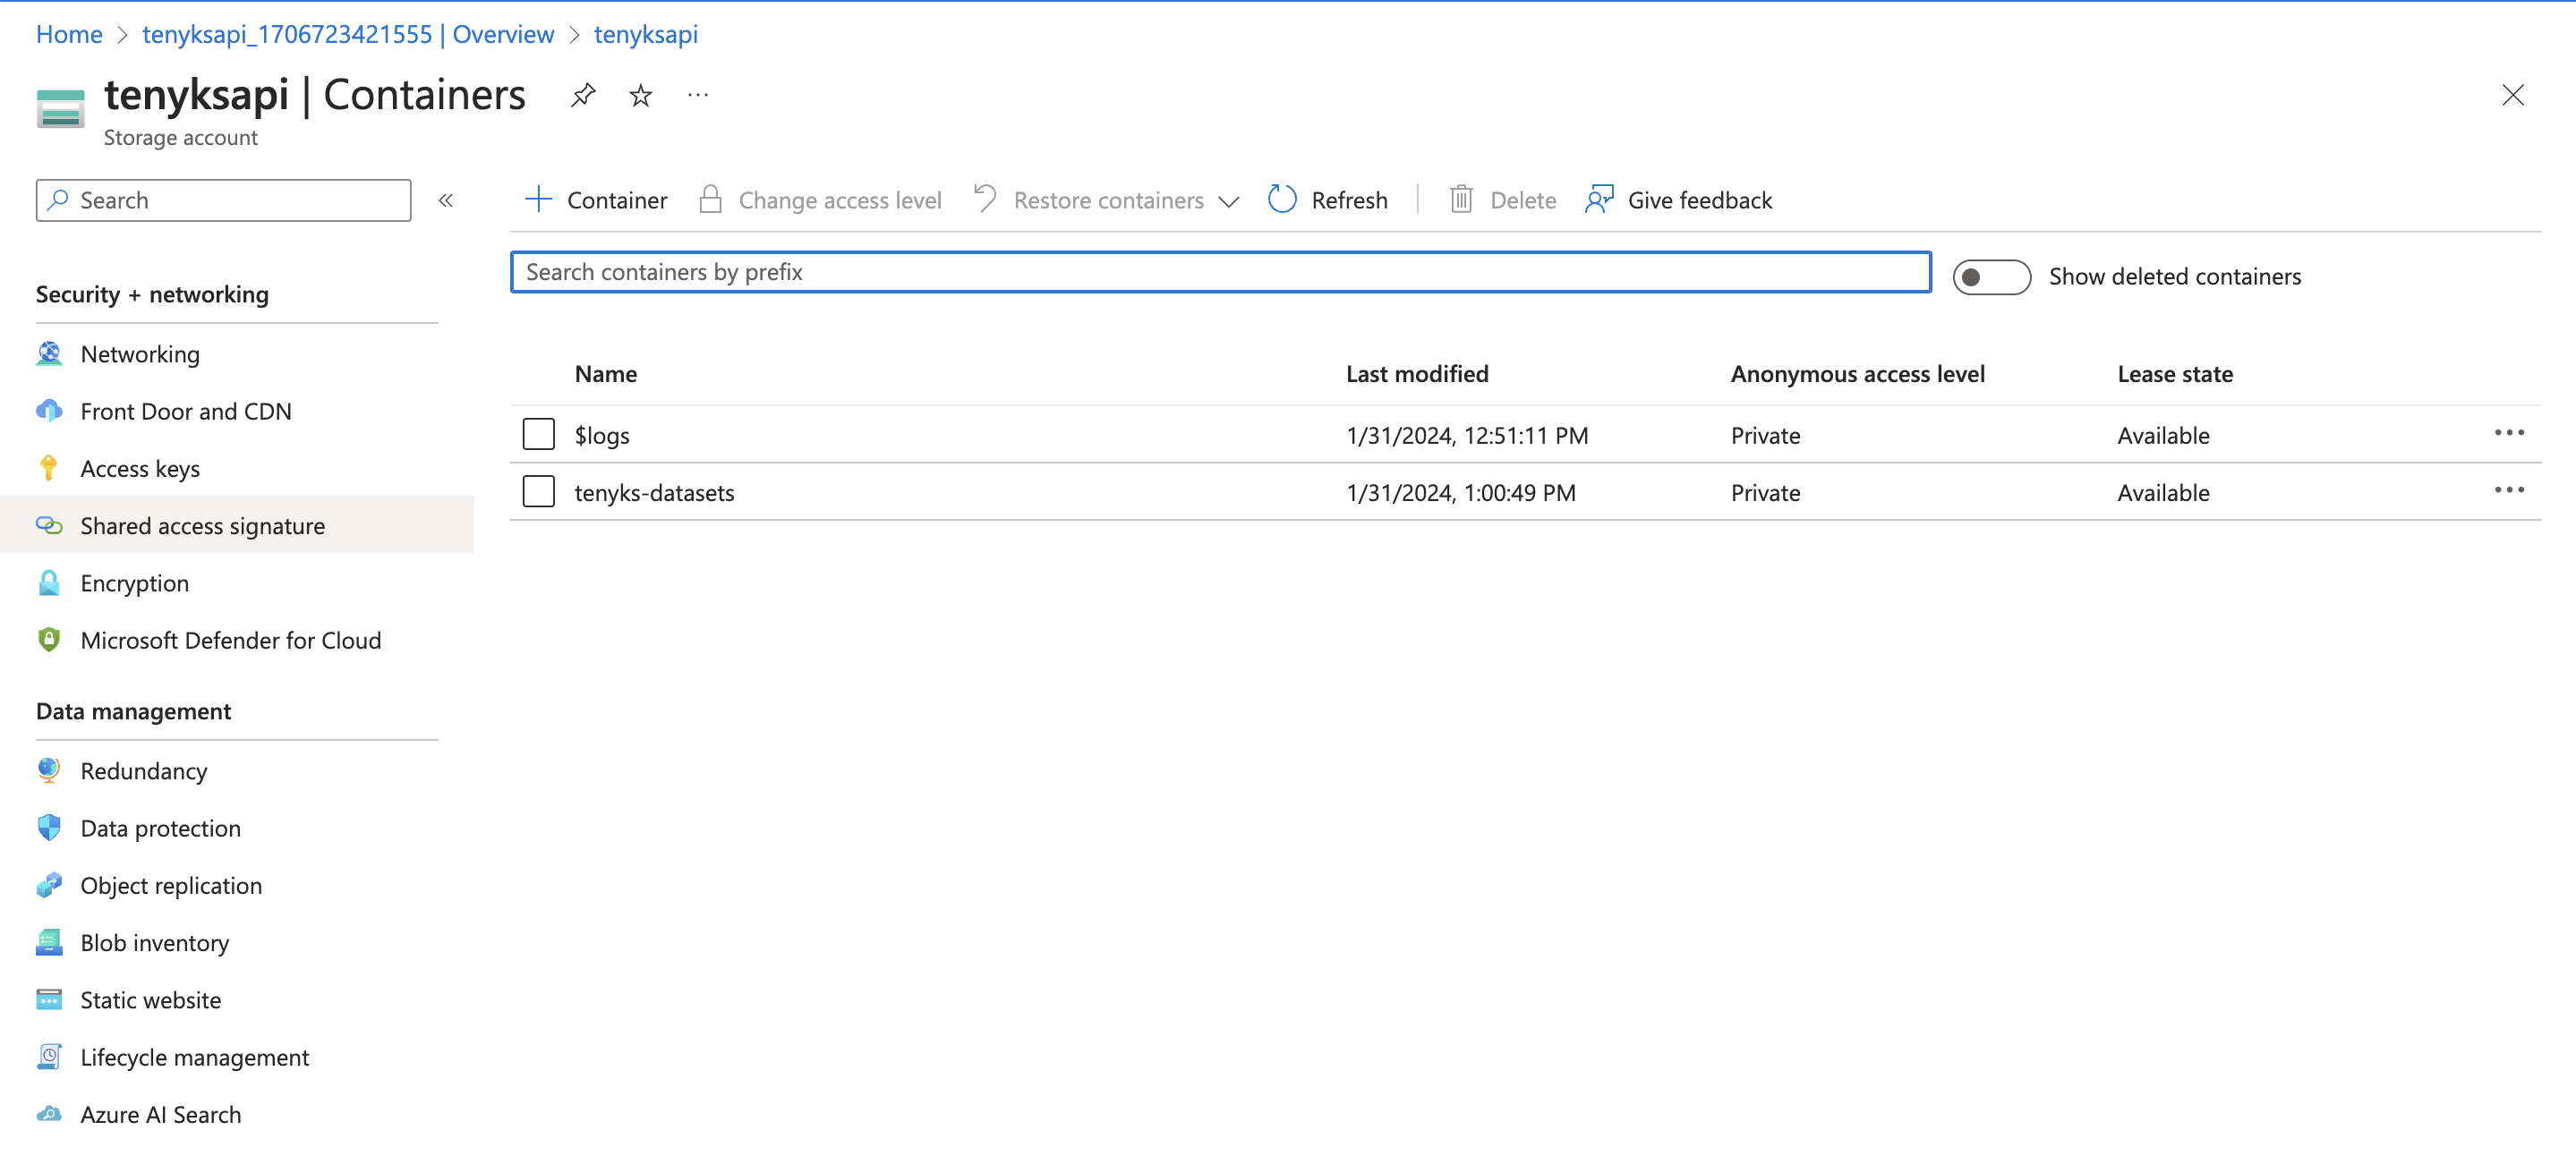
Figure 1 shows an example of a container named tenyks-datasets inside a storage account named tenyksapi.
If you haven't set them up, this guide shows you how to create a storage account, and this one how to create a container.
We assume you have set up a folder structure in your container(s) as described on Section 1.

Figure 1. An Azure container called tenyks-dataset
3. Access Policies
- Navigate to your storage account.
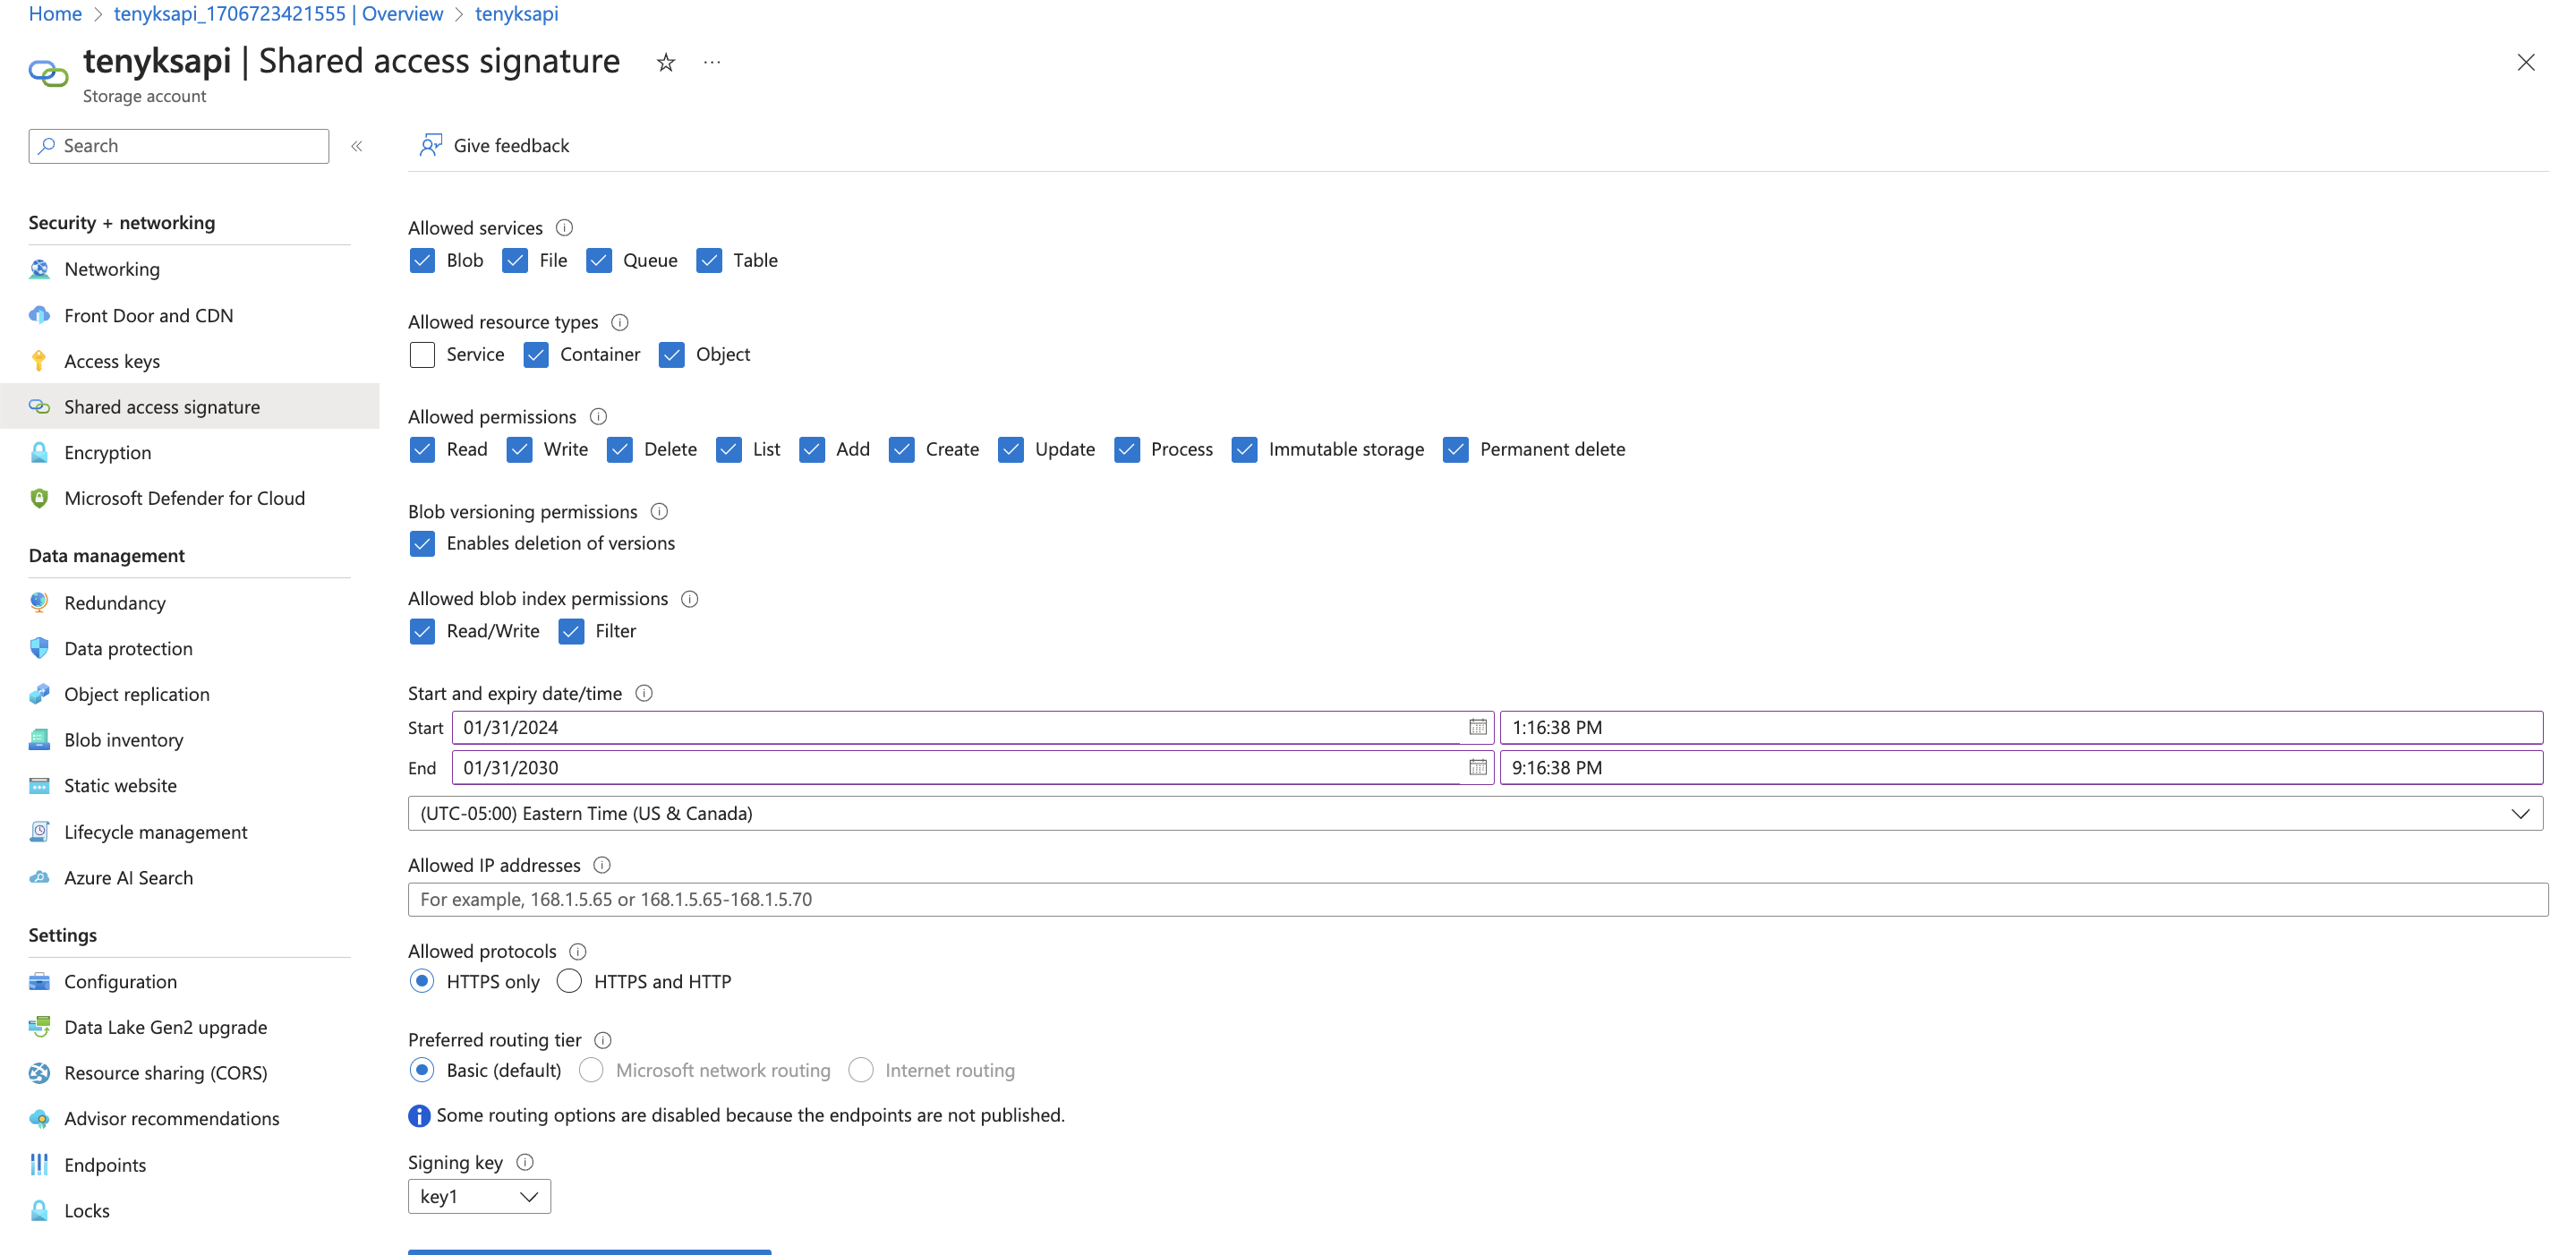
- On the left menu, under Security + networking, select Shared access signature (see Figure 2)

Figure 2. Setup of permissions
- On Allowed resource types tick the boxes: Container and Object.
- On Allowed permissions:
- For
read-onlytick the boxes Read and List. - For
read-writetick all the boxes.
- For
- Define an expiry date.
- Click on Generate SAS and connection string.
Connection String or Blob SAS URLChoose one of the two following options to access your container:
blob sas urlis per container level. You allow us to access the container only. This is the recommended approach 💫.connection stringis per account level. You create an account for us and we can access all the containers that belong to this account.
For blob sas url:
- From the different options displayed after generating the SAS and the connection string, save the value of
blob sas url.
⚠️ blob sas url should have a format similar to the following:
"https://tenyksdatasets.blob.core.windows.net/dataset?sp=racwdl&st=2021-02-02T17:40:59Z&se=2024-02-03T01:40:59Z&spr=https&sv=2022-11-02&sr=c&sig=E2PVl...aIgaHGY%3D"For connection string
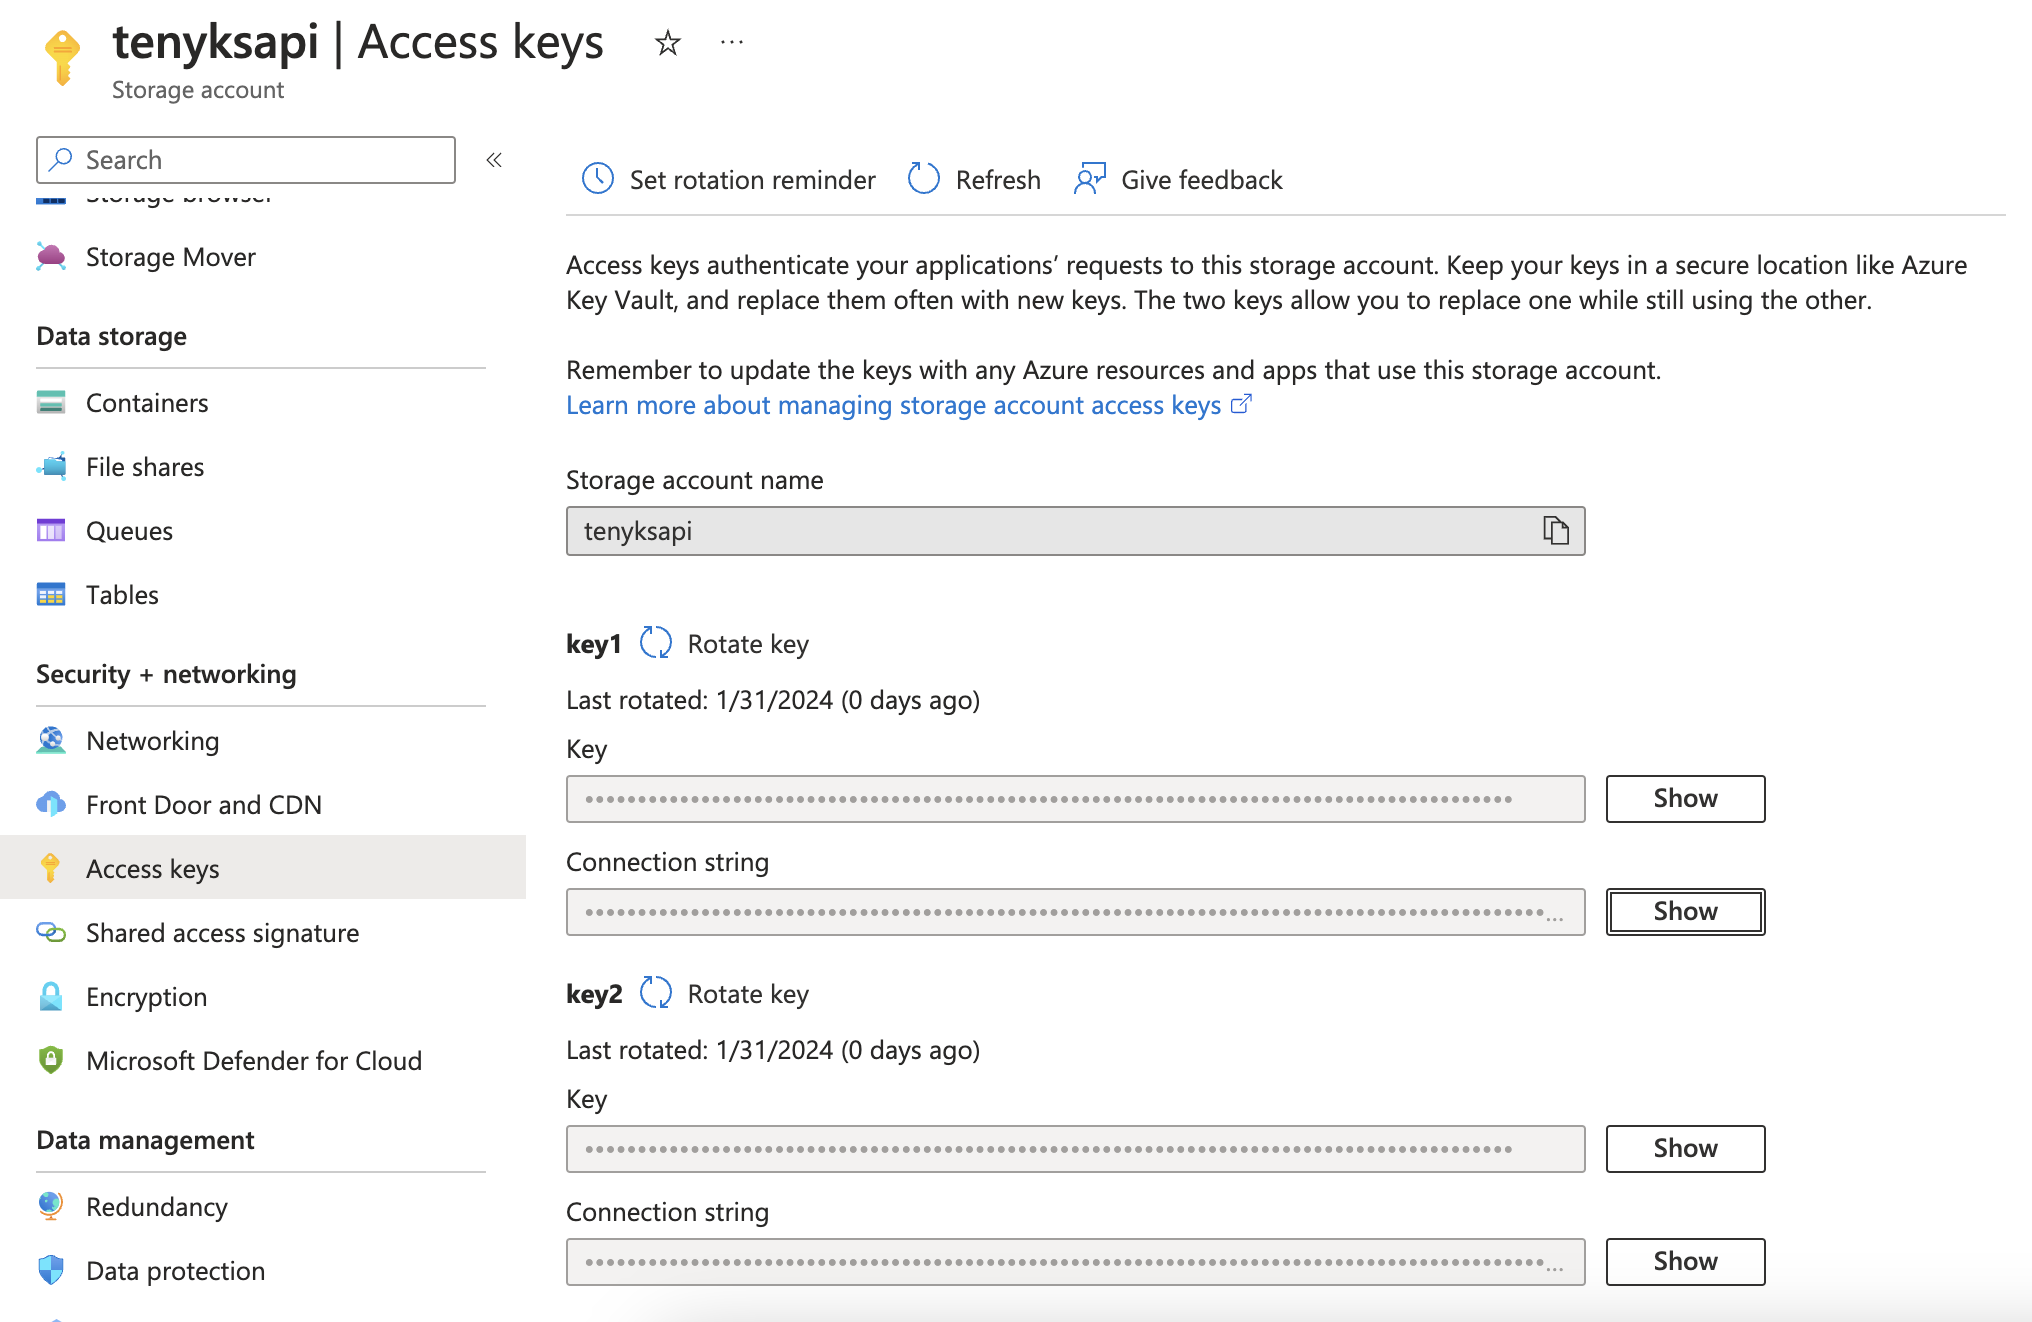
- On the left menu, under Security + networking, select Access Keys (see Figure 3)
- Save the value of
connection stringcorresponding tokey1.

Figure 3. Access keys: you will use connection string for key1 to connect your data to Tenyks
⚠️ connection string should have a format similar to the following:
"DefaultEndpointsProtocol=https;AccountName=tenyks;AccountKey=q1F...==;EndpointSuffix=core.windows.net"🚨 Note that blob sas url (or connection string) is expected to be copied and pasted as the value of credentials in the request body of the endpoints.
4. Metadata bucket CORS settings
In case you are storing metadata on your own cloud, to use functionalities like the Embedding Viewer, please configure the CORS settings for your storage account.
- Navigate to your storage account.
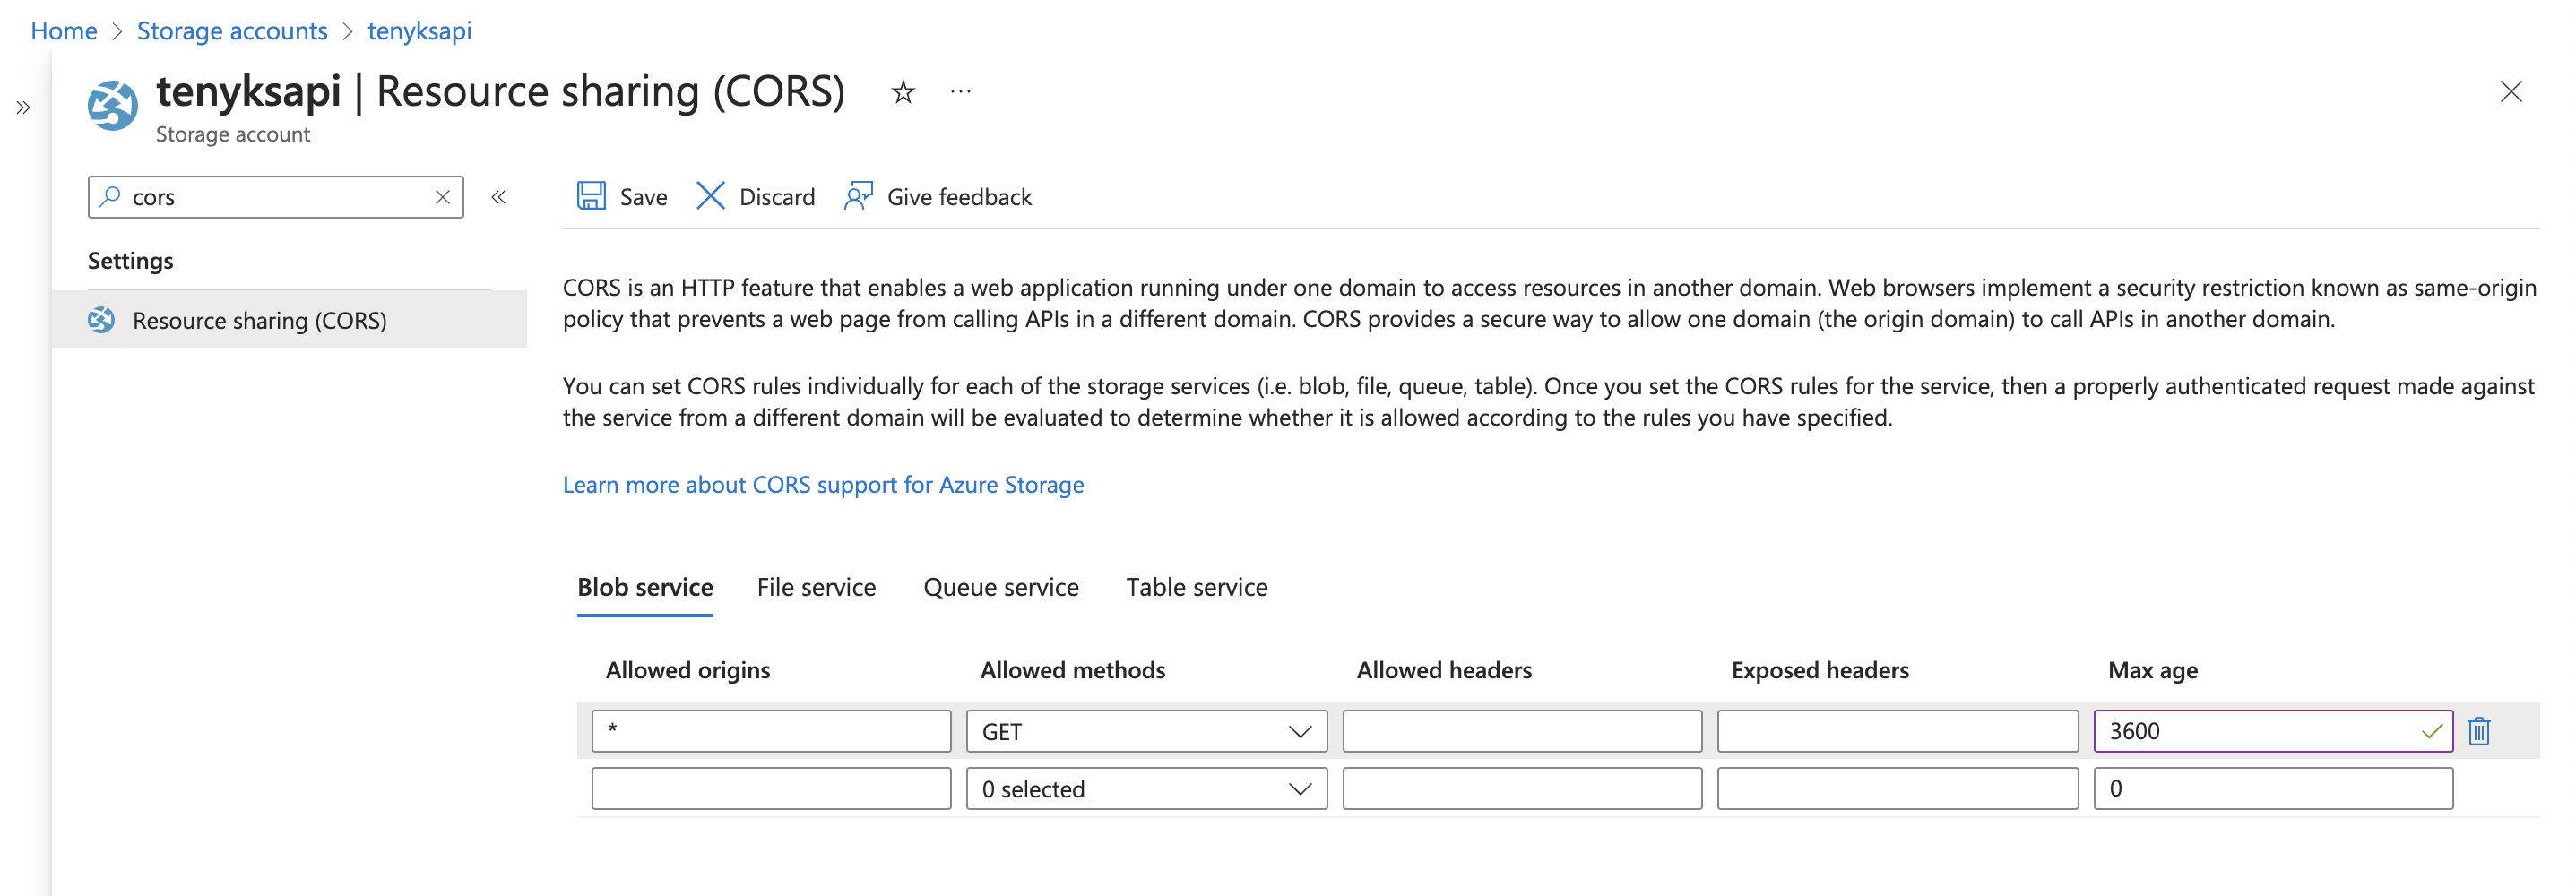
- On the left menu, click on "Resource sharing (CORS)"
- Select
blob serviceon the tab menu - For "Allowed origins" type
* - For "Allowed methods" type
GET - For "Max age" type
3600
Refer to Figure 4 below for more information.

Figure 4. CORS setting for your Azure Storage Account
5. Summary
We successfully created the following:
- One container.
- The appropriate access permissions to access the container.
- The CORS settings for the
read-onlyconfiguration (hint:read-writedon't require this setup). - One of the following:
blob sas urlorconnection string.
Updated 11 months ago
