AWS S3
We describe the process to set up AWS S3 to connect your data to the Tenyks platform.
🚀 AWS S3 connection is available for the Pro plan.
Before you start
📣 Please make sure you read the following points before continuing.
- We need
read-onlyaccess to the dataset images. We need to store metadata (e.g., thumbnails, compressed files); we can store it for you. If this is convenient for you, follow theread-onlyapproach (Section 3.1). This is the recommended approach! 💫 - (Optional) If you prefer to store metadata on your own cloud, you can:
- Create a separate
metadatabucket withread/writeaccess (Section 3.2.1), OR - Create a single bucket with separate
imageandmetadatafolders on the same bucket, and provide usread/writeaccess to that entire bucket (Section 3.2.2).
1. Expected folder structure
Here's the expected folder structure based on the option you choose:
read-only bucket:
read-only bucket:Container name: {your_tenyks_data_bucket}
Within this container, organize your data as follows:
Images Directory:
{your_tenyks_data_bucket}/{your_dataset_name}/{images_directory_name}/image_n.png
Predictions File (in COCO Format):
{your_tenyks_data_bucket}/{your_dataset_name}/predictions.json
Annotations File (in COCO Format):
{your_tenyks_data_bucket}/{your_dataset_name}/annotations.json
Metadata Directory: We will set this up for you!
read-write bucket:
read-write bucket:Container name: {your_tenyks_data_bucket}
Within this container, organize your data as follows:
Images Directory:
{your_tenyks_data_bucket}/{your_dataset_name}/{images_directory_name}/image_n.png
Predictions File (in COCO Format):
{your_tenyks_data_bucket}/{your_dataset_name}/predictions.json
Annotations File (in COCO Format):
{your_tenyks_data_bucket}/{your_dataset_name}/annotations.json
Metadata Directory:
{your_tenyks_data_bucket}/{your_dataset_name}/{metadata_directory_name} (see Sections 3.2.1 and 3.2.2)
2. Setting up S3 buckets
We assume you have set up the necessary bucket(s). Please follow the structure described above. In case you need to brush up your AWS skills 👷, here is a fantastic article explaining how to create your first S3 bucket.
3. Create Policies in IAM
3.1 read-only bucket
read-only bucket- Inside the AWS Management Console navigate to IAM.
- Under the 'Access management' menu, click on 'Policies'.
- A list of all the available policies will be displayed, see Figure 1. Click on 'Create policy'.
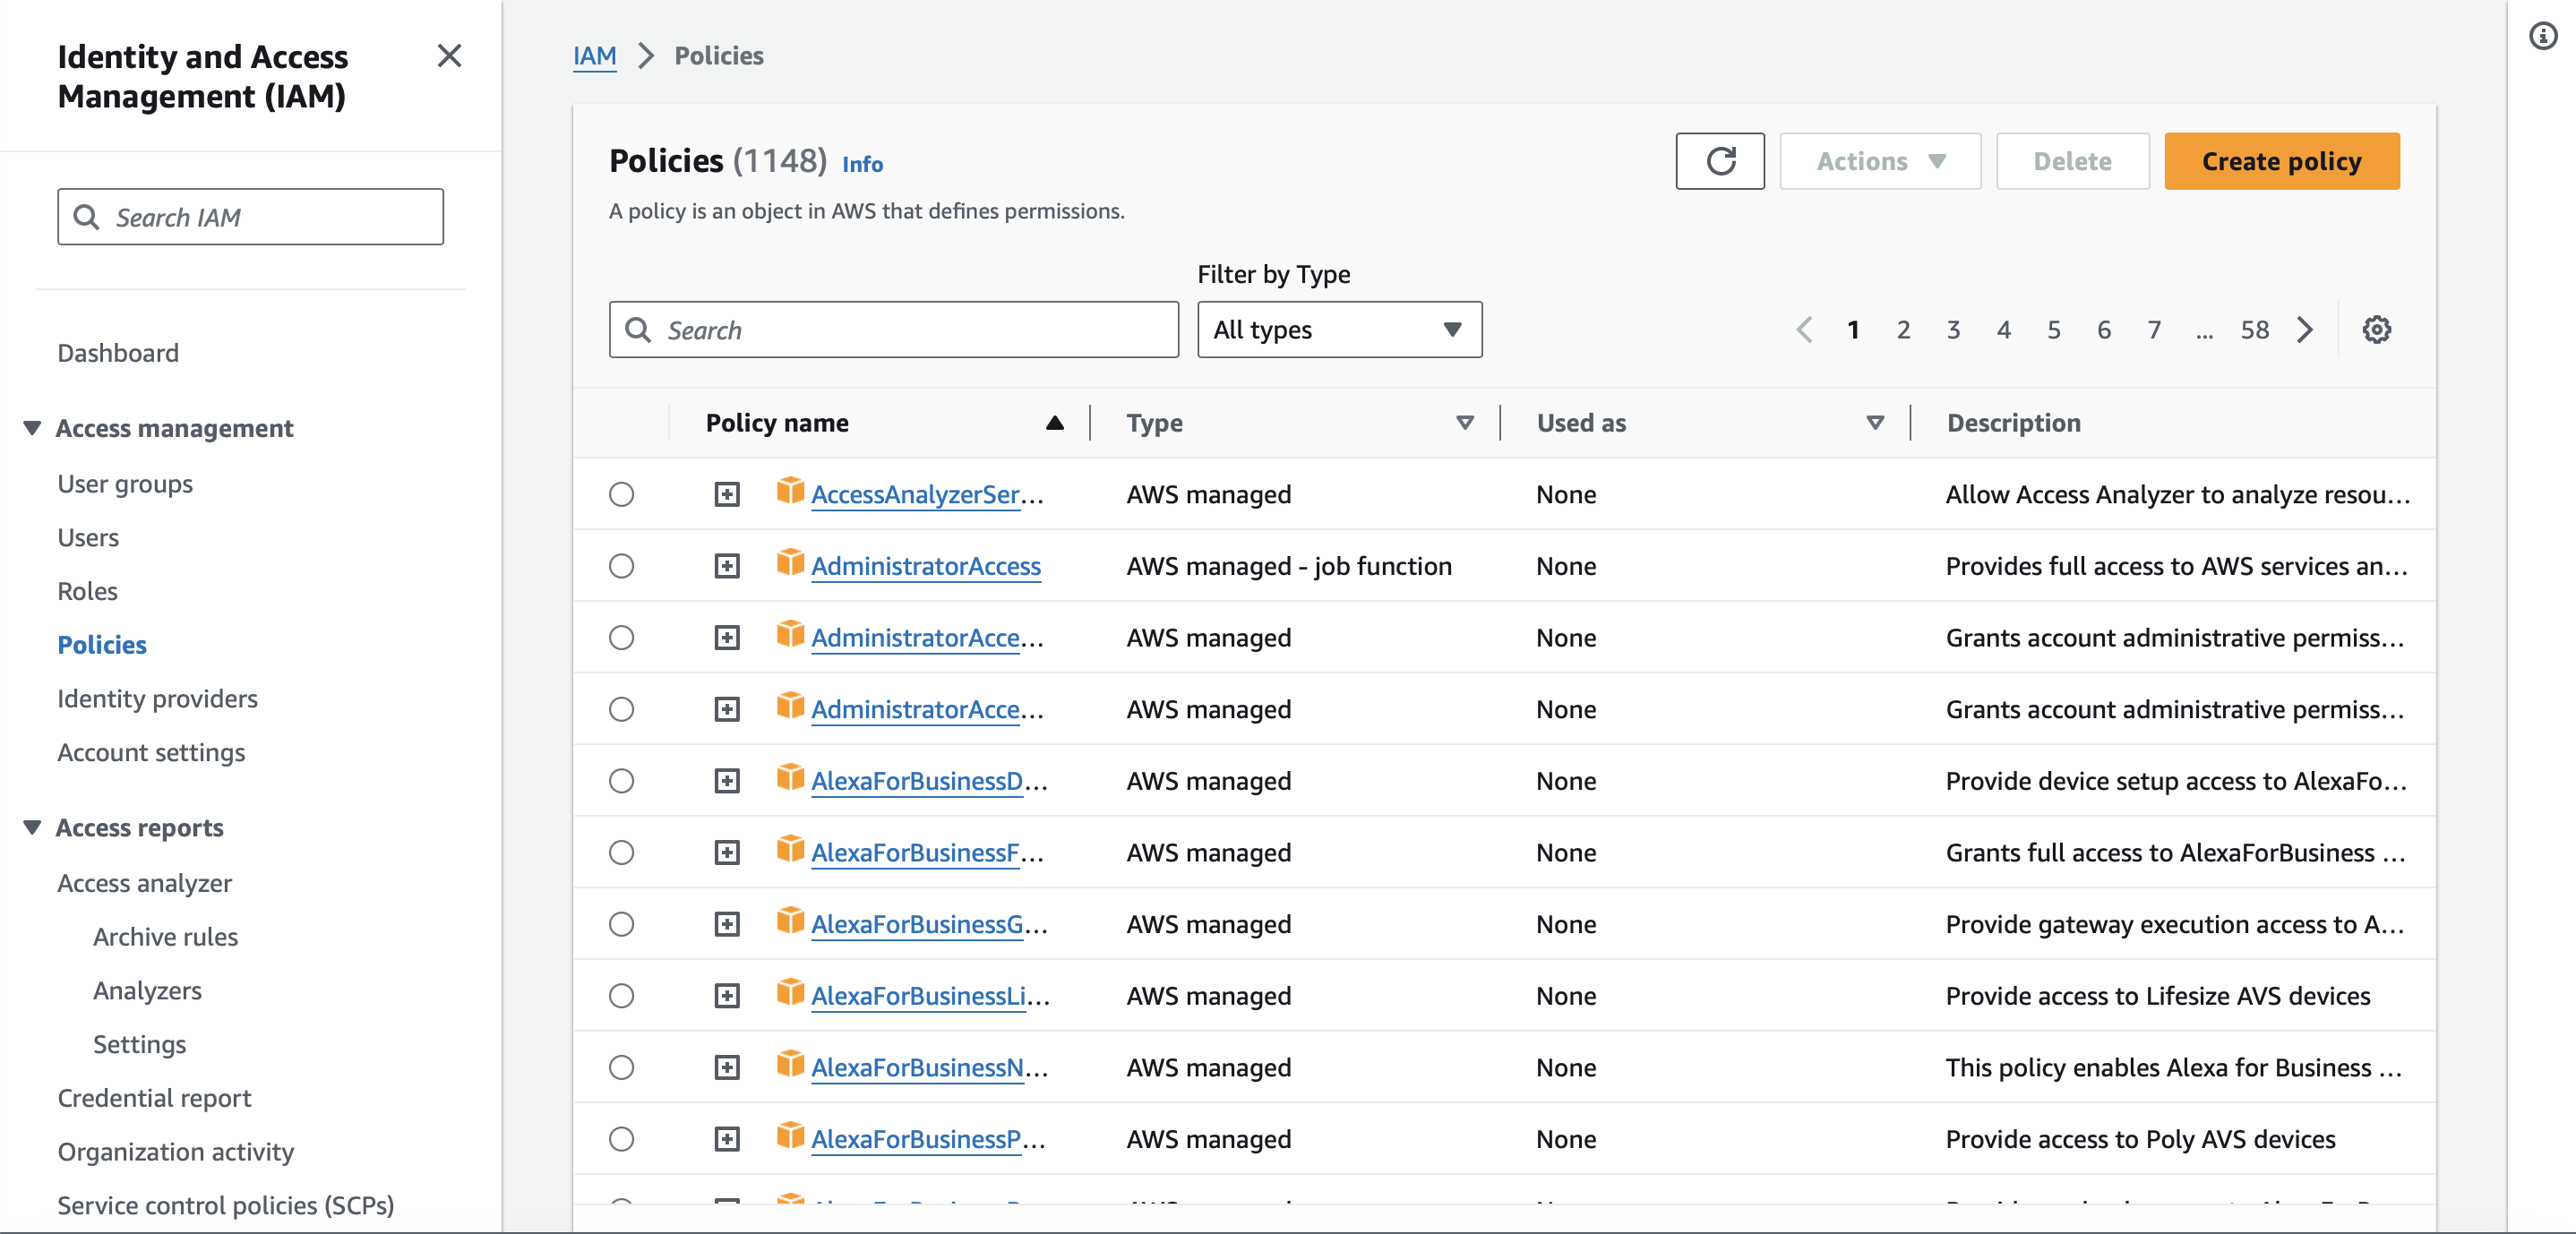
Figure 1. List of available policies in the IAM
- In the 'Policy Editor,' select
JSON. - Copy and paste the following permission: (i) replace
{your_tenyks_data_bucket}with the name of your images bucket, and (ii) replace{images_directory_name}with the name of your folder forimages.
{
    "Version": "2012-10-17",
    "Statement": [
        {
            "Sid": "tenyksReadOnlyAccess",
            "Action": [
                "s3:GetObject",
                "s3:ListBucket"
            ],
            "Effect": "Allow",
            "Resource": [
                "arn:aws:s3:::{your_tenyks_data_bucket}/{images_directory_name}/*",
                "arn:aws:s3:::{your_tenyks_data_bucket}"
            ]
        }
    ]
}- Define a policy name, and a description (optional).
- After creating the policy, you should see a similar screen as shown in Figure 2.
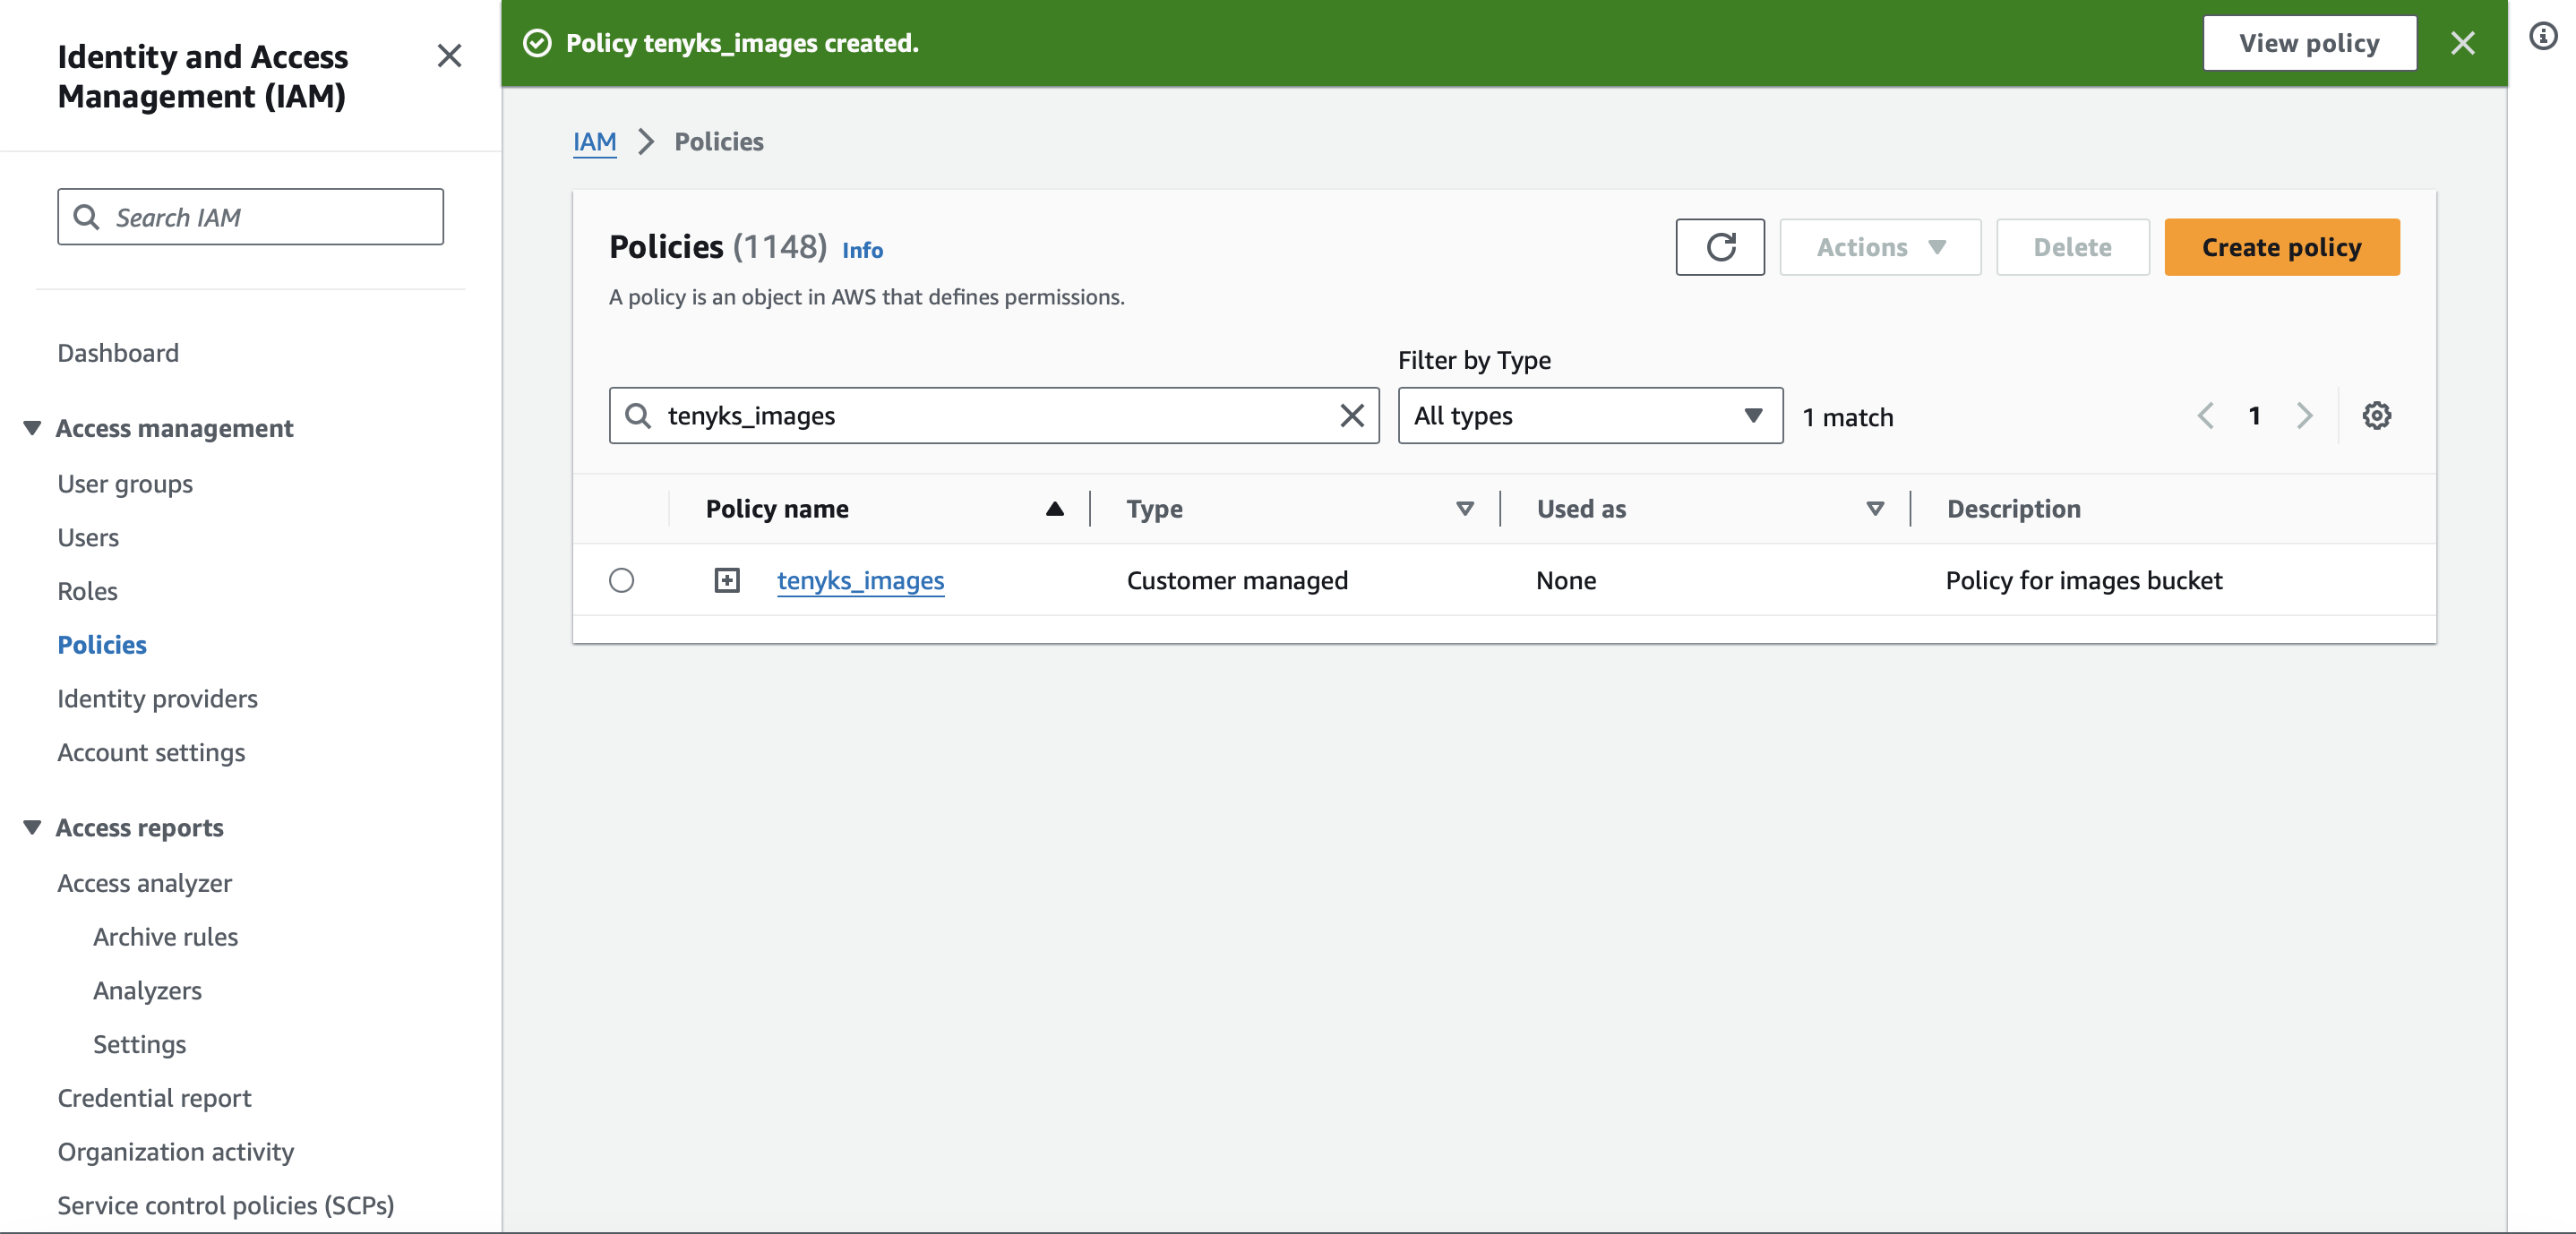
Figure 2. Policy for the images bucket successfully created
3.2 read/write bucket
read/write bucket
Metadata (optional)Note that this
read/writebucket is only required if you prefer that your metadata stays in your cloud. The recommended approach is to follow theread-onlymethod described in Section 3.1.
3.2.1 Bucket for metadata
- Click on "Create policy".
- In the 'Policy Editor,' select
JSON. - Copy and paste the following permission: (i) replace
{your_tenyks_metadata_bucket}with the name of your metadata bucket, and (ii) replace{metadata_directory_name}with the name of your folder formetadata.
{
    "Version": "2012-10-17",
    "Statement": [
        {
            "Sid": "tenyksWriteAccess",
            "Action": [
                "s3:GetObject",
                "s3:DeleteObject",
                "s3:PutObject",
                "s3:ListBucket"
            ],
            "Effect": "Allow",
            "Resource": [
                "arn:aws:s3:::{your_tenyks_metadata_bucket}/{metadata_directory_name}/*",
                "arn:aws:s3:::{your_tenyks_metadata_bucket}"
            ]
        }
    ]
}- Define a policy name, and a description (optional).
- Create the policy
✅ You should have two different policies, one for the images bucket and another for the metadata bucket, as shown in Figure 3.
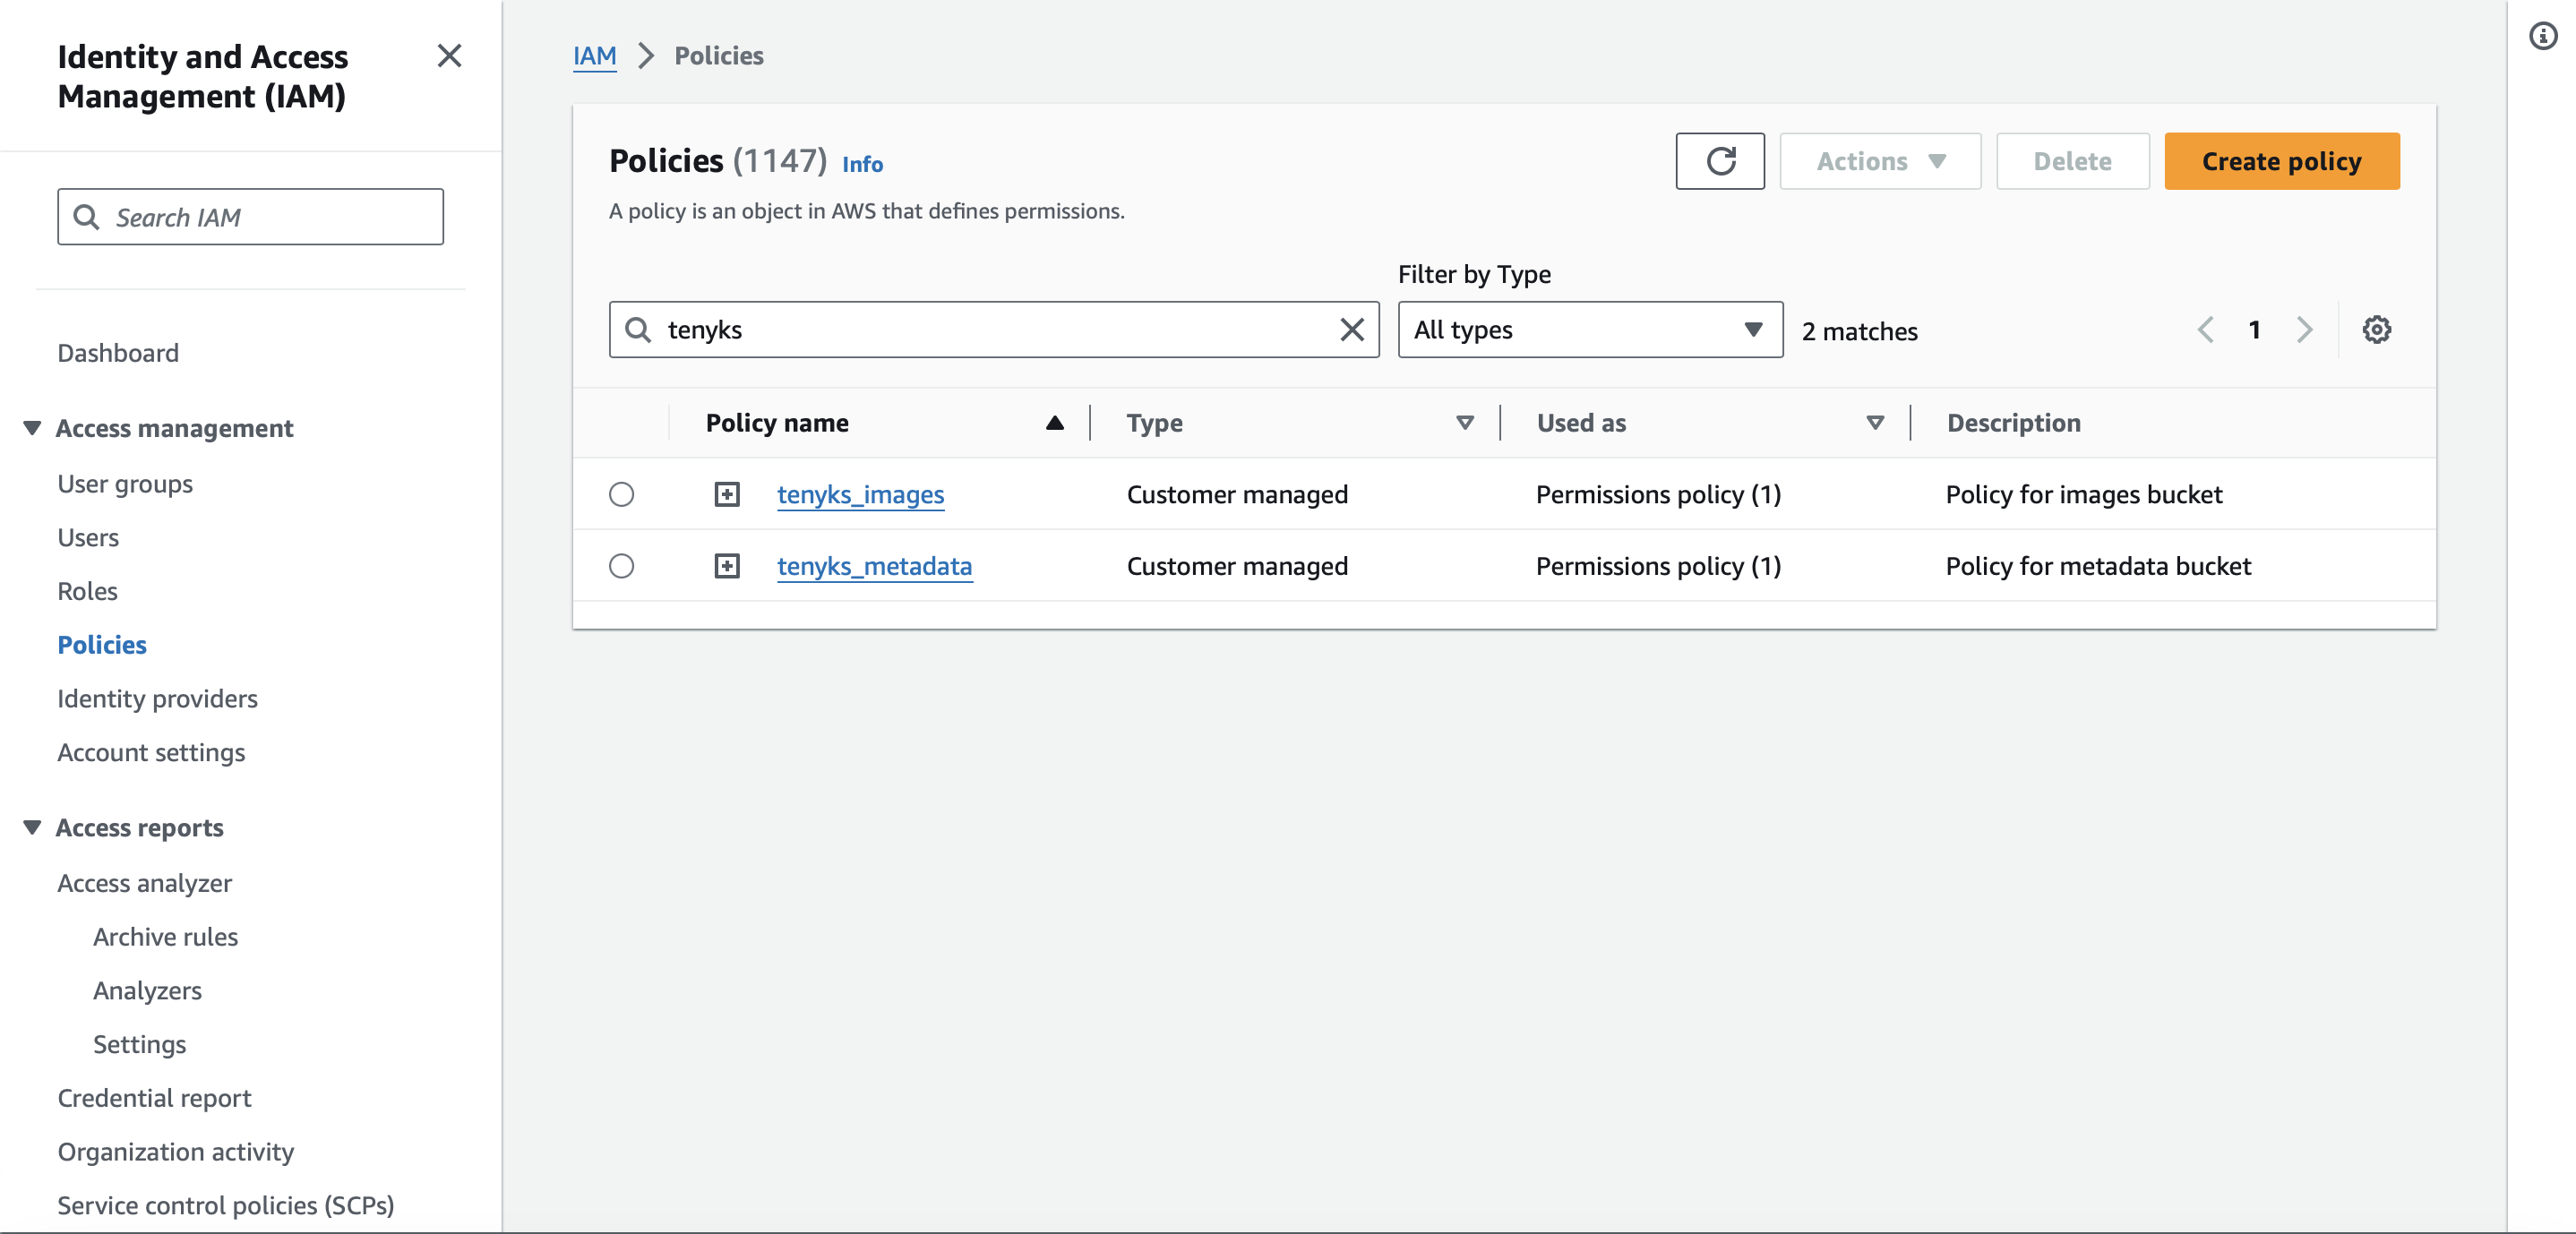
Figure 3. Two policies: one for each bucket
3.2.2 Bucket for images AND metadata
Be aware: one single bucketThis step assumes that
(i) your metadata will stay in your cloud
(ii) you created one single bucket with separate images and metadata directories
- Click on "Create policy".
- In the 'Policy Editor,' select
JSON. - Copy and paste the following permission: replace
{YOUR_BUCKET}with the name of your bucket.
{
    "Version": "2012-10-17",
    "Statement": [
        {
            "Sid": "tenyksFullBucketAccess",
            "Action": [
                "s3:GetObject",
                "s3:DeleteObject",
                "s3:PutObject",
                "s3:ListBucket"
            ],
            "Effect": "Allow",
            "Resource": [
                "arn:aws:s3:::{your_tenyks_data_bucket}/*",
                "arn:aws:s3:::{your_tenyks_data_bucket}"
            ]
        }
    ]
}- Define a policy name, and a description (optional).
- Create the policy
✅ You should have one policy, as shown in Figure 4.
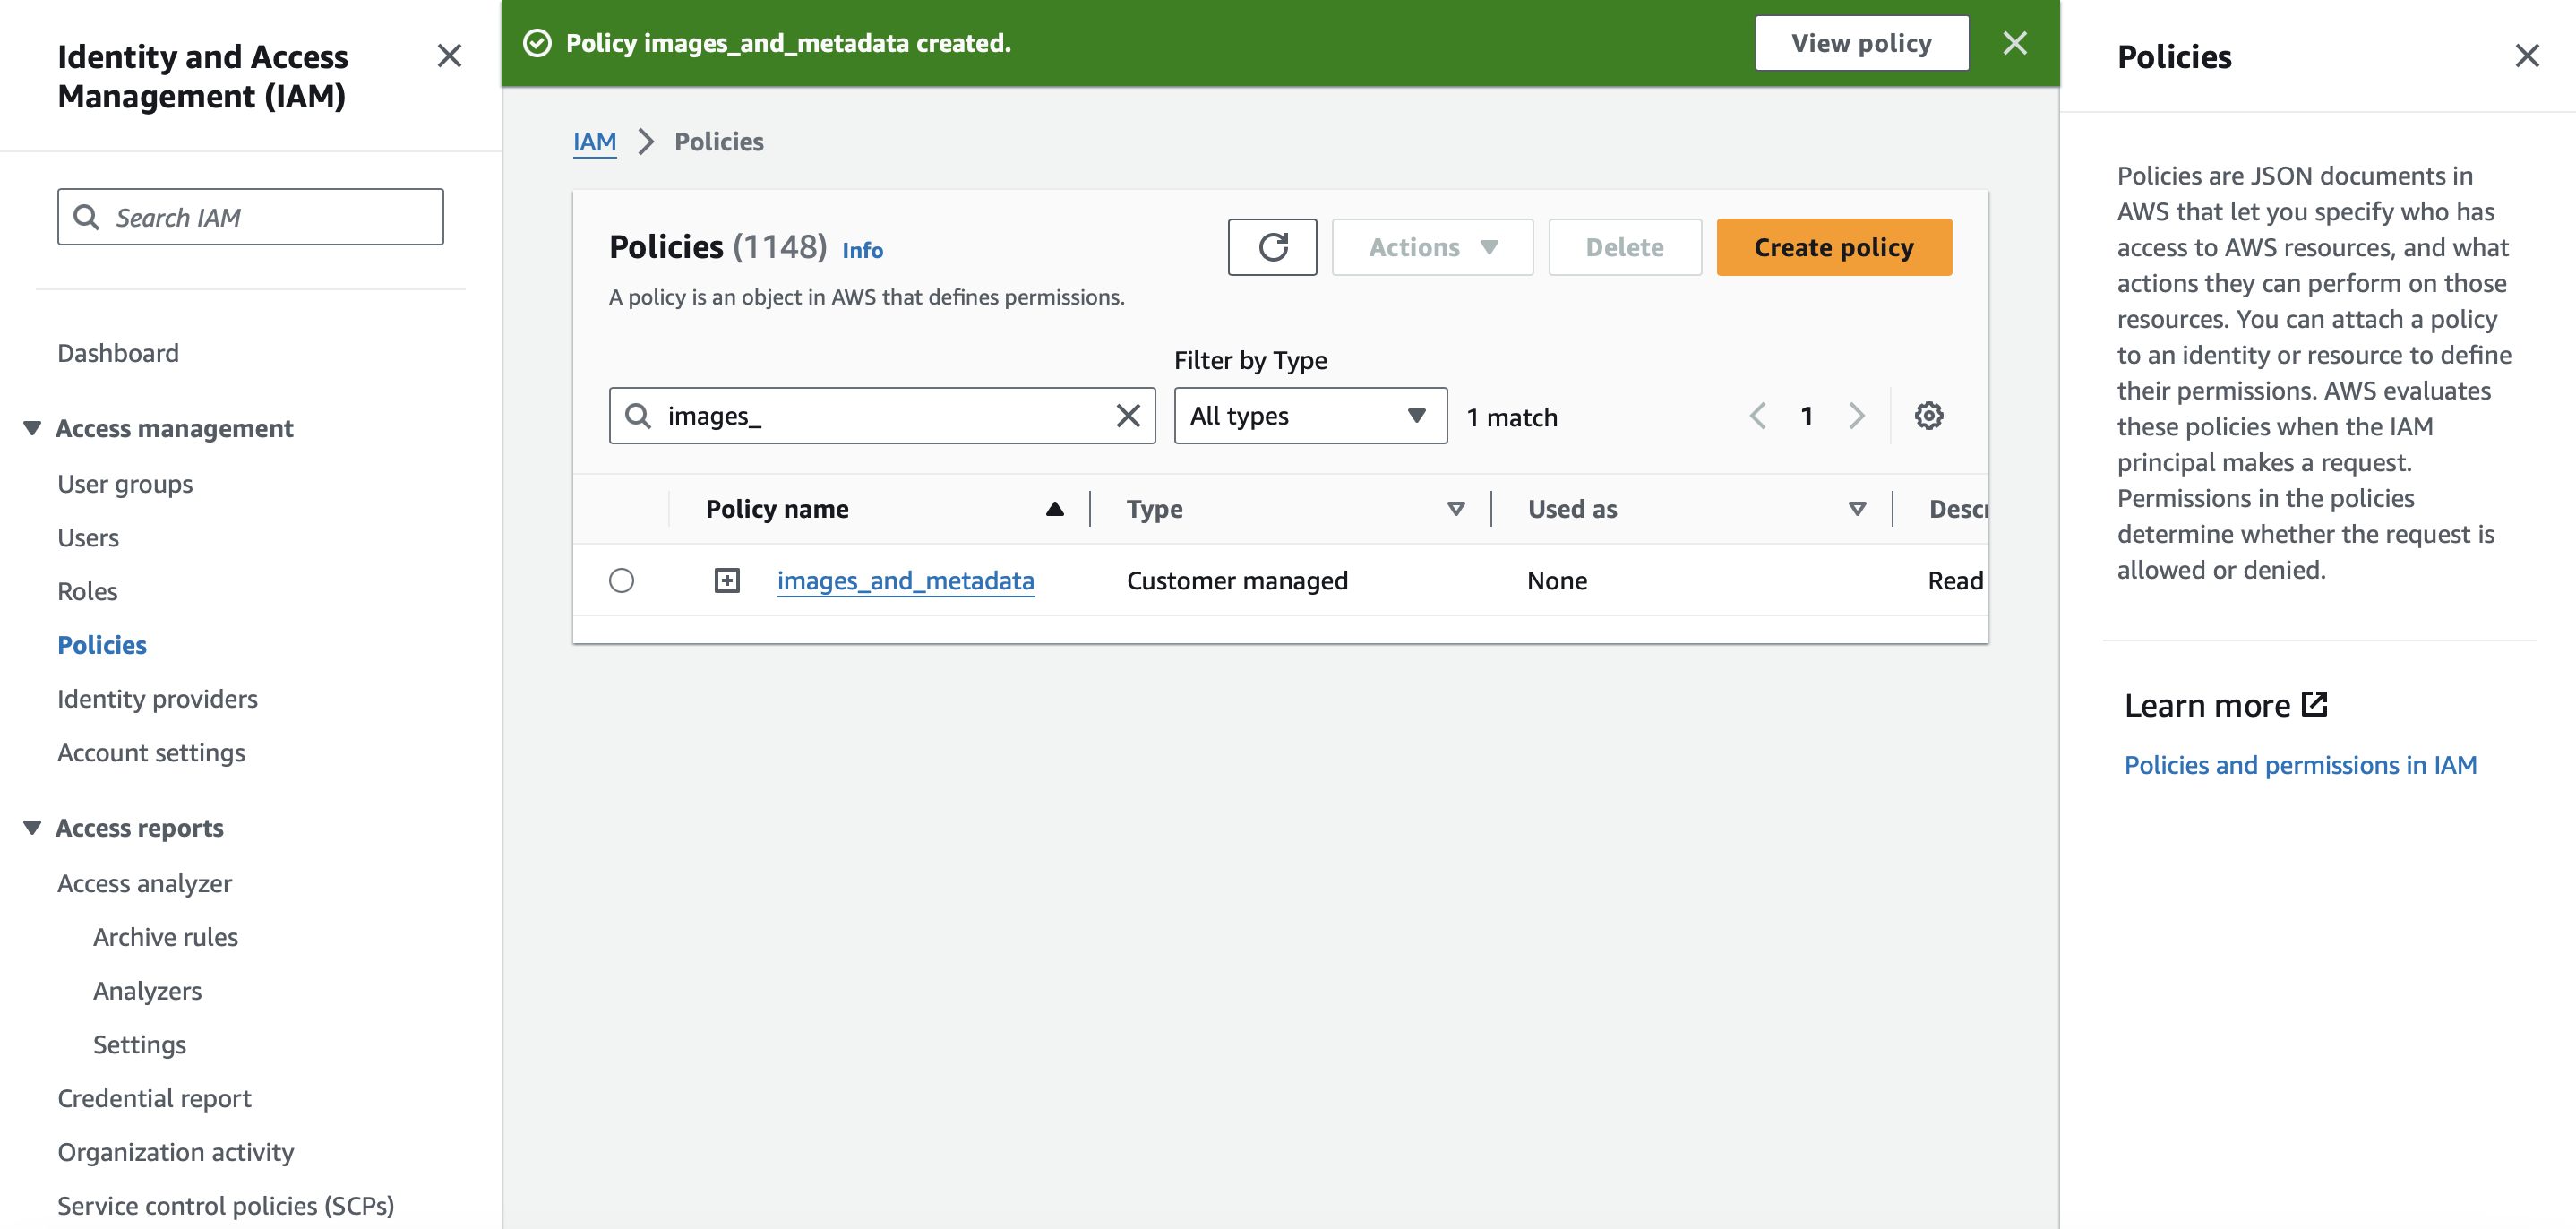
Figure 4. One single policy for both images and metadata with read and write access
3.3 Metadata Bucket CORS Settings
- Go to your metadata bucket.
- Navigate to "Permissions".
- Scroll down to "Cross-origin resource sharing (CORS)".
- Click "Edit" and "Paste" the following COR settings.
[
    {
        "AllowedHeaders": [],
        "AllowedMethods": [
            "GET"
        ],
        "AllowedOrigins": [
            "*"
        ],
        "ExposeHeaders": []
    }
]
✅ You should have the CORS settings, as shown in Figure 5.
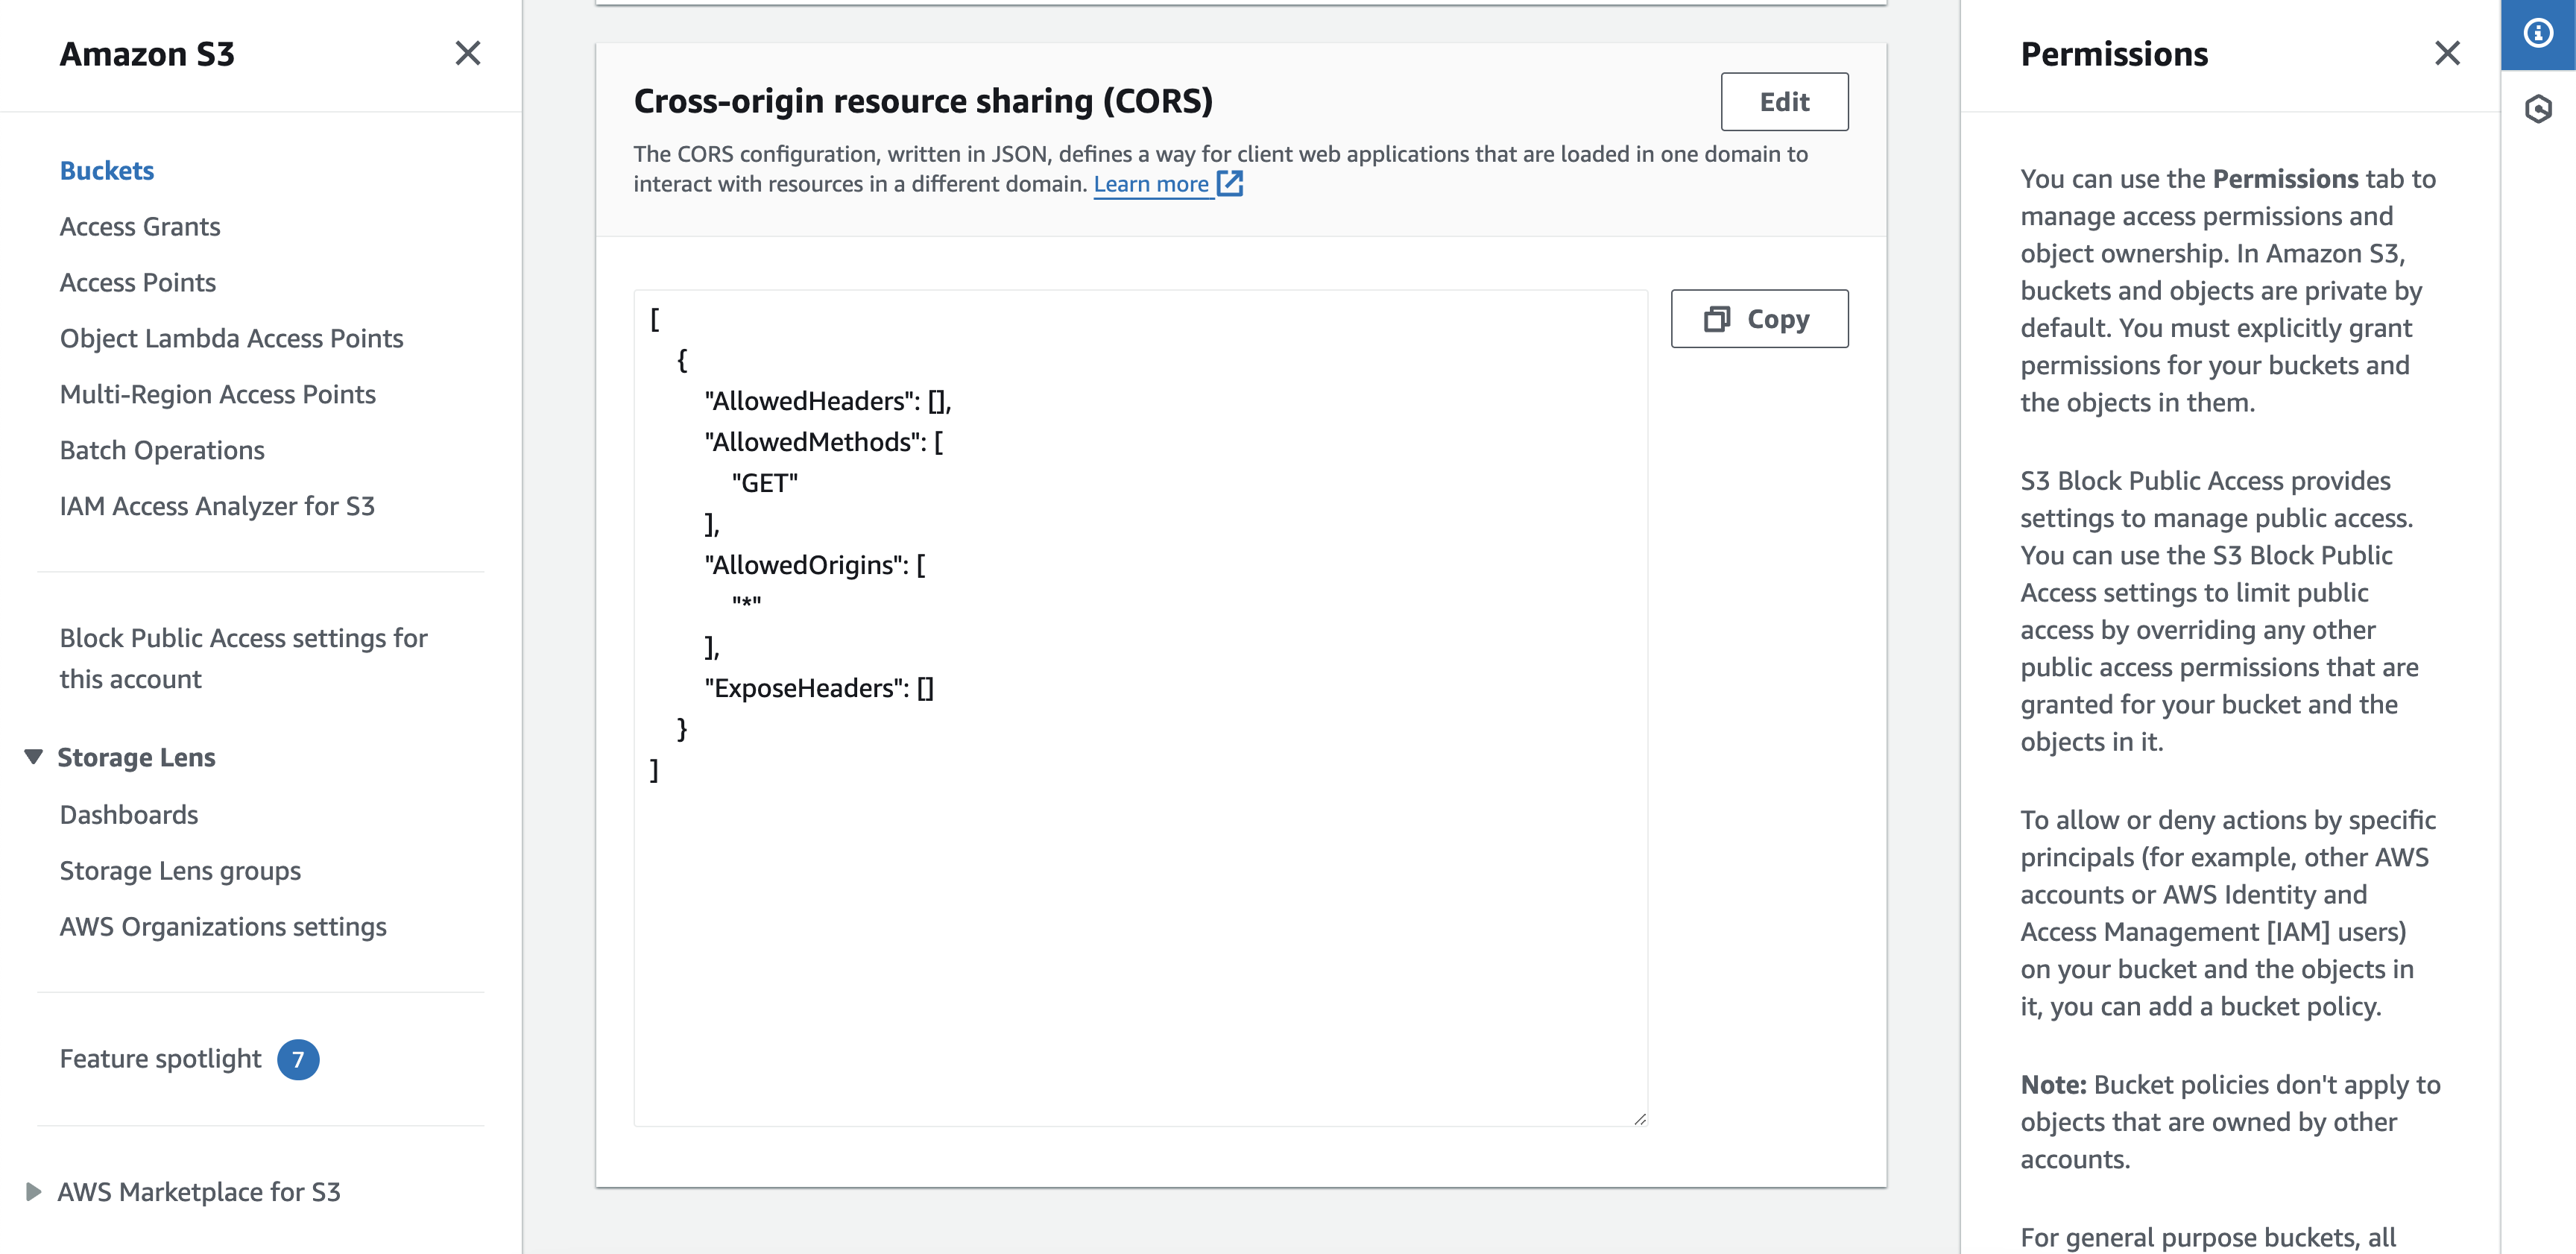
Figure 5. Metadata bucket CORS settings.
4. Create a new User
4.1 Create user
- Inside the AWS Management Console navigate to IAM.
- Under the 'Access management' menu, click on 'Users'
- A list of all the available users will be shown. Click on 'Create user', and provide a user name.
- In 'Set permissions', follow the next steps
- select 'Attach policies directly'
- use the search box to find the 1 or 2 policies (depending on the number of buckets created) defined in section 2
- select the 1 or 2 policies, and click on "Next". See Figure 6 for more details

Figure 6. Permission policies to be attached to the new User
- Click on 'Create user'. A screen similar to Figure 7 should indicate your user was successfully created.
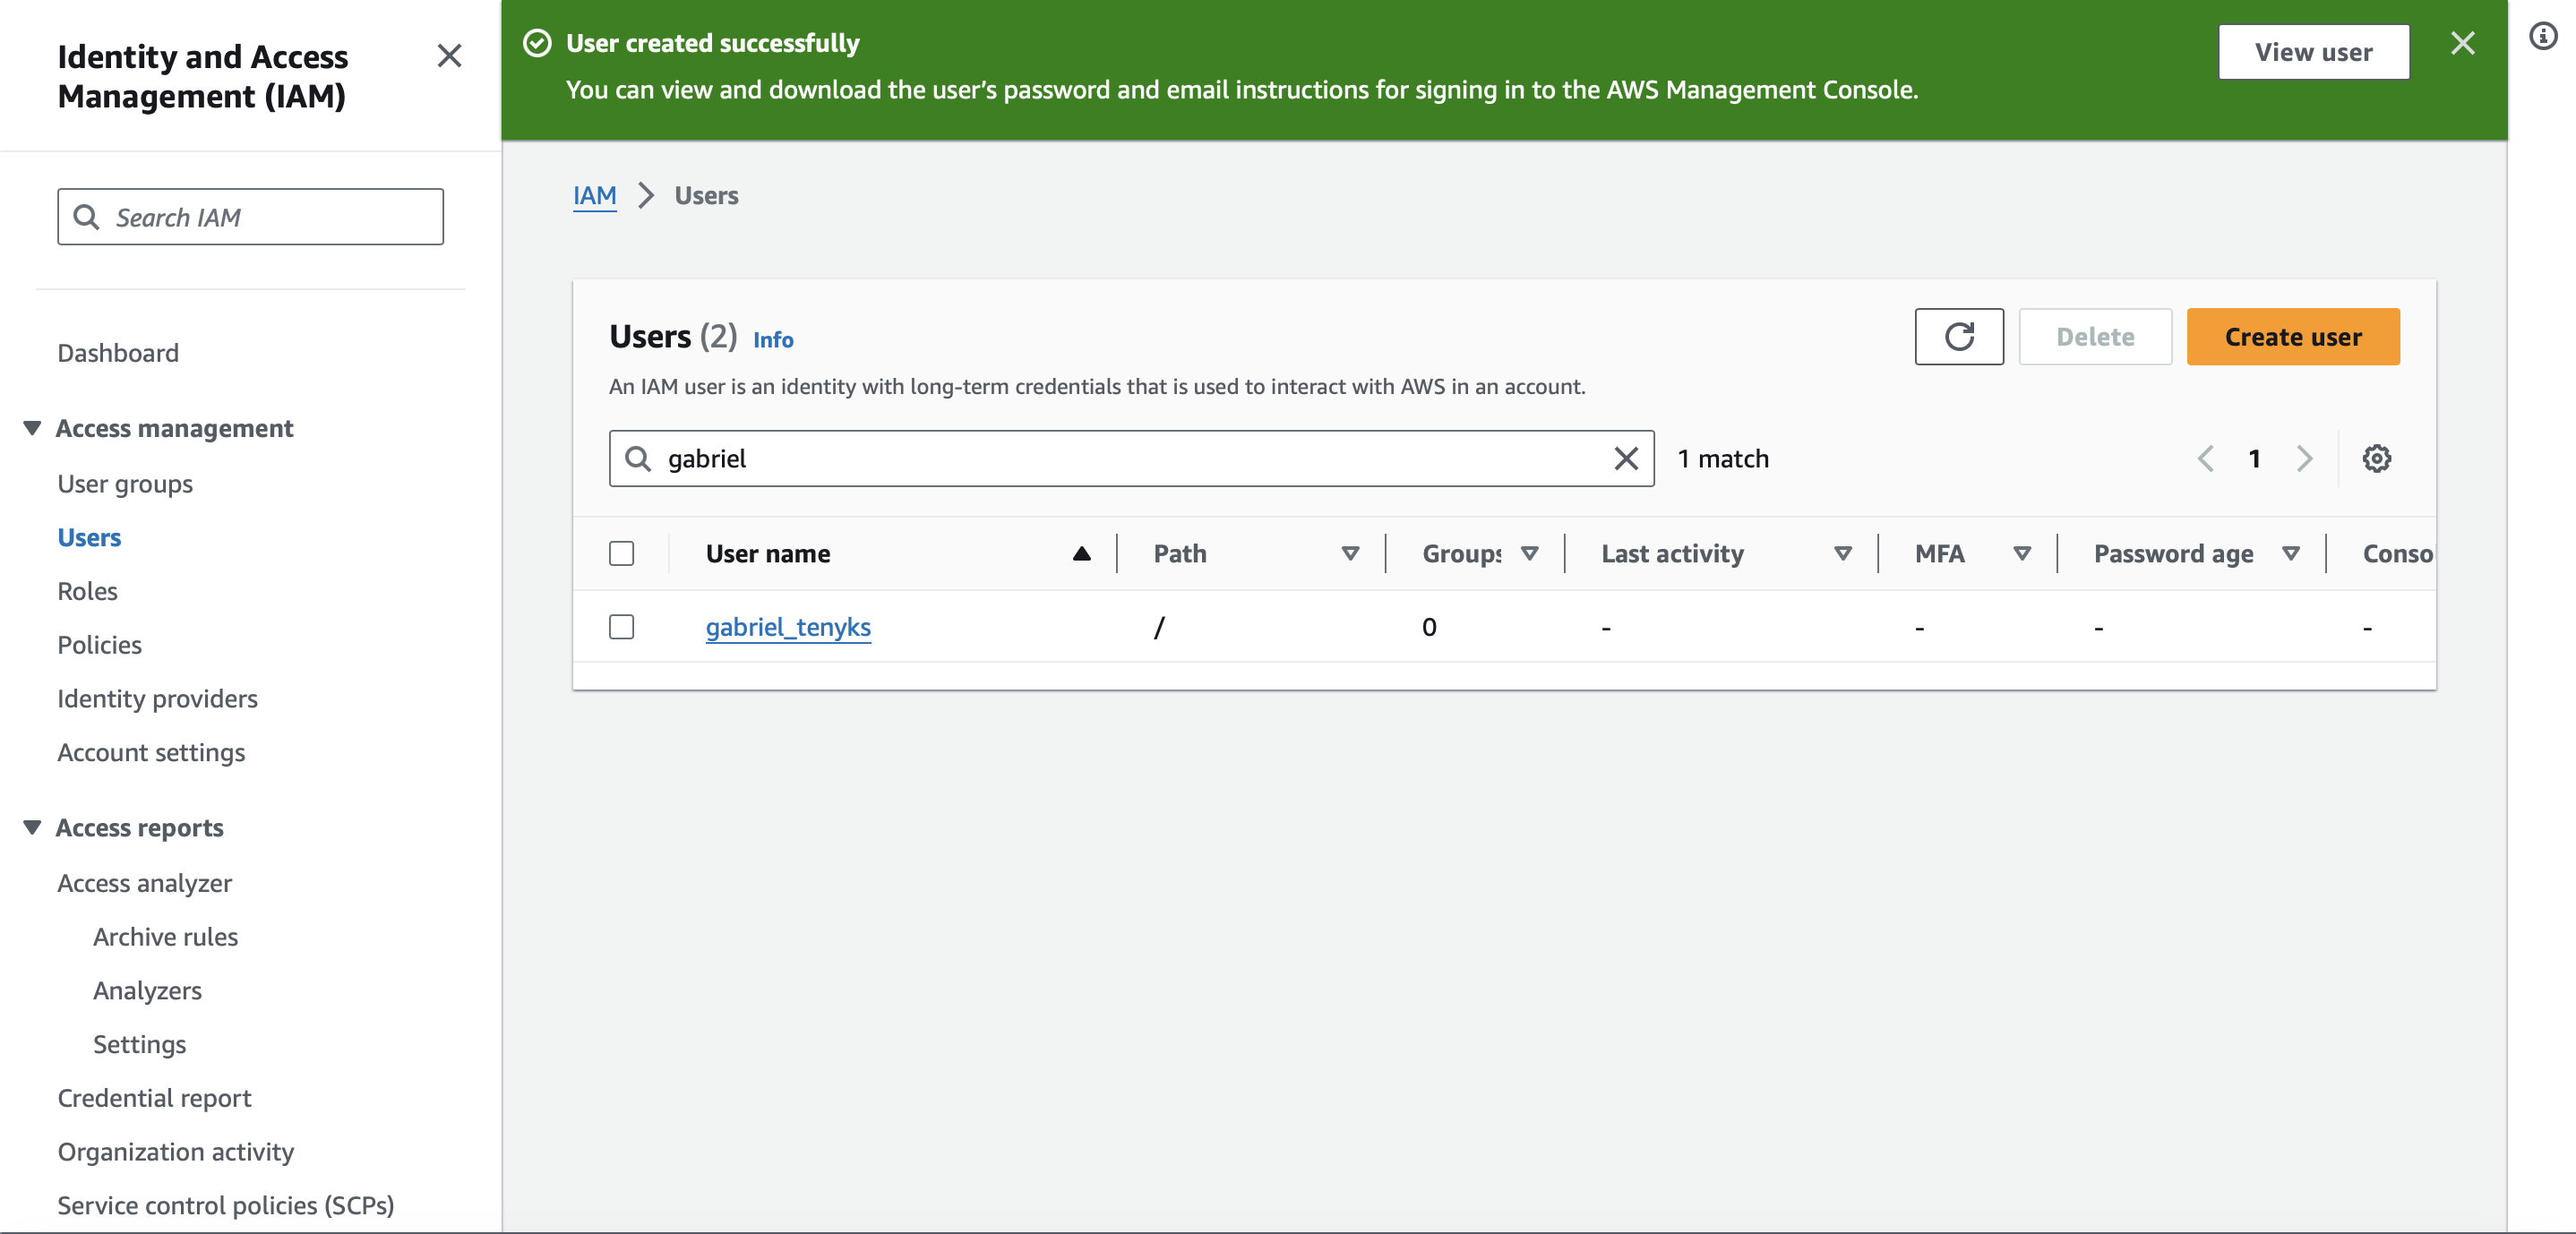
Figure 7. A new User with the attached policies was successfully created
ℹ️ For a refresher on IAM roles, the following AWS docs are a great start on all you need to know about IAM roles.
4.2 Create access key for the new user
- Inside the AWS Management Console navigate to IAM.
- Under the 'Access management' menu, click on 'Users'
- Select the recent user created on the previous step.
- Under 'Summary, click on 'Create access key'. See Figure 8 fore more details.
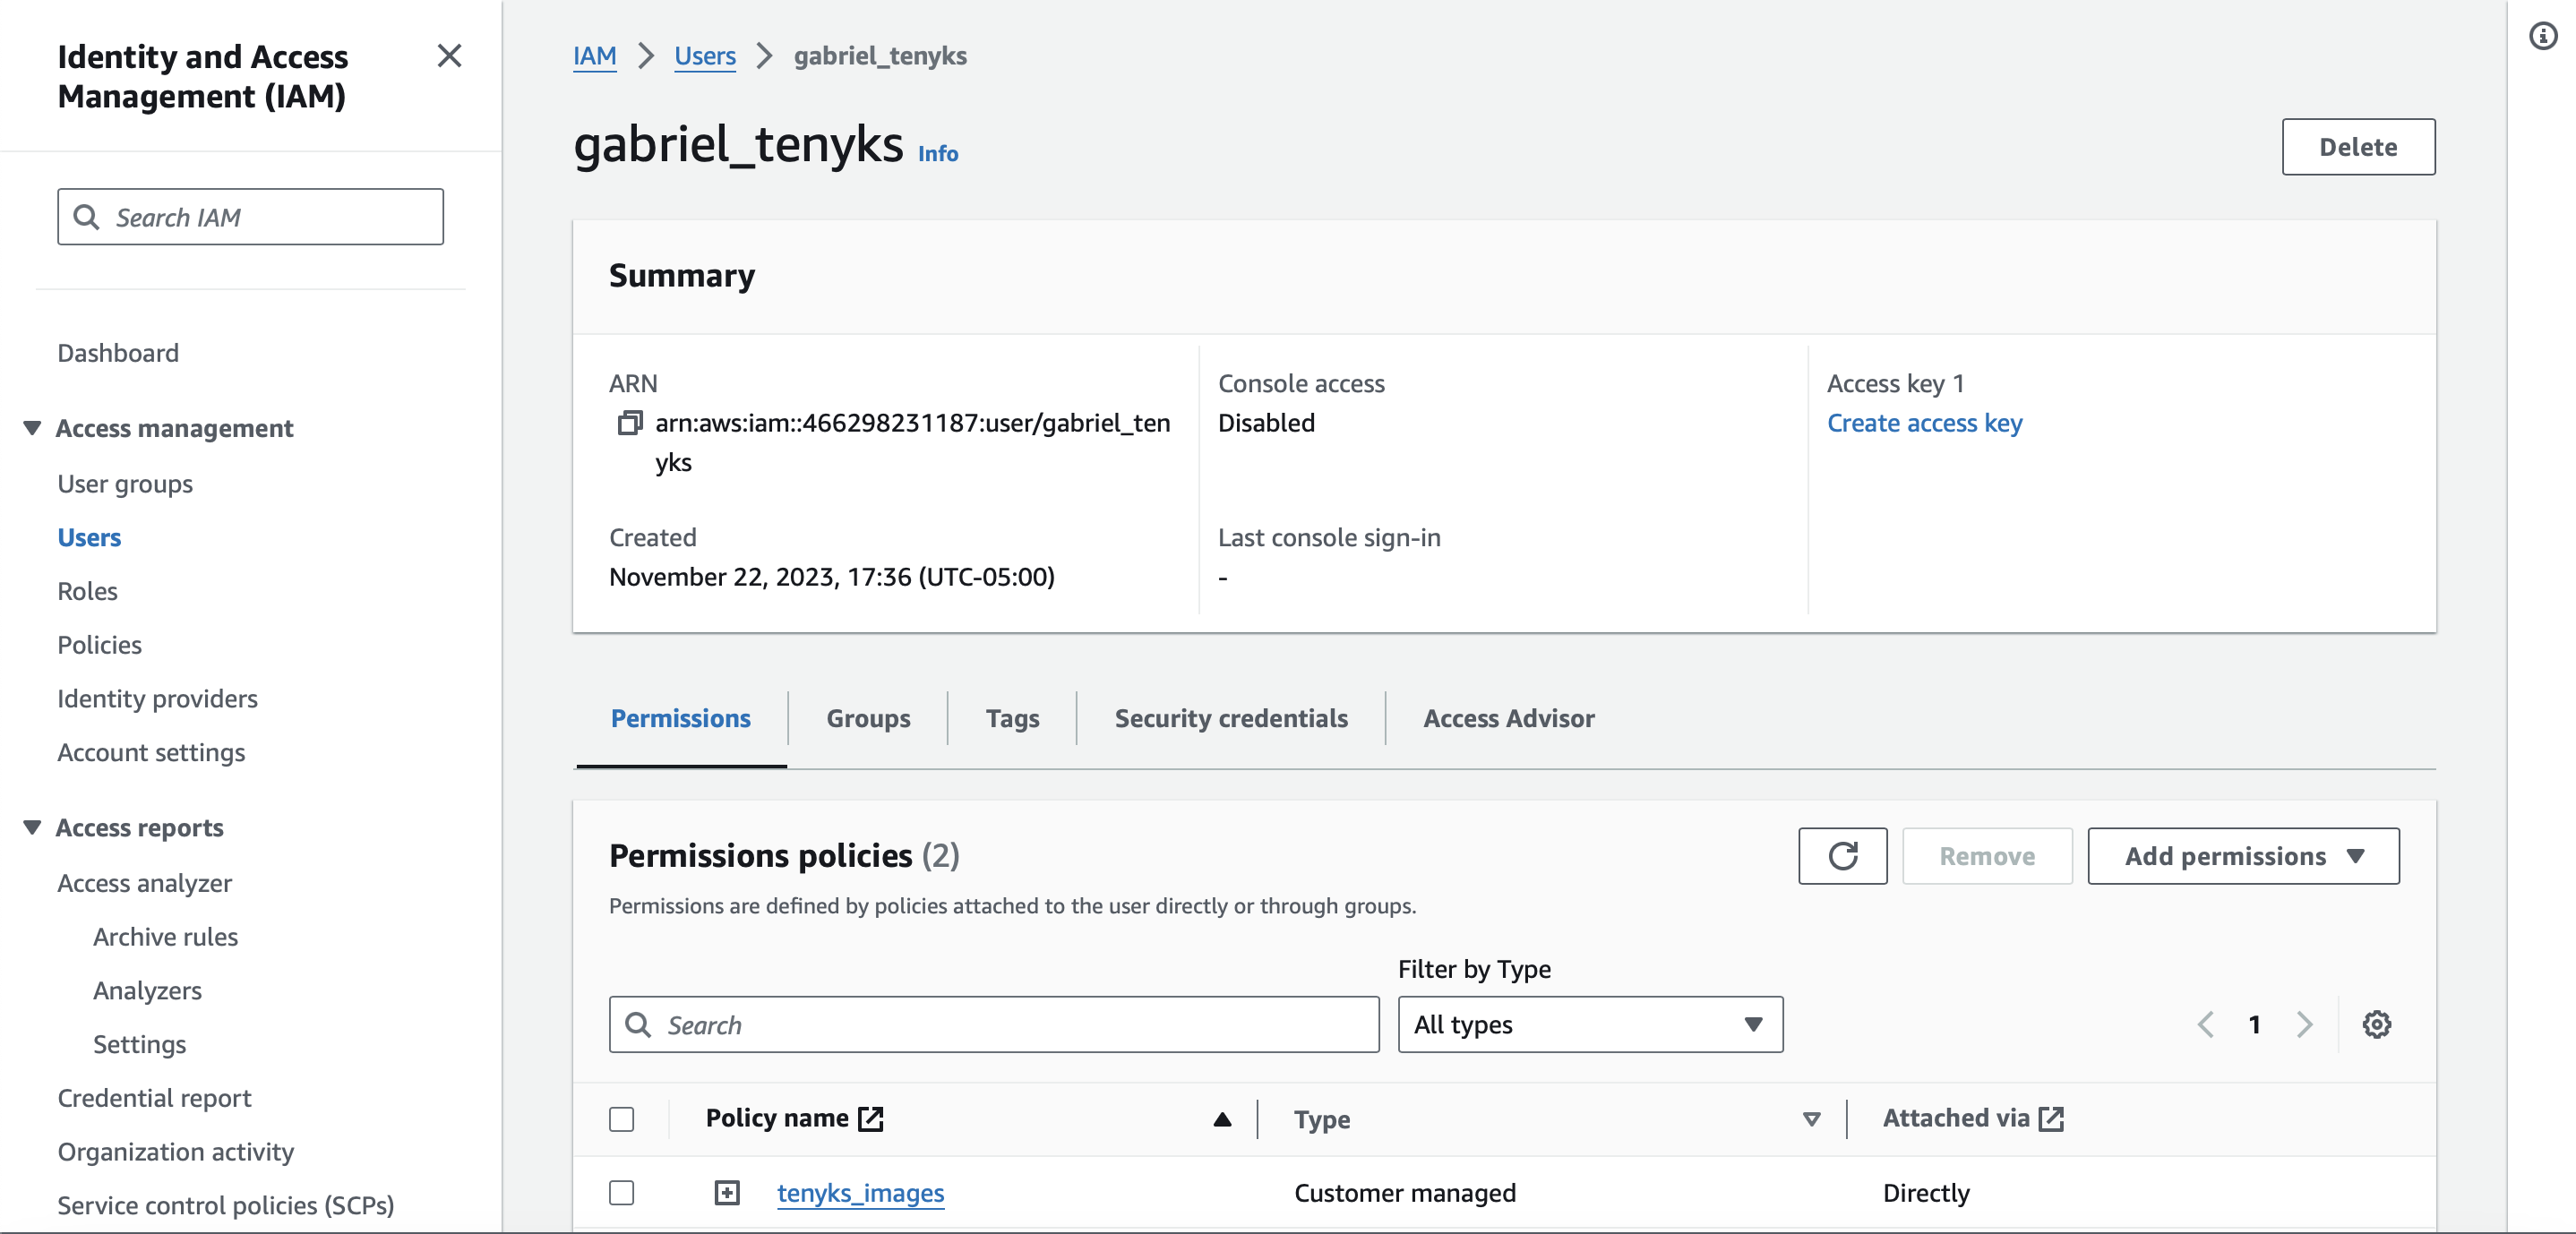
Figure 8. Summary of our recently created User
- In 'Use case', select CLI as shown in Figure 9.
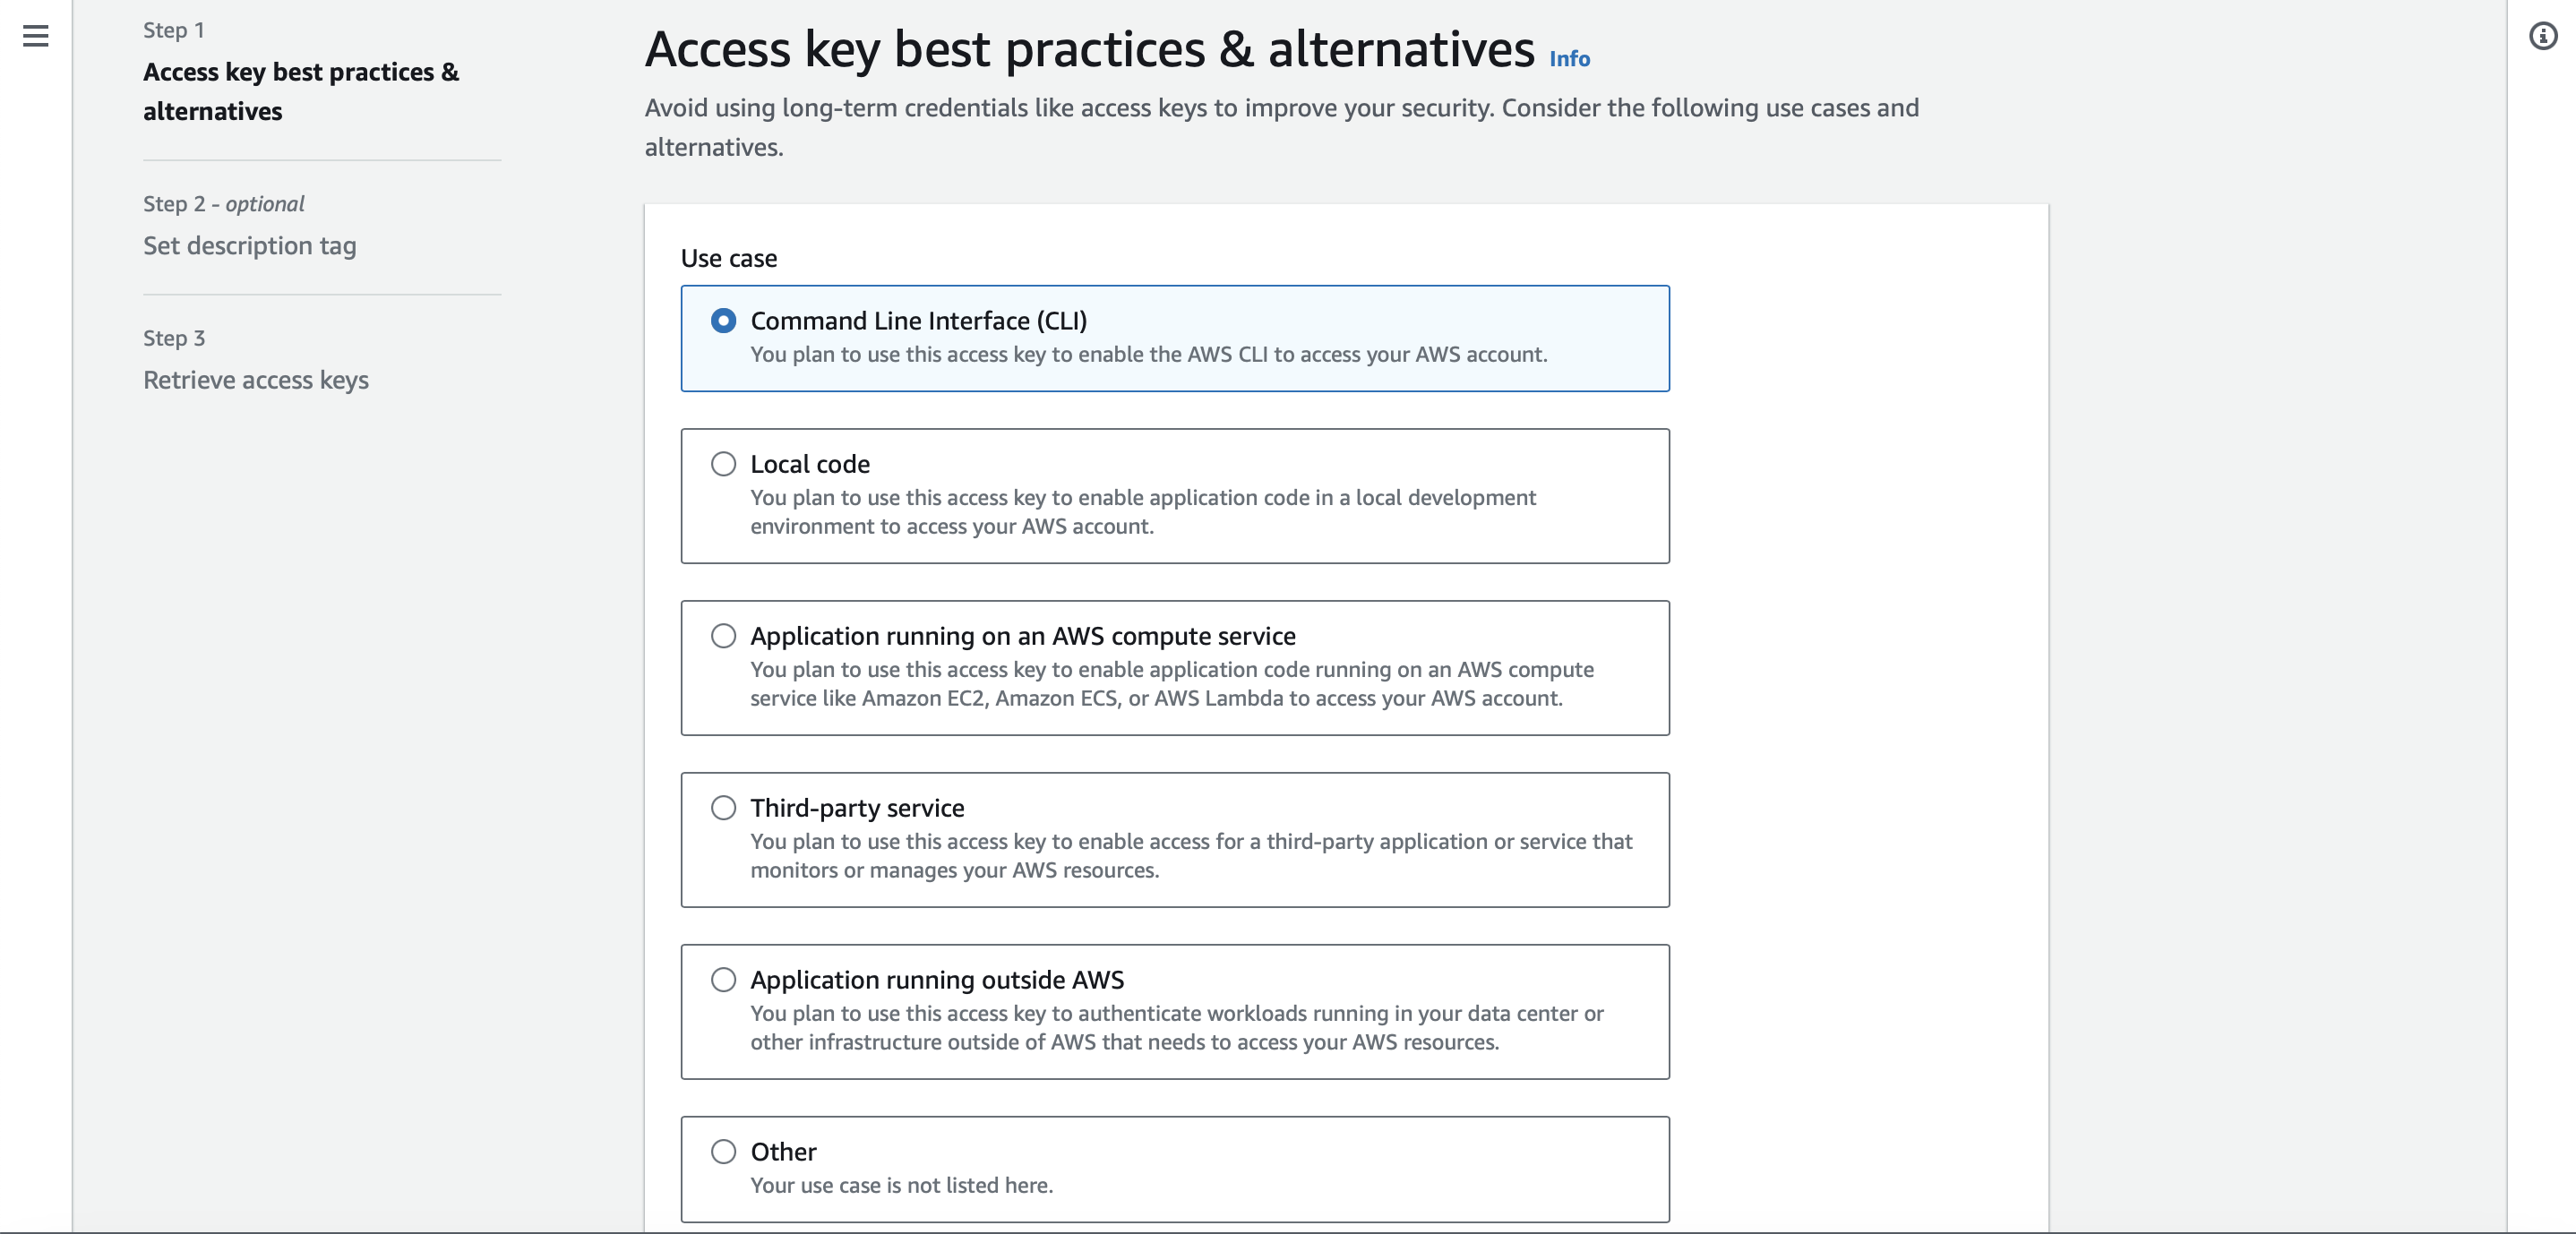
Figure 9. Select CLI as the use case for creating an access key 🔑
- Set description tags (optional).
- Click on 'Create access key'.
- A screen containing the user's
access keyandsecret access keywill be displayed. Download the csv file. See Figure 10.
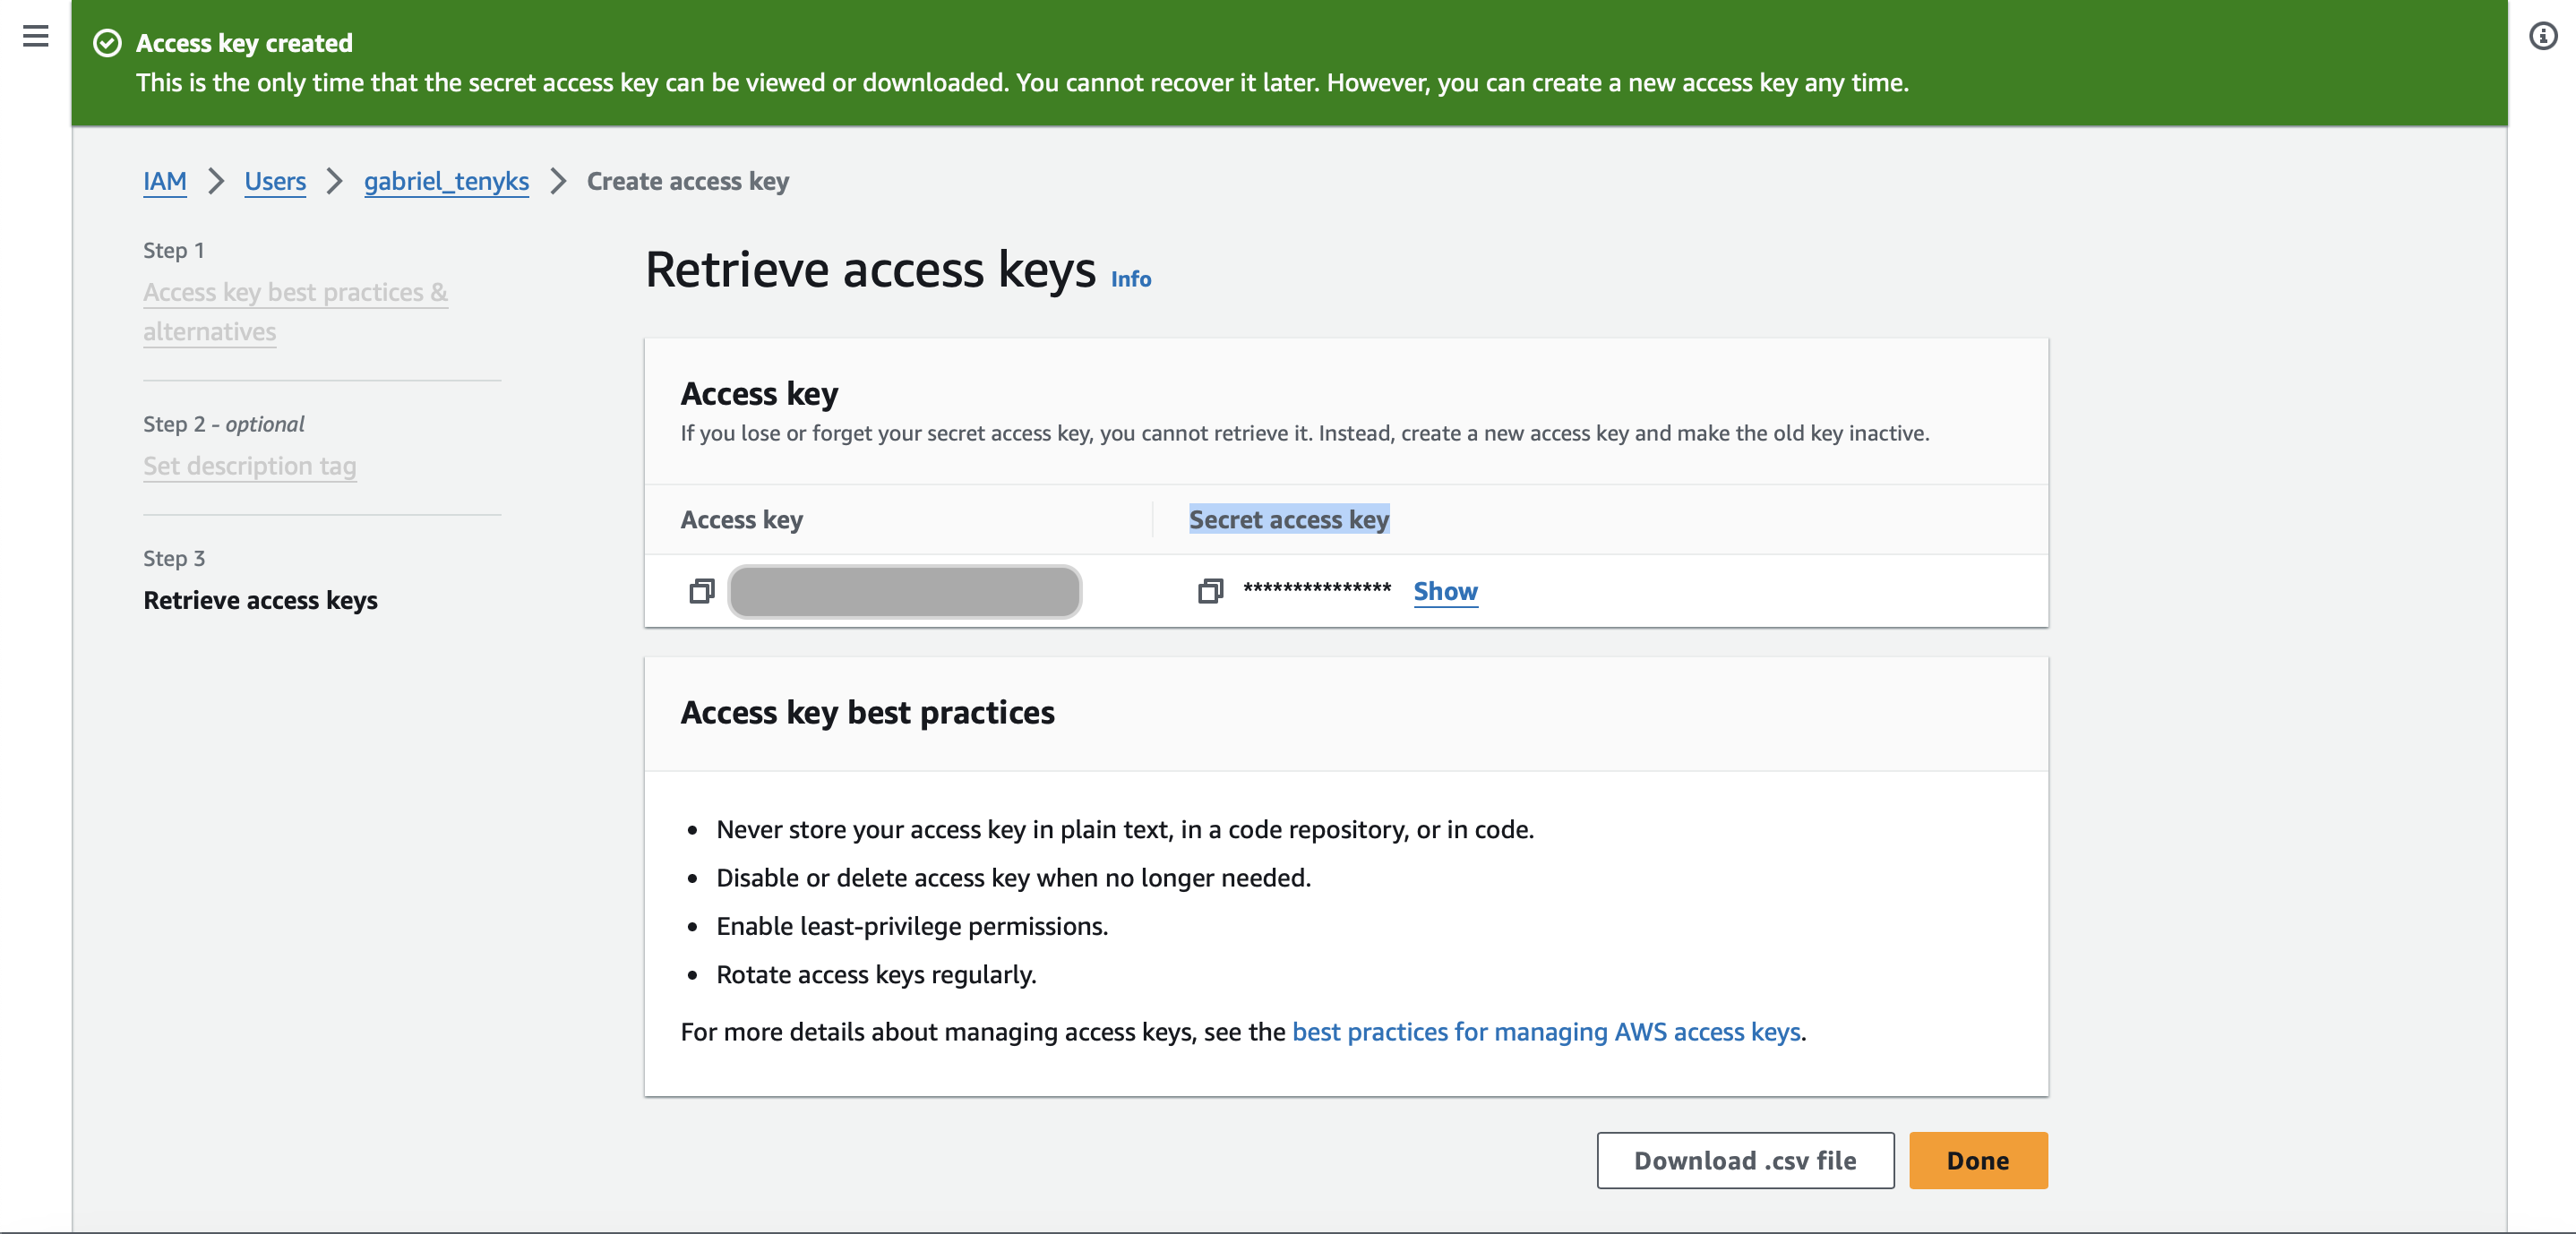
Figure 10. Access key created
5. Summary
We successfully created the following:
- One bucket for
imagesand another formetadata(optional), OR one single bucket with independent images and metadata folders (optional). - One or two permission policies (depending on the number of buckets created).
- One user configured with the two policies.
access keyandsecret access keyfor the user (to programatically access the buckets).
To conclude this procedure, kindly provide us with the following information: username, access key and secret access key.
Updated over 1 year ago