COCO format
Familiarize yourself with the supported formats in the Tenyks platform
1. COCO format
1.1 What is the COCO format?
The COCO (Common Objects in Context) format is a standard for organizing and annotating visual data to train and benchmark computer vision models, especially for object detection, instance segmentation, and keypoint detection.
This format provides a structured representation of annotations like object categories, bounding boxes, segmentation masks, and image metadata. COCO has been widely adopted by the computer vision community and serves as a common format for datasets used to develop and measure algorithms.

Figure 1. COCO dataset image with bounding boxes around objects
1.2 What is the COCO dataset and how it differs from the COCO format?
The COCO dataset and COCO format are related but distinct things:
- The COCO dataset is a large-scale collection of images labeled for object detection, segmentation, and captioning tasks. It contains over 200,000 images annotated with over 1.5 million object instances across 80 common object categories like person, car, dog, etc. The images show complex everyday scenes with contextual object relationships, see Figure 1.
- The COCO format refers to the specific annotation structure and JSON format used to represent the labels and metadata in the COCO dataset.
So in summary:
- COCO dataset - Large labelled image collection for computer vision
- COCO format - Standard annotation structure to mark objects in images
1.3 How does the COCO format look like?
Here is an example of a JSON snippet in COCO format for object detection annotations:
{
  "info": {
    "description": "Example COCO Dataset",
    "url": "https://www.example.com/dataset",
    "version": "1.0",
    "year": 2023,
    "contributor": "Sarah Connor",
    "date_created": "1964-09-14"
  },
  "licenses": [
    {
      "id": 1,
      "name": "Attribution-NonCommercial-ShareAlike License",
      "url": "https://creativecommons.org/licenses/by-nc-sa/2.0/"
    }
  ],
  "images": [
    {
      "id": 1,
      "width": 640,
      "height": 480,
      "file_name": "image1.jpg",
      "license": 1,
      "date_captured": "2023-09-14 10:30:00"
    },
    {
      "id": 2,
      "width": 800,
      "height": 600,
      "file_name": "image2.jpg",
      "license": 1,
      "date_captured": "2023-09-14 11:15:00"
    }
  ],
  "annotations": [
    {
      "id": 1,
      "image_id": 1,
      "category_id": 1,
      "segmentation": [[100, 200, 150, 200, 150, 250, 100, 250]],
      "area": 2500,
      "bbox": [100, 200, 50, 50],
      "iscrowd": 0
    },
    {
      "id": 2,
      "image_id": 2,
      "category_id": 2,
      "segmentation": [[300, 400, 400, 400, 400, 500, 300, 500]],
      "area": 2500,
      "bbox": [300, 400, 100, 100],
      "iscrowd": 0
    }
  ],
  "categories": [
    {
      "id": 1,
      "name": "Person",
      "supercategory": "Human"
    },
    {
      "id": 2,
      "name": "Car",
      "supercategory": "Vehicle"
    }
  ]
}- The
infokey stores general information about the dataset, providing metadata and context. - The
licenseskey contains information about the licenses associated with the dataset. - The
imageskey holds information about individual images in the dataset.
For Object Detection the annotations and categories are described below:
{
  "annotation": {
    "id": "int",
    "image_id": "int",
    "category_id": "int",
    "segmentation": "RLE or [polygon]",
    "area": "float",
    "bbox": ["x", "y", "width", "height"],
    "iscrowd": "0 or 1"
  },
  "categories": [
    {
      "id": "int",
      "name": "str",
      "supercategory": "str"
    }
  ]
}
The annotations list contains bounding box information for all object instances across all images in the dataset. Each annotation object represents a single bounding box with the label for one object on one image. There will be one annotation for every object instance that appears in the images.
id- The identifier for the annotation.image_id- Links the annotation to the corresponding image via the image's unique ID.category_id- Specifies the label ID mapping to the object class. Matches the id field of the categories list.segmentation- Segmentation data for objects on an image.area- The area in pixels of the annotated region.bbox- Gives the pixel coordinates for the bounding box around the object as [x, y, width, height].iscrowd- A flag indicating if the image contains a crowd of objects.
The categories list contains information about each object label in the dataset. Each category object defines a label class.
id- A unique integer ID for the label. This maps to the category_id field in each annotation object.name- The name of the object label as a string.supercategory- A parent category grouping related labels.
For more information visit COCO's dataset official website, where the annotation types are described in more detail.
2. How do I convert a dataset to COCO format?
Here is a list of resources to validate and convert your data to COCO format
2.1 Open-source
- yolo2coco - convert YOLO format to COCO
- voc2coco - convert VOC format to COCO
- csv2coco - convert CSV format to COCO
- openimages2coco - convert Open Images annotations to COCO
- visdrone_to_coco - convert VisDrone data to COCO
- xview_to_coco - convert xView data to COCO
- coco_validator - validator of COCO format
- coco_check - check the format of your COCO annotation file
2.2 Related platforms (e.g. annotation services)
- Roboflow - Convert data from and to COCO
- Labelbox - Convert Labelbox exports to COCO
- CVAT - Export your data and convert it to COCO
2.3 Short tutorials and walkthroughs (third parties)
- Kaggle - Simply convert data to COCO format
- Kaggle - Create coco format annotations
- Tutorial - Inspecting COCO dataset using COCO API
Deep dive: COCO APIThe COCO API provides tools and utilities for working with the COCO dataset.
This API is widely used in the computer vision community to develop and evaluate object detection algorithms. It simplifies the process of working with the COCO dataset and enables practitioners to focus on testing their models.
3. Tenyks freemium account
💗 We are thrilled to offer you our Tenyks freemium account! It's an excellent way to dive into our platform without any direct cost. As with any freemium service, there are some limits to ensure we can continue providing this free account.
One of the key limitations to keep in mind is the number of images you can upload per dataset. With the freemium plan, you can upload up to 2,000 images per dataset.
For many users, this limit will be more than sufficient for basic tasks and smaller projects. However, if you have larger datasets or ambitious plans, you might want to consider one of our paid subscription plans, which offer more generous data allowances. Feel free to reach out via email: [email protected].
We want you to make the most of your experience with Tenyks, so knowing about these limits helps you plan your projects effectively. We are re here to support you on your journey, whether you stick with the freemium plan or decide to upgrade.
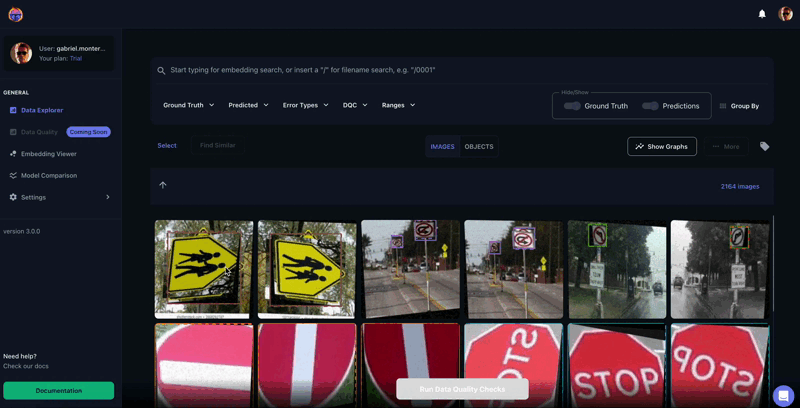
Figure 2. Tenyks similarity search feature in action: finding "Walk Cross" examples by providing text as input
4. Uploading your data: folders and files
🎀 Tip: download this toy dataset with the expected format so that you can have a clean start!
Once in your Tenyks sandbox account, to upload your data you need the following:
For the Dataset:
images- the raw images of your datasetannotations- the annotations (in COCO format) of yourimagesclass_names- a txt file containing the name of your classes
For the Model:
predictions- add the predictions of your model to a copy of yourannotationsfile (i.e. thepredictionsfile differs from yourannotationsfile in that, the former has an additional key called predictions. See the following example.
// Expected structure of the predictions file
// Note: see the additional 'predictions' key in the JSON object
{
  "images": [
    // ... (images)
  ],
  "annotations": [
    // ... (annotations)
	],
  "predictions": [
    {"id": 0, "image_id": 0, "category_id": 1, "segmentation": [], "area": 4633720.0, "bbox": [770.0, 1029.0, 2680.0, 1729.0], "iscrowd": 0, "score": 0.295855},
    {"id": 1, "image_id": 0, "category_id": 2, "segmentation": [], "area": 4855479.0, "bbox": [1277.0, 1021.0, 2693.0, 1803.0], "iscrowd": 0, "score": 0.504993}
    // ... (more predictions)
  ],
  "categories": [
    // ... (categories)
  ]
}
🎀 Tip: The Getting Started section contains the detailed steps to upload a dataset and a model via drag and drop.
👊 Upload more than one modelBe aware that you are not restricted to upload only one model per dataset: upload more than one model to take advantage of some of the Tenyks features such as Model Comparison.
5. Reach out if you need help
💬 If you ever find yourself facing any challenges while uploading your data to the Tenyks platform, please don't hesitate to reach out for assistance.
You can easily connect with us through Intercom, located at the bottom right corner of your Tenyks dashboard. Alternatively, you can drop us an email at [email protected], and our dedicated team will get back to you promptly to address any questions or concerns you may have.
6. Integrations
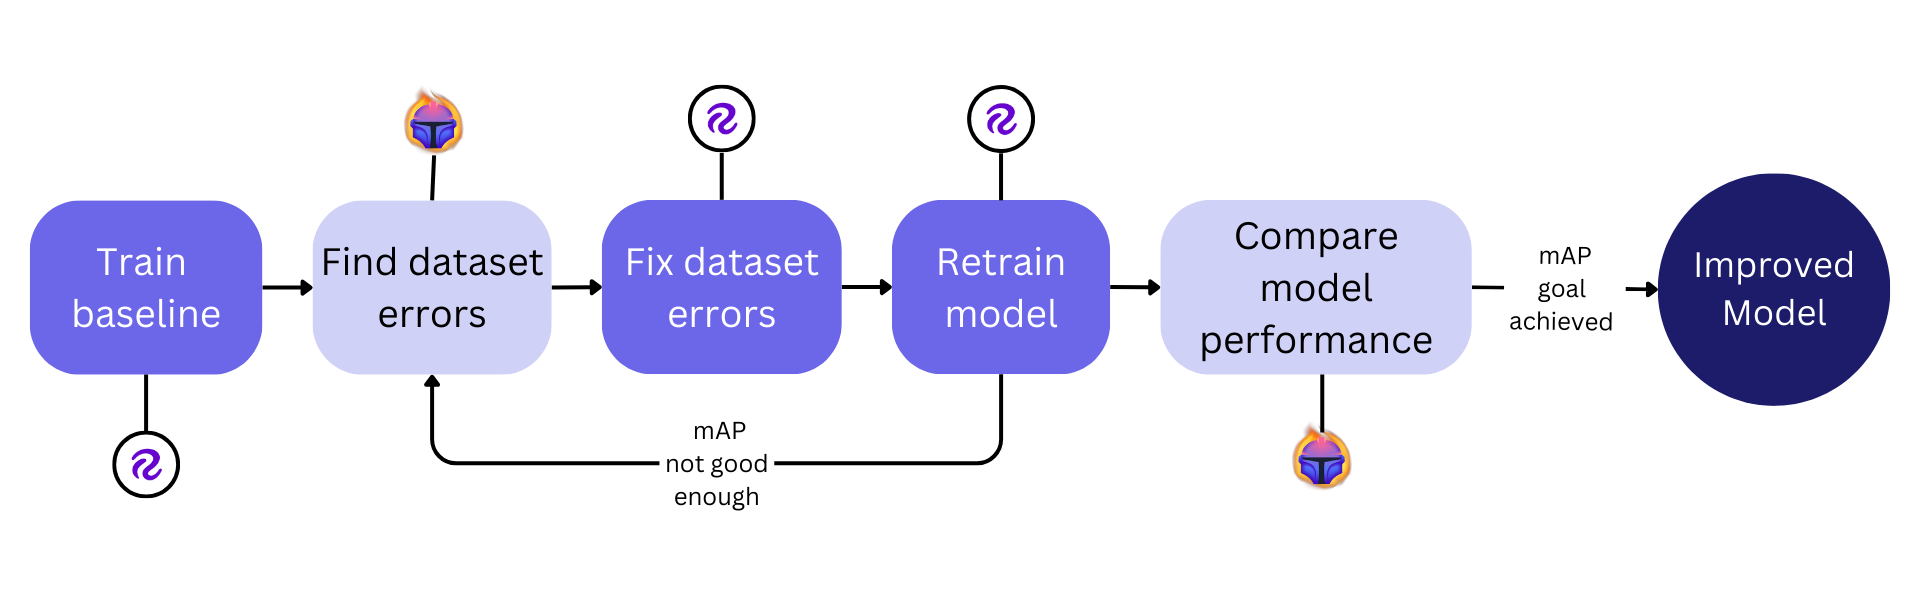
Figure 3. Roboflow & Tenyks model performance pipeline
We are excited to share that the Tenyks platform is currently in the process of developing integrations with powerful tools like Roboflow, so that you can import any public object detection dataset from the Roboflow Universe to Tenyks, aiming to make your dataset failure analysis experience even more efficient.
These upcoming integrations will allow you to effortlessly import your datasets, identify potential dataset failures (i.e. bias, class imbalance, etc) here in Tenyks, so that you can improve model performance by fixing your data. We're dedicated to continuously expanding our integrations, including a number labeling tools, to provide you with a comprehensive ecosystem for your data needs.
Stay tuned for the upcoming Roboflow integration tool!
Updated over 1 year ago