We show you how to use the Tenyks API with Azure.
Testing the API endpoints!Hey! You can directly test the API endpoints within the documentation itself!
We walk you through the steps for integrating the Tenyks API with Azure 🚀.
1. Setting up an account
To get started, the initial step involves configuring your Tenyks account. For comprehensive instructions, consult the dedicated documentation page outlining the account setup
2. Getting your API keys 🔑
Once your account is all set up, the next thing to do is get your API keys. You can find step-by-step instructions on how to get your API keys here.
3. Getting an Access Token 🔐
The access token works as a bearer token, allowing the bearer (the user) to access the API endpoints. Assuming you already have your API keys (Step 2), find how you can obtain an access token.
4. Let's try the API: obtaining the details of every dataset!
With your access token (e.g., eyJraWQ .... o1NV) in hand, you can retrieve detailed information of your datasets with one simple API call:
####
#### Hint: Replace your_bearer_token with your actual access_token
####

import requests
url = "https://dashboard.tenyks.ai/api/workspaces/tenyks/datasets"
headers = {
    "accept": "application/json",
    "authorization": "Bearer your_bearer_token"
}
response = requests.get(url, headers=headers)
Example of the response object:
[
  {
    "dataset_id": "...",
    "dataset_name": "face_detection_dataset",
    "key": "face_detection_dataset_v1",
    "display_name": "face_detection_dataset_v1",
    "task_type": "object_detection",
    "size": 100000,
    "img_type": ".jpg",
    ...
    ...
  }
]
5. Setting up Azure Access Policies
For a successfull connection with Azure, follow the Azure setup guide to set up and create your Azure access configuration. This guarantees effortless data management and storage features in the Tenyks platform.
6. Uploading a dataset
There are three steps to successfully upload a dataset:
- Create the dataset
- Upload the annotations
- Ingest the dataset
6.1 Creating a dataset
To create a dataset call the create dataset endpoint. Use the code provided below with the appropriate values for thepayload parameters.
Hint:credentials refers to the connection_string value you obtained after setting up Azure Access Policies.
import requests
url = "https://dashboard.tenyks.ai/api/workspaces/tenyks/datasets"
payload = {
    "key": "face_detection",
    "display_name": "face_detection",
    "task_type": "object_detection",
    "images_location": {
        "type": "azure",
        "azure_uri": "https://azure_storage_account.blob.core.windows.net/tenyks-datasets/kitti/images/"
        "credentials":
         {
            "connection_string": "your_connection_string"
         }
    },
    "metadata_location": {
        "type": "azure",
        "azure_uri": "https://azure_storage_account.blob.core.windows.net/tenyks-datasets/kitti/metadata/"
        "credentials":
      	{
            "connection_string": "your_connection_string"
         }
    }
}
headers = {
    "accept": "application/json",
    "content-type": "application/json",
    "authorization": "Bearer your_bearer_token"
}
response = requests.post(url, json=payload, headers=headers)
💡Hint: In the response object, save the value of dataset_key, you will need it for the next steps.
6.2 Uploading the annotations
After creating a dataset, we upload its annotations.
➡️ Note that the URL requires a unique dataset_key, which was assigned to your dataset when it was created.
import requests

url = f"https://dashboard.tenyks.ai/api/workspaces/tenyks/datasets/{dataset_key}/images/annotations"
payload = {
		"type": "azure",
    "azure_uri": "https://azure_storage_account.blob.core.windows.net/tenyks-datasets/kitti/annotations.json"
    "credentials":{
      "connection_string": "your_connection_string"
    }
}
headers = {
    "accept": "application/json",
    "content-type": "application/json",
    "authorization": "Bearer your_bearer_token"
}
response = requests.put(url, json=payload, headers=headers)
6.3 Ingesting the dataset
The last step is to ingest the dataset as follows:
import requests
url = f"https://dashboard.tenyks.ai/api/workspaces/tenyks/datasets/{dataset_key}/ingest"
headers = {
    "accept": "application/json",
    "content-type": "application/json",
    "authorization": "Bearer your_bearer_token"
}
response = requests.put(url, headers=headers)
7. Creating a model
Follow this steps to upload a model:
- Create a model
- Upload model predictions
- Ingest the model
7.1 Create a model
Run the endpoint to create a model.
Note that you need to change the dataset_key assigned to your dataset.
import requests
url = f"https://dashboard.tenyks.ai/api/workspaces/tenyks/datasets/{dataset_key}/model_inferences"
headers = {
    "accept": "application/json",
    "content-type": "application/json",
    "authorization": "Bearer your_bearer_token"
}
response = requests.post(url, headers=headers)
💡 Hint: In the response object, save the value of model_key, you will use it to upload your model predictions.
7.2 Upload model predictions
After creating a model, use the endpoint to upload predictions.
➡️ Note that you need both the dataset_key and the model_key.
import requests
url = f"https://dashboard.tenyks.ai/api/workspaces/tenyks/datasets/{dataset_key}/model_inferences/{model_key}/predictions"
payload = {
		"type": "azure",
    "azure_uri": "https://azure_storage_account.blob.core.windows.net/tenyks-datasets/kitti/predictions.json"
    "credentials":{
      "connection_string": "your_connection_string"
    }
}
headers = {
    "accept": "application/json",
    "content-type": "application/json",
    "authorization": "Bearer your_bearer_token"
}
response = requests.put(url, json=payload, headers=headers)
7.3 Ingest model predictions
Finally, ingest your predictions:
import requests
url = f"https://dashboard.tenyks.ai/api/workspaces/tenyks/datasets/{dataset_key}/model_inferences/{model_key}/ingest"
headers = {
    "accept": "application/json",
    "content-type": "application/json",
    "authorization": "Bearer your_bearer_token"
}
response = requests.put(url, headers=headers)
8. Track progress
Monitor the status of individual dataset processing tasks in the notifications dropdown at the top right of your dashboard, as depicted in Figure 1.
- If all tasks are completed successfully, you're all set! ✅
- If some are still pending, please be patient and WAIT ⏩
- In case of any failures, reach out to us through Intercom 📢, and we'll investigate the issue for you 😉
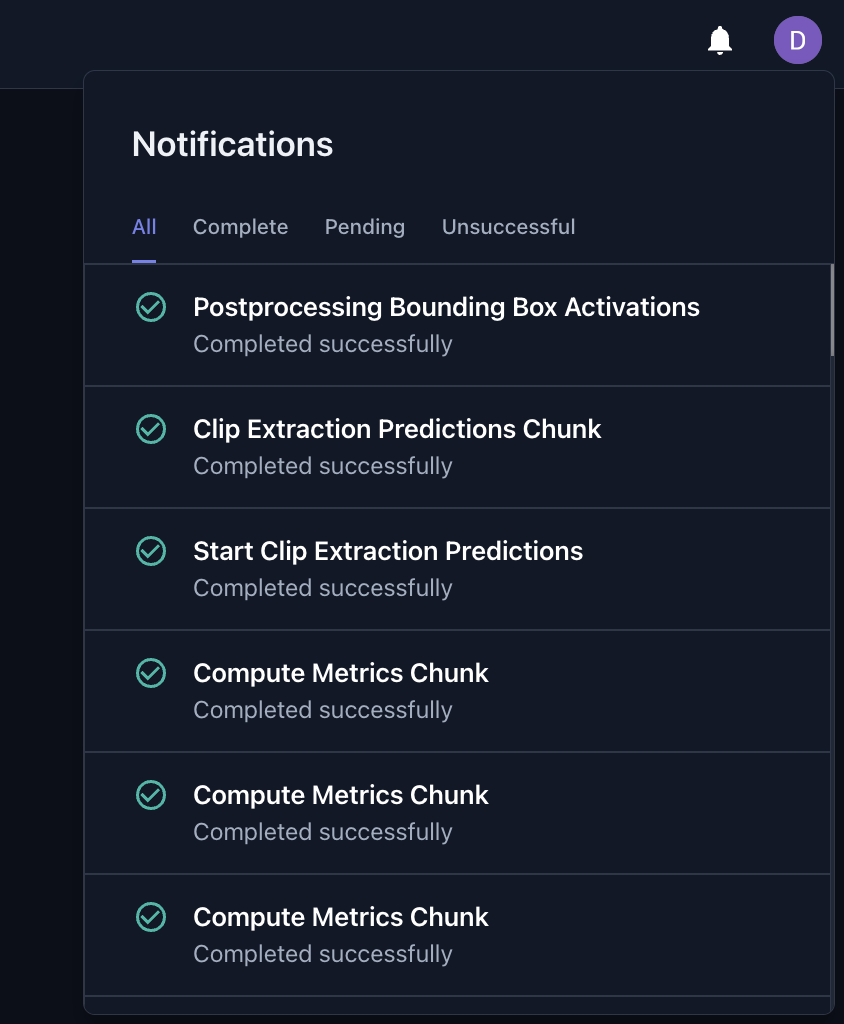
Figure 1. Notifications tab where users can track the progress of dataset processing tasks
9. Check your dataset on the Tenyks dashboard
🏁 Excellent work! Once you log into your Tenyks account, you'll discover your new dataset right on your dashboard!
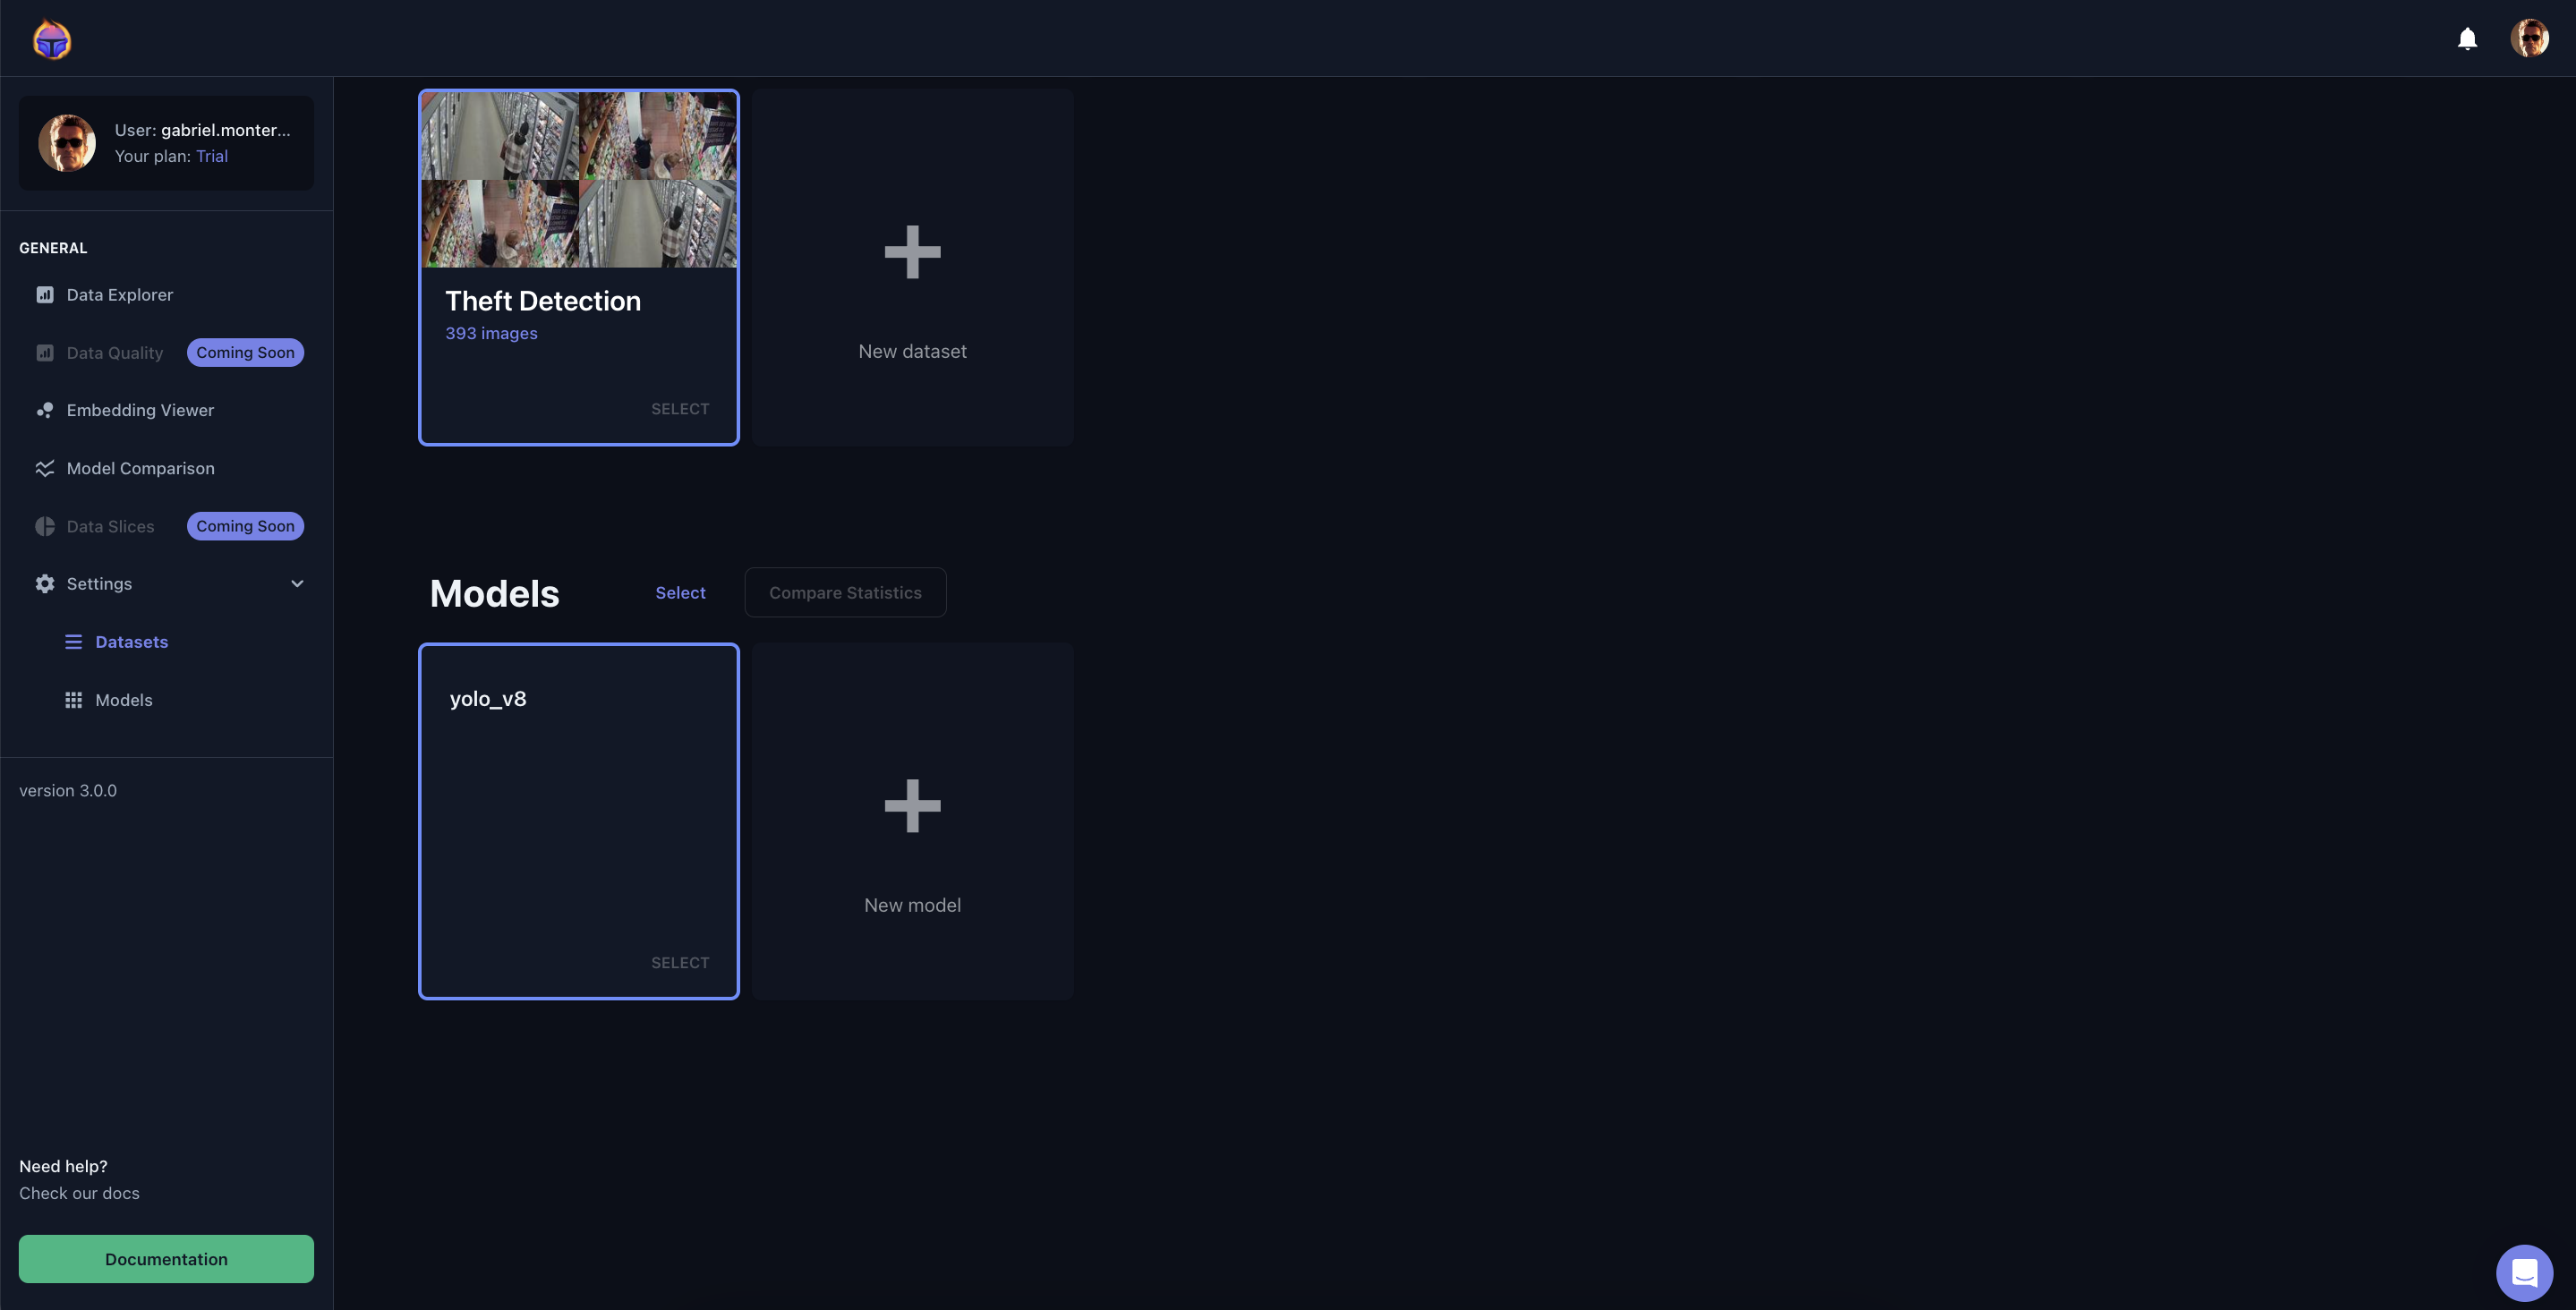
Figure 2. Your dataset and your model predictions on the Tenyks dashboard