Learn how to start using the Tenyks API with AWS S3
🚀 We walk you through all the necessary steps to use the Tenyks API with AWS S3.
1. Setting up an account
To get started, the first step is setting up your Tenyks account. For detailed instructions, refer to the dedicated documentation page on setting up an account.
2. Getting your API keys 🔑
After successfully setting up your account, the next step is obtaining your API keys. These keys serve as the gateway to interacting with Tenyks services. Detailed guidance on retrieving your API keys is available here.
3. Getting an Access Token 🔐
This access token is designed to facilitate interactions within the Tenyks environment. It works as a bearer token, allowing the bearer (the user or application) to access other protected endpoints on the API. Given your API keys, find how you can retrieve an access token.
4. Retrieving datasets
With an access token in hand, the endpoint to retrieve datasets allows you to obtain the information of all your datasets.
import requests
url = "https://dashboard.tenyks.ai/api/workspaces/tenyks/datasets"
headers = {
    "accept": "application/json",
    "authorization": "Bearer your_bearer_token"
}
response = requests.get(url, headers=headers)
The response object provides you with fine-grained details of every dataset on your Tenyks dashboard:
[
  {
    "dataset_id": "...",
    "dataset_name": "face_detection_dataset",
    "key": "face_detection_dataset_v1",
    "display_name": "face_detection_dataset_v1",
    "task_type": "object_detection",
    "size": 100000,
    "img_type": ".jpg",
    ...
  }
]
5. Setting up S3 Access and Accounts
For seamless integration with S3 storage, simply follow the link to the S3 setup documentation to configure and establish S3 access and accounts. This ensures smooth data handling and storage capabilities within the Tenyks platform 👷.
6. Creating a dataset, uploading annotations and creating a model
Testing the API endpoints in seconds! ✈️Hey! Every endpoint can be directly tested within the documentation for that specific endpoint! For instance, creating datasets contains all the necessary
codeto create a new dataset in seconds!
Once your Tenyks account is set up, and an Access Token is in place, you can dive into the core functionalities of Tenyks.
6.1 Creating a dataset
Let's create a dataset by calling the create dataset endpoint. Use the code provided below with the appropriate payload. We'll use face_detectionas the value for key.
s3_uri and credentialsare the values you obtained after Setting up S3 Access and Accounts.
import requests
url = "https://dashboard.tenyks.ai/api/workspaces/tenyks/datasets"
payload = {
    "key": "face_detection",
    "display_name": "face_detection",
    "task_type": "object_detection",
    "images_location": {
        "type": "aws_s3",
        "s3_uri": "s3://your_s3_uri",
        "credentials": {
            "aws_access_key_id": "your_aws_access_key_id",
            "aws_secret_access_key": "yor_aws_secret_access_key",
            "region_name": "your_region_name"
        }
    },
    "metadata_location": {
        "type": "aws_s3",
        "s3_uri": "your_s3_uri",
        "credentials": {
             "aws_access_key_id": "your_aws_access_key_id",
            "aws_secret_access_key": "yor_aws_secret_access_key",
            "region_name": "your_region_name"
        }
    }
}
headers = {
    "accept": "application/json",
    "content-type": "application/json",
    "authorization": "Bearer your_bearer_token"
}
response = requests.post(url, json=payload, headers=headers)
6.2 Uploading annotations
Once the dataset has been created, it's turn to upload annotations for this dataset.
You will need the unique dataset_key assigned to your dataset when it was created.
import requests
# replace 'dataset_key' in the url
# dataset_key = ""
url = f"https://dashboard.tenyks.ai/api/workspaces/tenyks/datasets/{dataset_key}/images/annotations"
payload = {
    "type": "aws_s3",
    "s3_uri": "your_s3_uri_annotations.json",
    "credentials": {
             "aws_access_key_id": "your_aws_access_key_id",
            "aws_secret_access_key": "yor_aws_secret_access_key",
            "region_name": "your_region_name"
     }
}
headers = {
    "accept": "application/json",
    "content-type": "application/json",
    "authorization": "Bearer your_bearer_token"
}
response = requests.put(url, json=payload, headers=headers)
6.3 Ingesting the data
Once our annotations have been uploaded, it's time to ingest the data.
import requests
# replace 'dataset_key' in the url
# dataset_key = ""
url = f"https://dashboard.tenyks.ai/api/workspaces/tenyks/datasets/{dataset_key}/ingest"
headers = {
    "accept": "application/json",
    "content-type": "application/json",
    "authorization": "Bearer your_bearer_token"
}
response = requests.put(url, headers=headers)
6.4 Creating a model
In this step you will use again the unique dataset_key assigned to your dataset when it was created. The endpoint to create a model includes all what you need.
import requests
# replace 'dataset_key' in the url
# dataset_key = ""
url = f"https://dashboard.tenyks.ai/api/workspaces/tenyks/datasets/{dataset_key}/model_inferences"
headers = {
    "accept": "application/json",
    "content-type": "application/json",
    "authorization": "Bearer your_bearer_token"
}
response = requests.post(url, headers=headers)
6.5 Model predictions
Finally, once a model is set up, add predictions to this model with the endpoint to upload predictions.
Be aware that this time you need the dataset_key and also the model_key, which is a unique model identifier included in the response of the previous endpoint.
import requests
# replace 'dataset_key' and 'model_key' in the url
# dataset_key = ""
# model_key = ""
url = f"https://dashboard.tenyks.ai/api/workspaces/tenyks/datasets/{dataset_key}/model_inferences/{model_key}/predictions"
payload = {
    "type": "aws_s3",
    "s3_uri": "your_s3_uri_predictions.json",
    "credentials": {
             "aws_access_key_id": "your_aws_access_key_id",
            "aws_secret_access_key": "yor_aws_secret_access_key",
            "region_name": "your_region_name"
     }
}
headers = {
    "accept": "application/json",
    "content-type": "application/json",
    "authorization": "Bearer your_bearer_token"
}
response = requests.put(url, json=payload, headers=headers)
6.6 Tracking progress
Track the progress of individual dataset processing tasks in the notifications dropdown (located on the top right of your dashboard), as shown in Figure 1.
- If all tasks are successful, you're good to go! ✅
- If some are pending, please WAIT ⏩
- If some have failed, use Intercom 📢 to reach us, and we'll look into it 😉
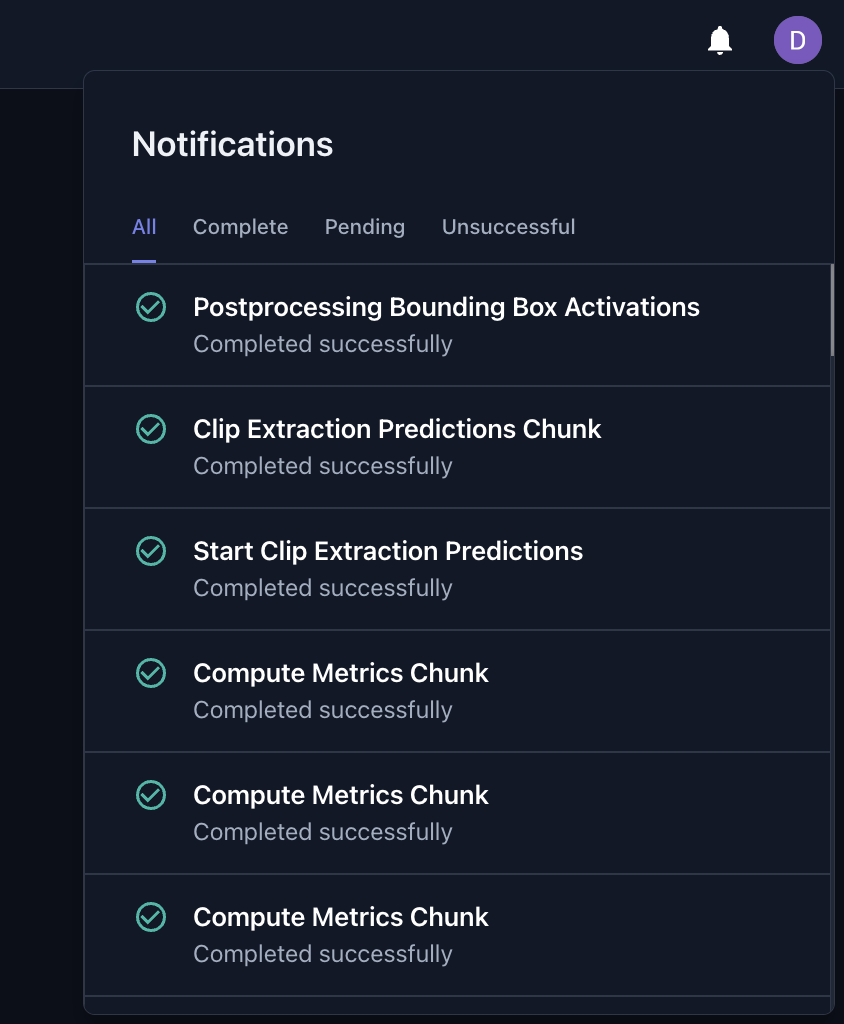
Figure 1. Notifications tab where users can track the progress of dataset processing tasks
6.7 See your dataset on the Tenyks dashboard
Great job! Now after you log in on your Tenyks account, you will find your new dataset on your dashboard! 😀
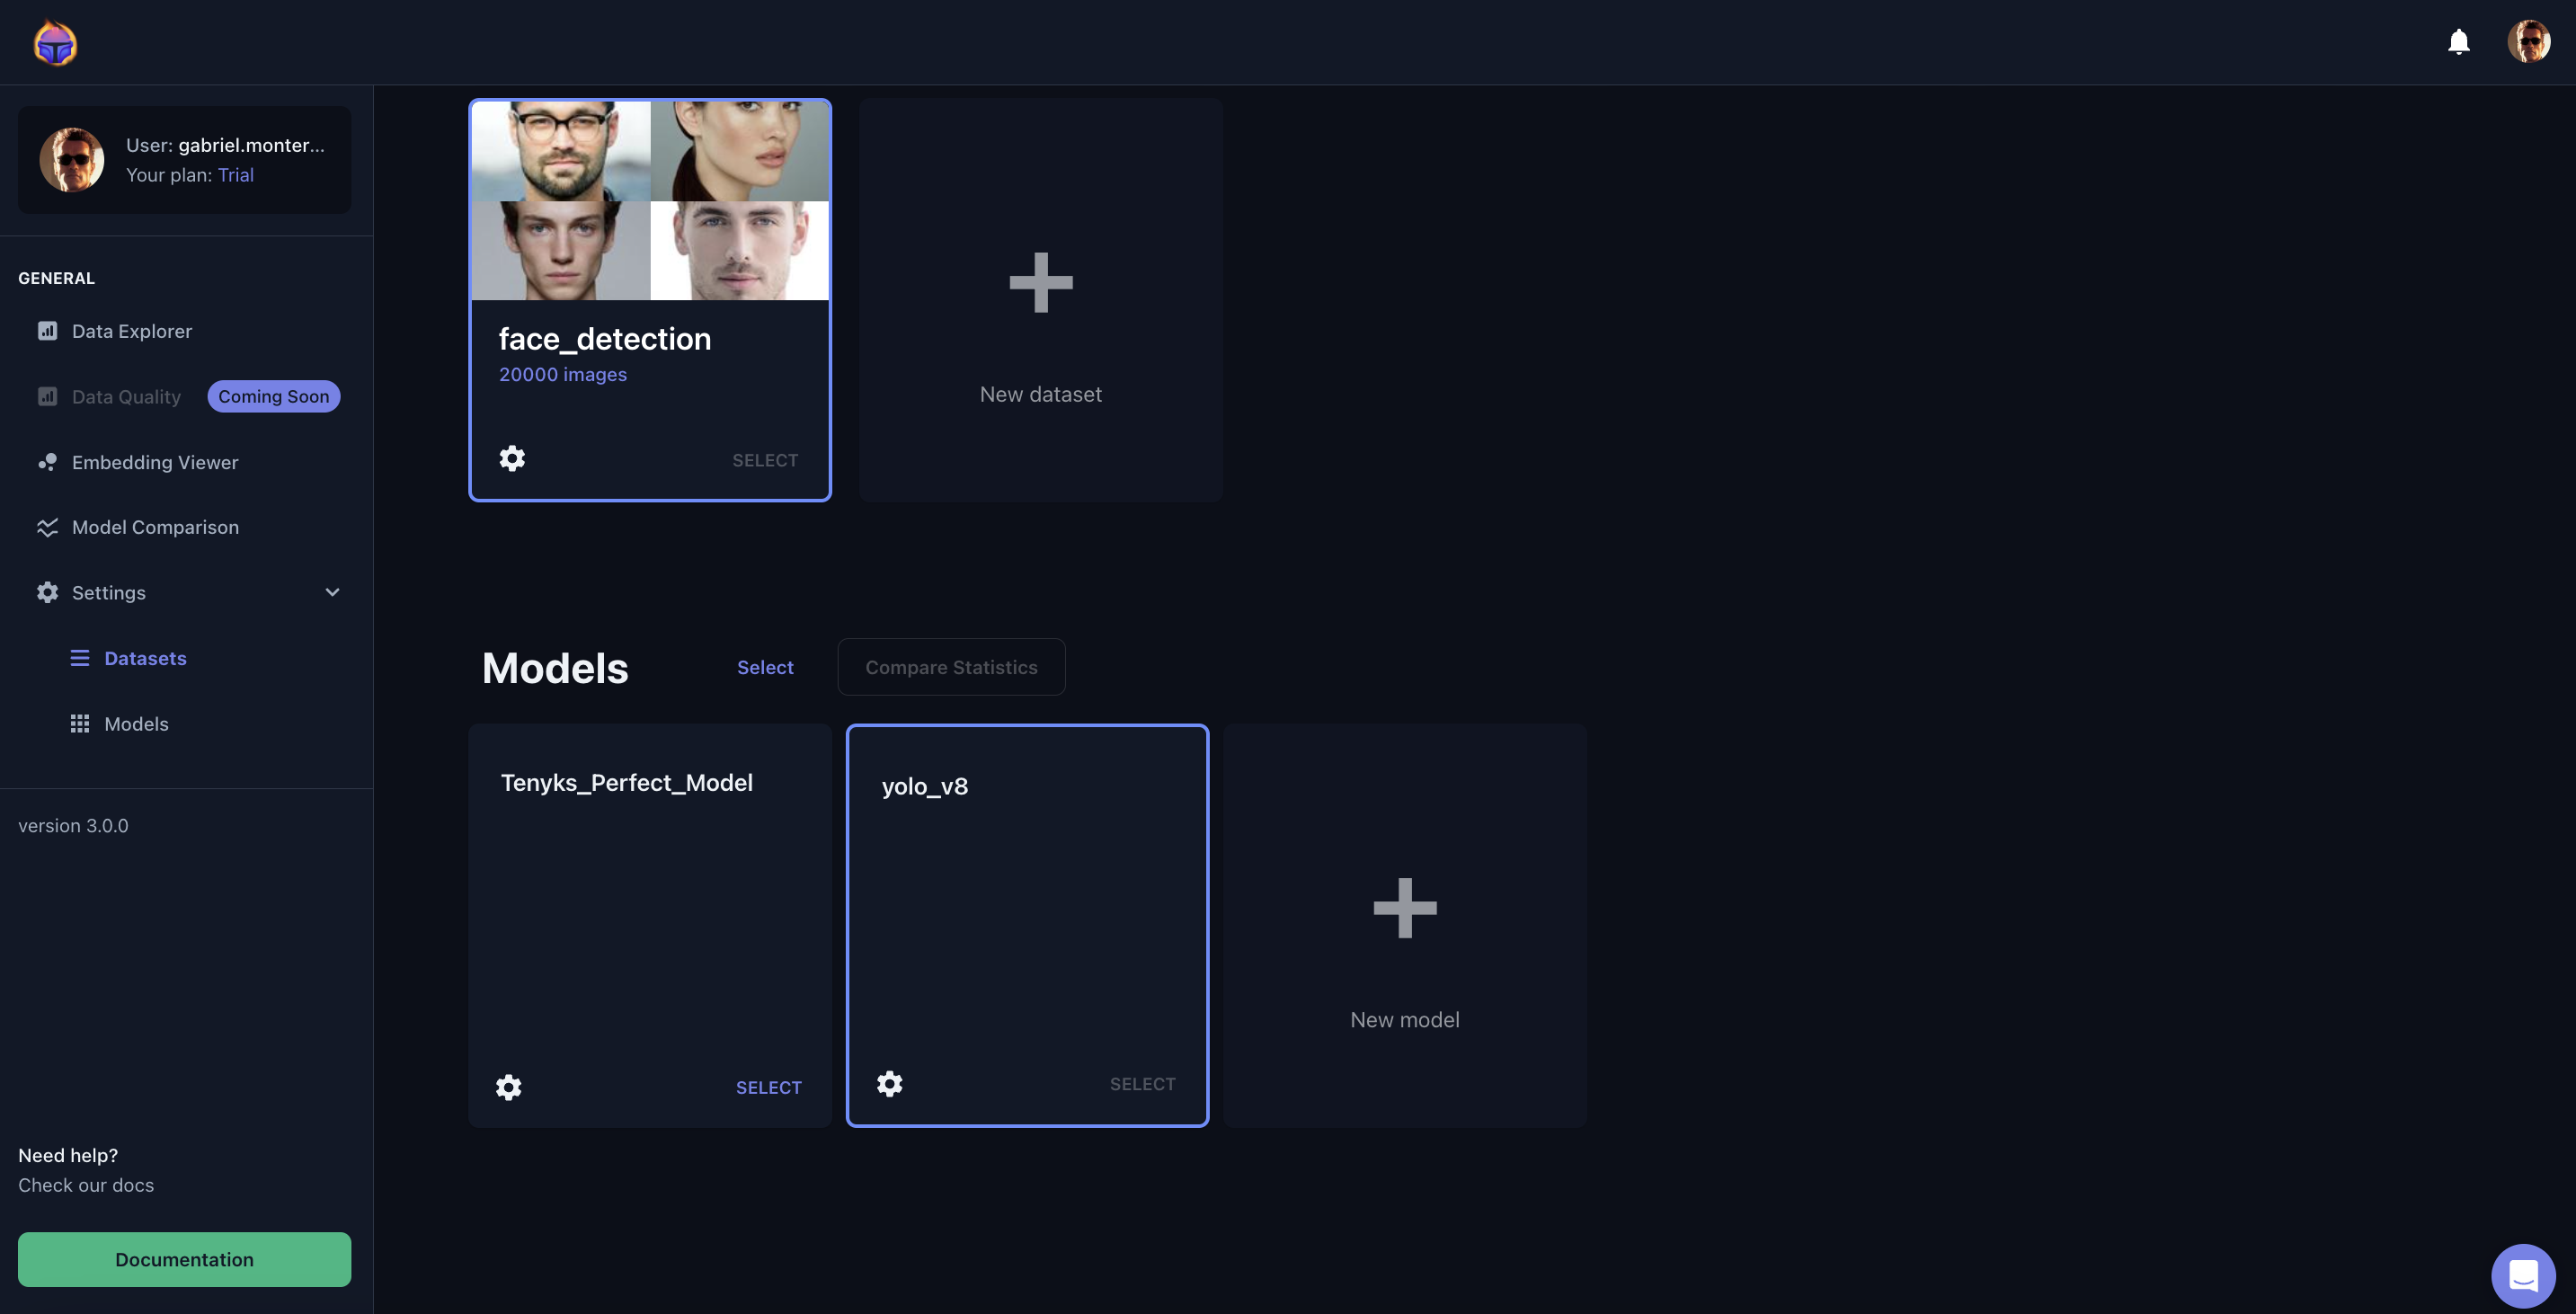
Figure 2. Tenyks Dashboard with the face_detection dataset we just created!